Ide drive installation, Sata/ide drive removal – StarTech.com UNIDOCKU33 User Manual
Page 7
Instruction Manual
4
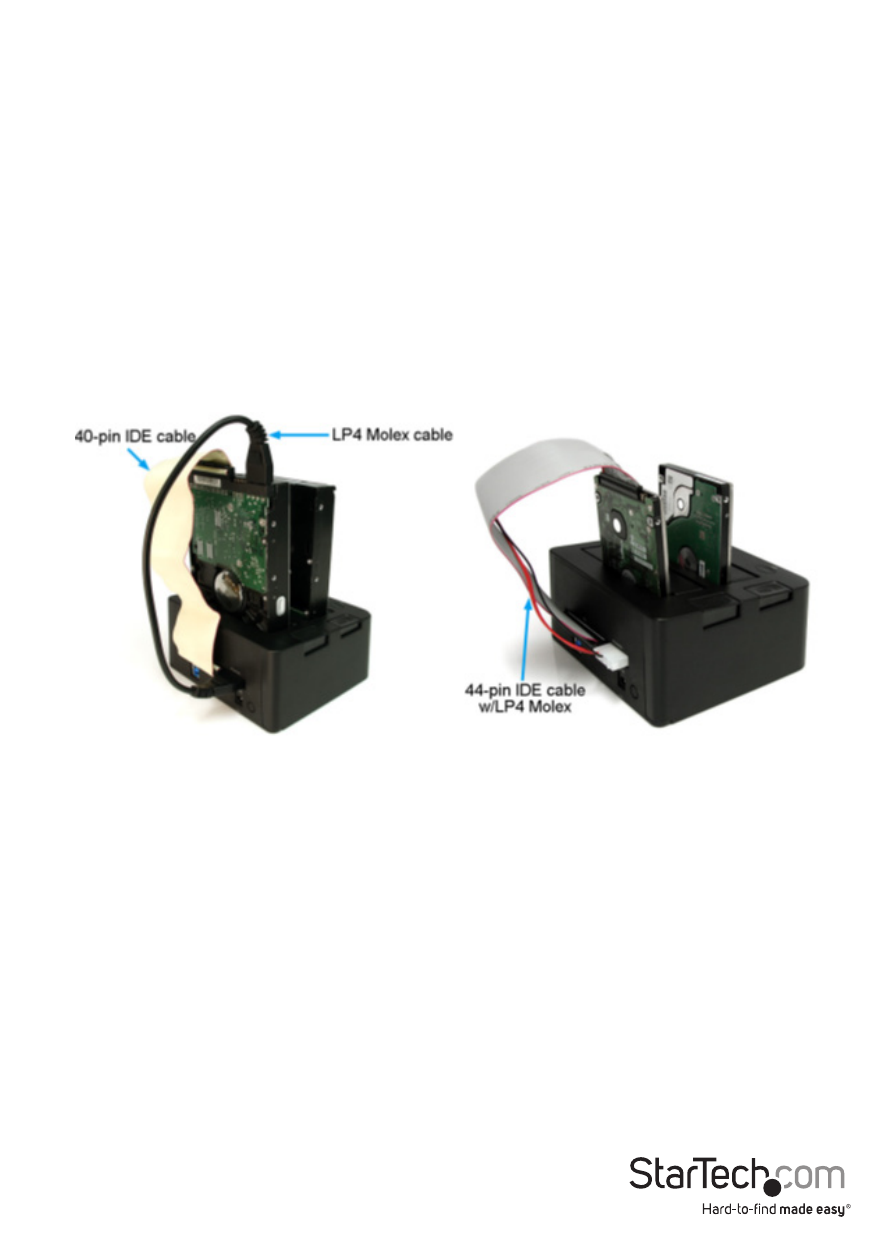
IDE Drive Installation
1. Connect the included 40-pin IDE ribbon cable to the IDE connector on the rear of
the dock. If using a 2.5in IDE hard drive, connect the 40 to 44-pin IDE cable to the
rear of the dock.
2. Connect the included LP4 Molex power cable into the LP4 connector on the rear
of the dock. If using the 40 to 44-pin cable, connect the built-in LP4 connector to
the connector on the rear of the dock.
3. Connect the IDE hard drive to the ribbon cable and LP4 Molex connector (3.5in
only). Make sure all of the cables are securely connected.
4. Insert the IDE hard drive into the top-loading drive bay (closest to rear connectors).
5. Press the IDE Hard Drive power button.
Note: If your computer fails to automatically recognize your drive it is likely your drive
has not been initialized or formatted correctly. (See Drive Initialization in Software
operation for further instructions.)
SATA/IDE Drive Removal
WARNING:
Ensure your hard drive(s) has been disconnected from your computer operating
system prior to attempting drive removal. Failure to properly disconnect your drive
may result in lost data or drive damage. (See Disconnecting the Hard Drive in Docking
Station Operation for further instructions.)
1. Turn off your drive by pressing the corresponding power button.
2. (Only required for IDE drives) If you have a 3.5in IDE drive, disconnect the 40pin IDE cable
and the LP4 power cable (3.5in drive) from both your hard drive and the docking station.