Installation, Hardware installation – StarTech.com UNI3510UEBGB User Manual
Page 6
Instruction Manual
3
Installation
Hardware Installation
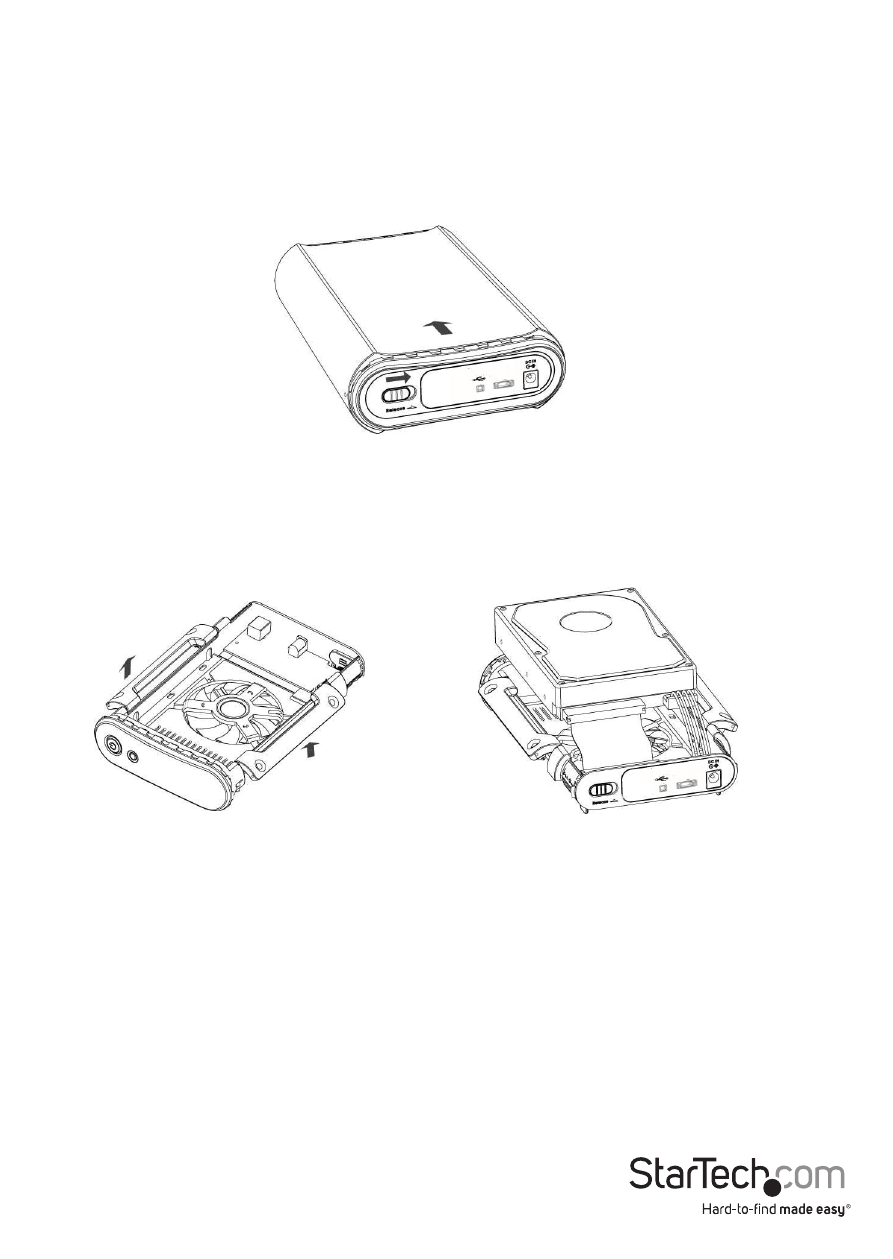
1. Open the hard drive enclosure by pushing the rear panel release button to the right
and sliding the hard drive bracket out of the external casing from the front.
2. If using an IDE/ATA hard drive, ensure that the hard drive you are using is set to MASTER.
3. Pull the two tabs on either side of the hard drive holding mechanism up, then
connect the provided SATA or IDE data and power supply cables to the rear ports of
the drive.
4. SATA HDD: If you will be using the USB 2.0 interface to connect to the enclosure,
plug the SATA data cable into the port labelled CN5 on the enclosure’s PCB board.
If using the eSATA interface to connect to the enclosure, plug the SATA data cable
into the port labeled CN6 on the enclosure’s PCB board. The locations of the CN5
and CN6 ports are shown below. Plug the power connector into the J1 port on the
PCB board.