SIG SAUER SIG522 Sight Kit Installation User Manual
Page 2
18 Industrial Drive, Exeter, NH 03833 • (603) 772-2302 • www.sigsauer.com
P/N 1520161
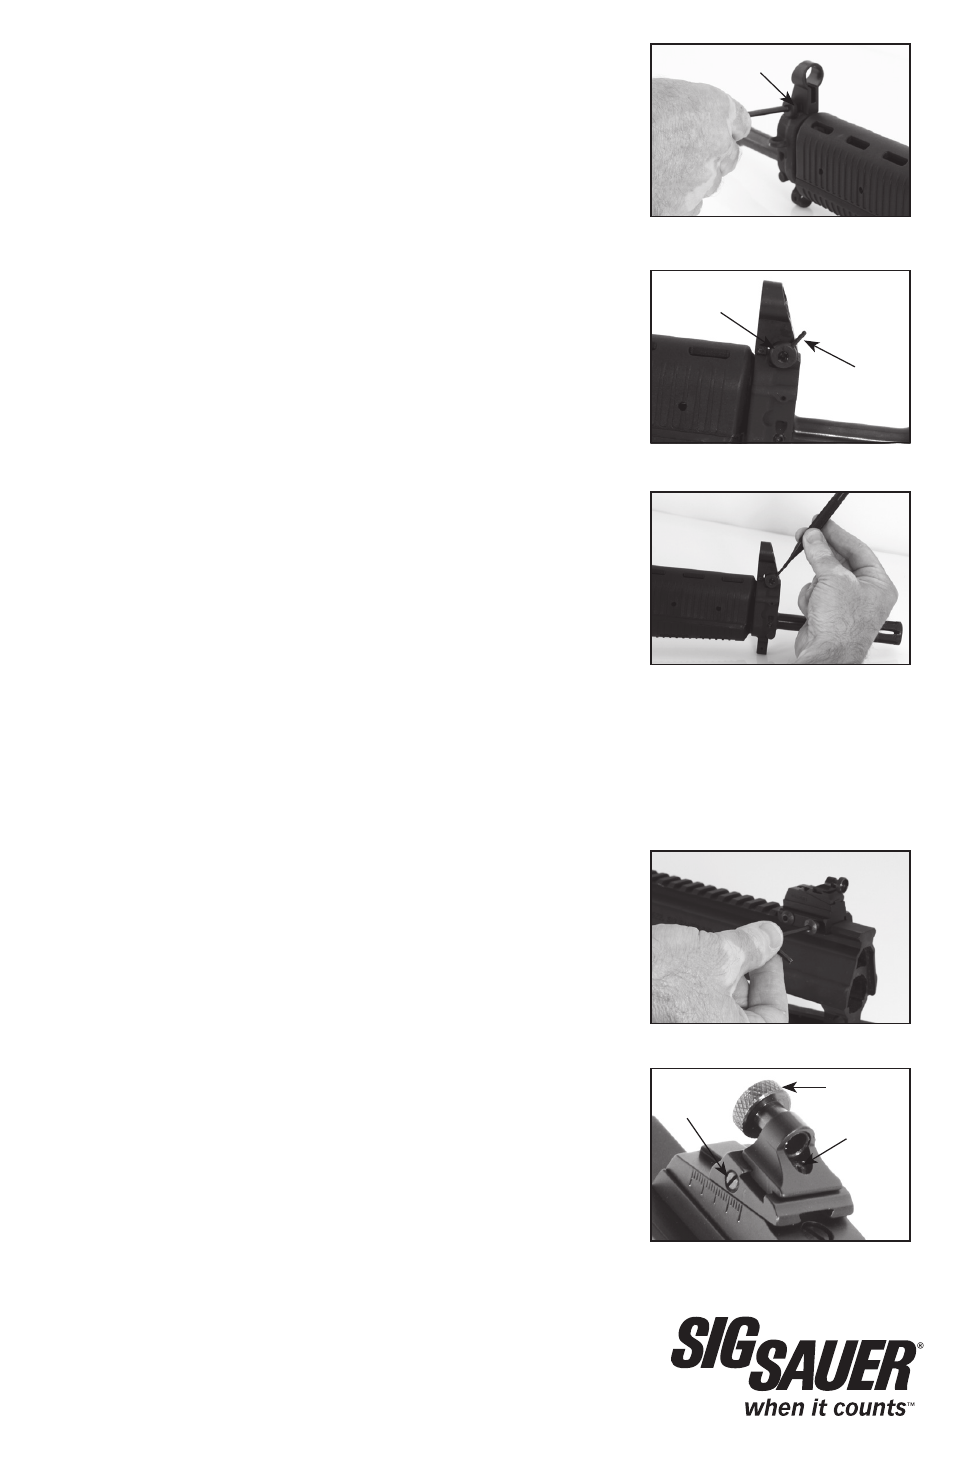
5. Apply a small amount of lubricant to the threads of the Sight Screw.
Insert the sight screw into the front sight from the left side and thread it
into the sight nut using a 4mm hex wrench.
6. Align the hole in the sight nut with a 1/16” punch and tighten until the
sight is centered.
7. Insert the sight screw pin into the sight screw hole leaving the 1/16”
punch as a guide.
8. Drive the pin in using a 3/32”roll pin punch.
9. Check the sight for proper movement.
Lubricate threads
Sight pin
Installation of the Rear Sight onto SIG522 upper receiver.
1. Remove the two (2) mounting screws on the base of the rear sight
using a 3mm hex wrench.
2. From the rear of the M1913 receiver rail, slide the sight on to the rail
aligning it with the last two slots in the rail.
3. Insert the clamping screws from left to right and tighten them snug
plus ¼ turn with the 3mm hex wrench.
4. Adjustments can be made by loosening the appropriate screws with
a small straight blade screwdriver and moving the sight aperture.
Use punch for alignment of hole
and pin.
Sight screw
Elevation
Screw
Sight
Aperture
Windage
Screw