PRG Mbox Director User Manual v3.7 User Manual
Page 40
34
MBOX
®
DIRECTOR USER MANUAL
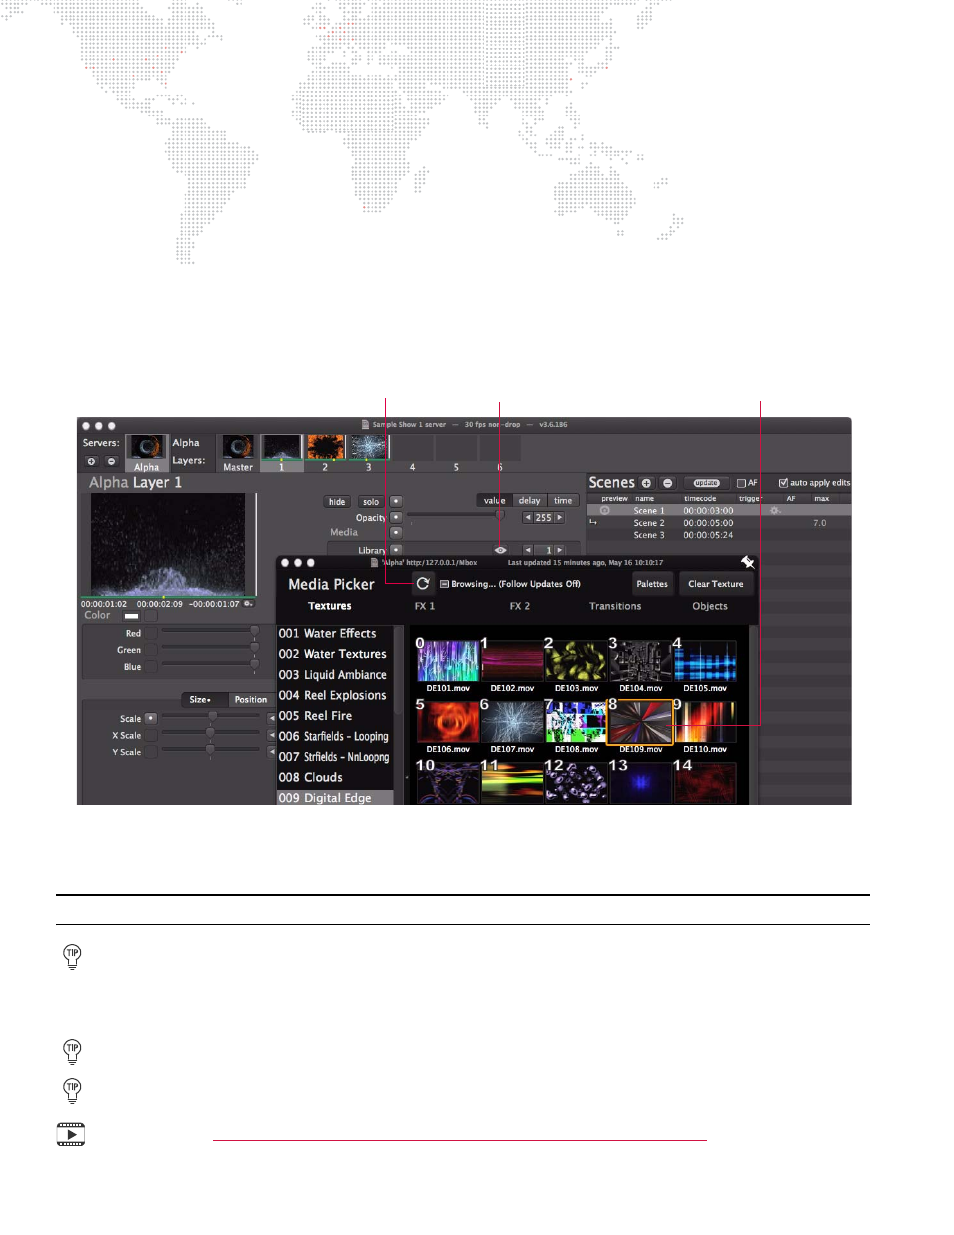
To customize layers:
Step
1. Select desired server by clicking on its icon. The active layers will be displayed.
Step
2. Select desired layer by clicking on its icon.
Step
3. Using Opacity slider, raise intensity to a level above 0. (255 is full.)
Step
4. Add content to the layer as follows:
a.
Open Media Picker by clicking on "eye" icon.
b.
If thumbnails are not visible, press Refresh Thumbnails icon. Wait about 10 seconds for thumbnails to
appear. (Refer to
on page 25 for more information about this window.)
c.
Select a media file by clicking directly on its thumbnail. A preview of the selected media will appear in
the upper-left corner of the layer window.
d.
Close Media Picker or move it out of the way.
Step
5. Adjust parameters using sliders, arrow buttons and/or numeric fields. Note that in order for the current text
entry to be accepted, the [Tab] or [Enter] key must be pressed. [Tab] will accept the entry and move to the
next field, while [Enter] will accept the entry and stay in the current field.
Note: Some changes, such as color, will not show up in the layer’s media preview.
Media can also be added or changed using direct numeric entry. At the Library/File fields, use arrows or
keyboard entry to enter the file information for a media clip. Library is the numeric prefix of the folder (for
example, 001 Water Effects), and File is the numeric prefix of the actual media file (for example,
014.280_JBlack).
Hit [Tab] to advance to the next field while entering data.
Click inside the Library or File fields and drag either left or right to scroll backward or forward through the
numbers. Press and hold the Command [
] key to slow down the scrolling speed.
Training Video:
Open Media Picker
Selected Media File
Refresh Thumbnails