Changing the operation voltage and/or frequency – OmniSistem PR Solo 250 User Manual
Page 14
solo 250 manual_last revision_en.doc
14/16
To be carried out by qualified engineers only
The power input settings of the SOLO 250 may be changed to suit the supply in the area where the
unit is operated. The voltage and frequency is pre-set at the factory and will be marked on the exterior
of the unit.
Any error or mistake in setting the frequency or voltage of the projector may seriously damage the unit.
Open both plastic covers of the base by undoing the 4 screws on the top of the base and the 8 screws
on the very rim of the underside.
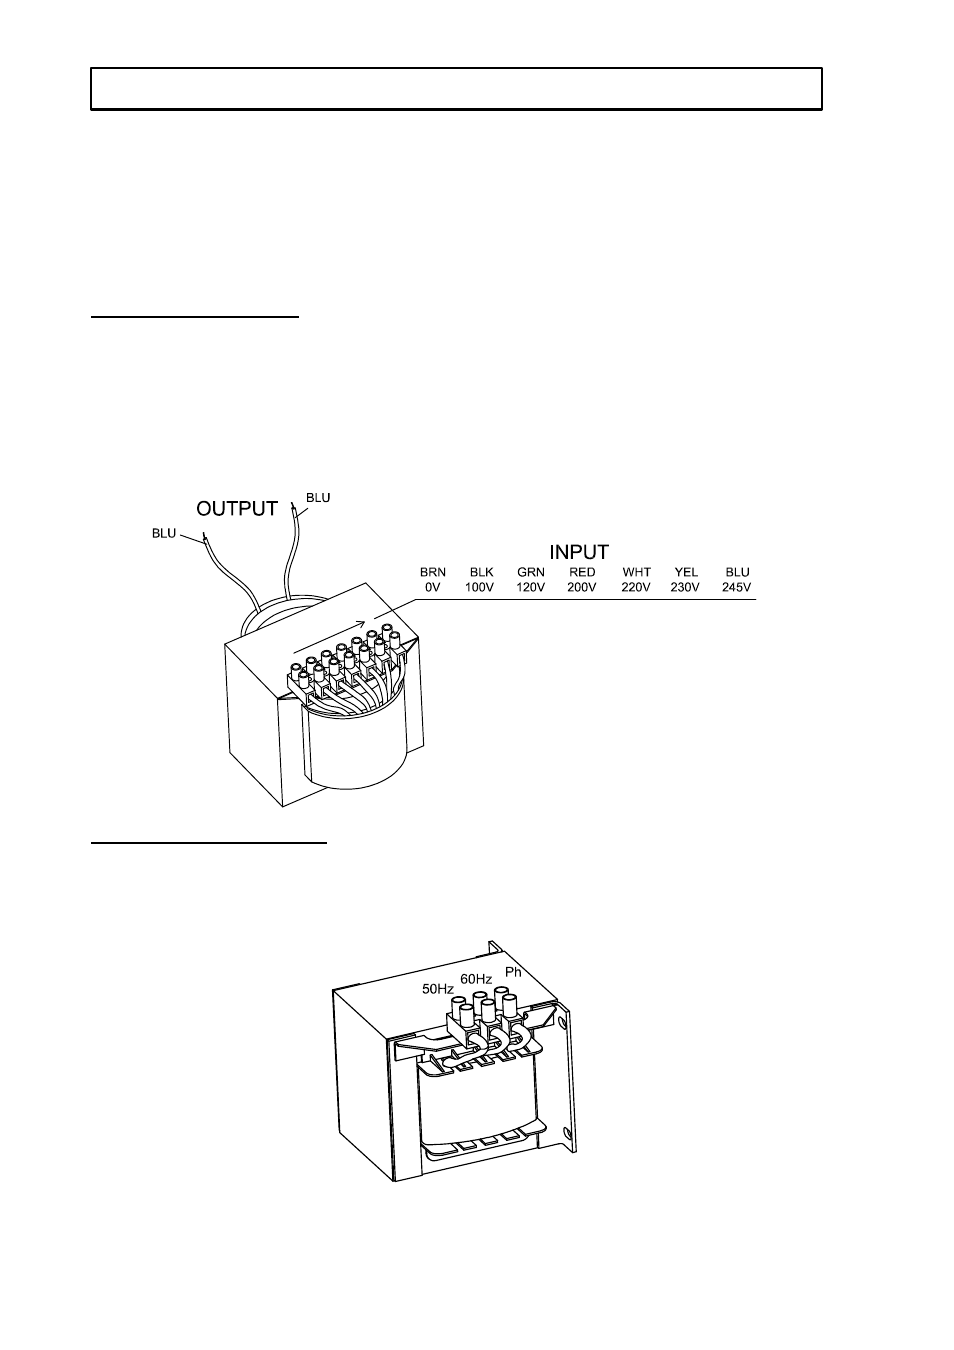
To Change the Voltage
Locate the transformer and select the appropriate voltage from 100V, 120V, 200V, 220V, 230V and
245V according to the local supply voltage. The voltages are marked on the transformer. Move only
the incoming power cable that was connected to the factory set voltage as marked on the projector.
Under NO circumstances should you move the cable attached to the 0V connection.
It is strongly recommended that you immediately mark the new voltage on the projector so that it may
not be mistaken for the factory set voltage.
To Change the Frequency
Locate the ballast in the base of the projector, and select the required frequency from 50Hz or 60Hz by
moving the cable to the appropriate position. The ballast will be labelled to show the connections.
Never move or disconnect the cable attached to the connector marked “Ph”.
It is strongly recommended that you immediately mark the new frequency on the projector so that it
may not be mistaken for the factory set frequency.
Once finished with the settings, re-assemble the base of the projector and covers.
CHANGING THE OPERATION VOLTAGE AND/OR FREQUENCY