Fitting the lamp, Installing the projector – OmniSistem PR Design 150 Pro User Manual
Page 4
Design 150 PRO EN doc
4/26
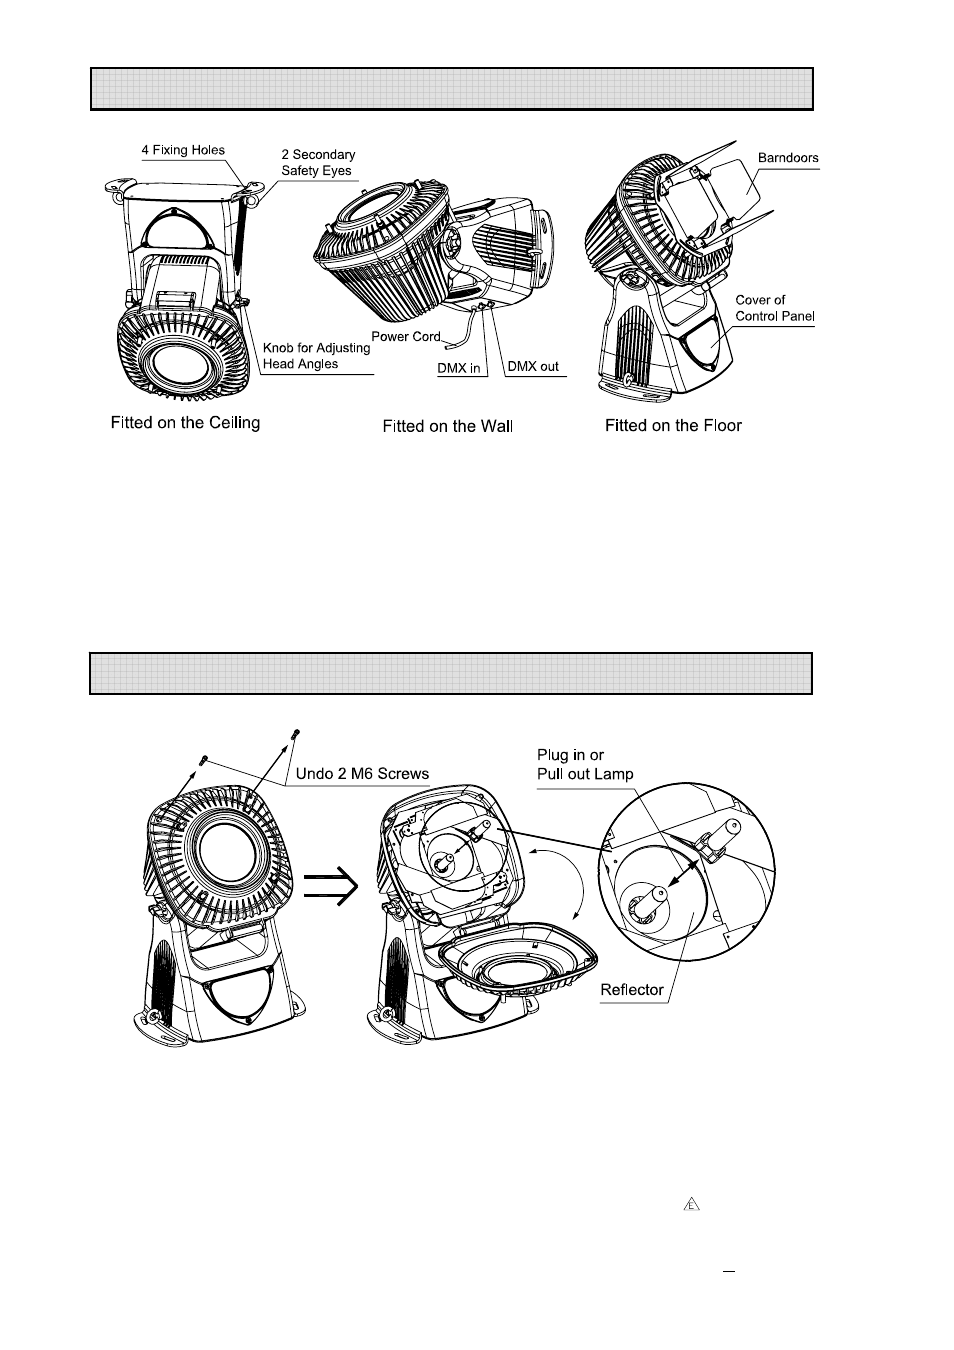
The unit was designed to make installation easy: it can be fitted on a floor, wall or ceiling as
required and will operate in any working position, as the head can be rotated through 90°.
Always ensure that the projector is firmly anchored to avoid vibration and slipping whilst
functioning. Always ensure that the structure to which you are attaching the projector is
secure and is able to support each Design 150 PRO. For safety the projector should have a
secondary fixing with a safety chain through the 2 secondary safety eyes on both sides of
the unit.
Note: For installing the barndoors, first install the 4 copper stand-offs and sealing rubber
washers in the unit head, and then place the barndoors on the 4 copper stand-offs and
fasten them with 4 screws and flat washers.
Loosen the 2 M6 screws and then open the head cover as shown in the figure above.
Reveal the lamp holder by gently moving the colour filters and blades aside from the center.
Plug the lamp into the lamp holder. Note: To avoid premature lamp failure, do not touch the
lamp glass with your fingers. If you touch the lamp during installation, clean it carefully with
rubbing alcohol and a clean, lint-free cloth before operation.
Close the cover and then tighten the 2 M6 screws.
NOTE: The CDM series are high pressure lamps with external igniters (
). Care should
always be taken when handling these lamps. Always read the manufacturers "Instructions
for use" enclosed with the lamp.
FITTING THE LAMP
INSTALLING THE PROJECTOR