Ba c d – MF Digital PicoJet Mask Setting Guide User Manual
Page 3
Setting up the Mask Settings Utility (Non Hub Printable)
Once you have successfully measured your media you can now input those measurements into the Mask Settings Utility. To bring this
Utility on screen, follow the steps below.
1. Click on the Start Button
2. For XP users, select Printers and Faxes. Windows 2000 users select Settings, then Printers
3. Right click on the PicoJet 6000 Icon and choose Printing Preferences
4. Note the tabs at the top of this dialog; choose the one labeled Mask Settings.
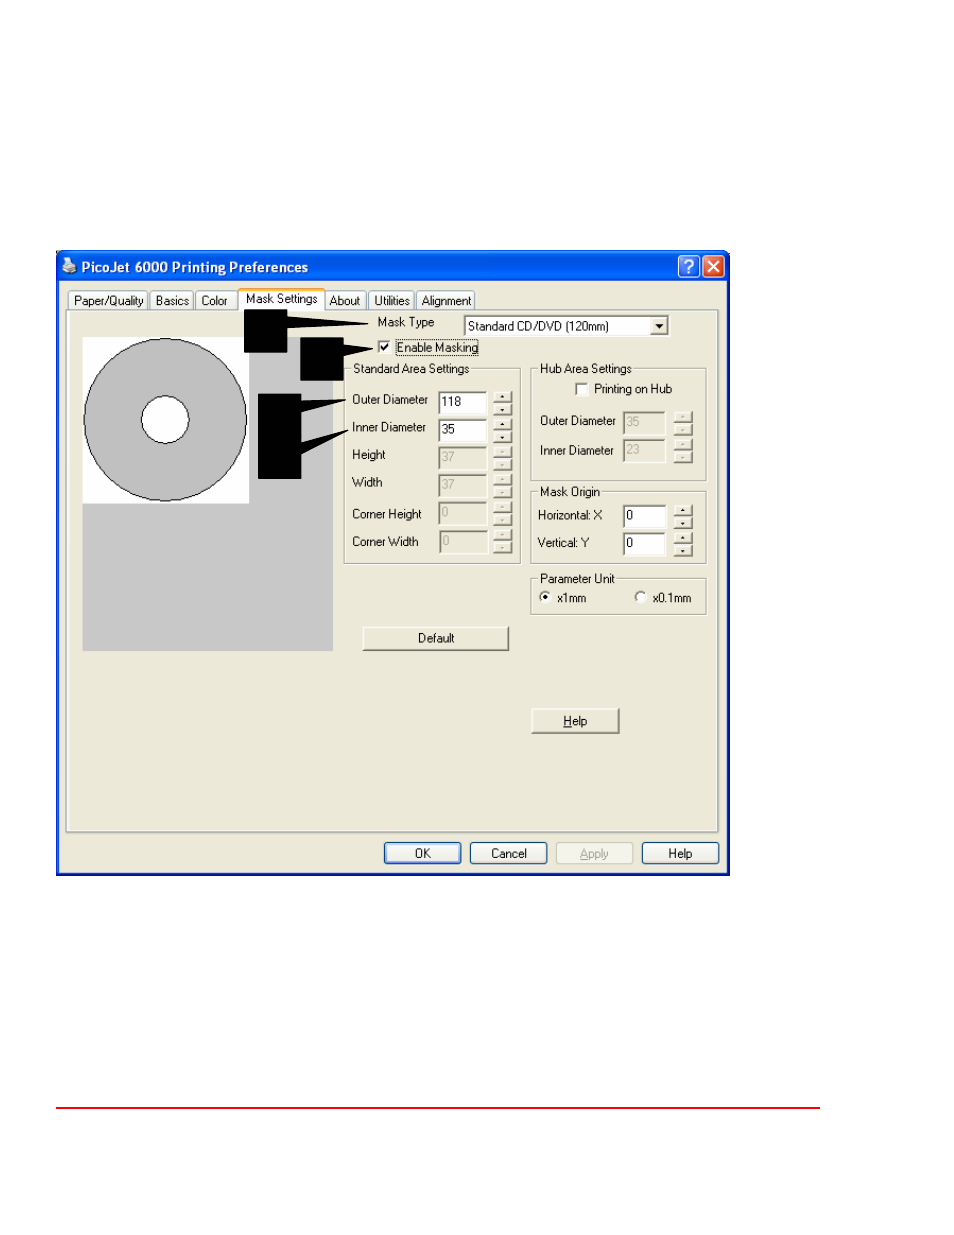
The above picture shows the Mask Settings Dialog. For this example, the dialog is set for a standard 120mm disc with Enable
Masking checked. Printing on the hub is currently disabled. Hub Printing will be discussed in the next section
A. Mask Type: This drop down box gives you the option to choose which kind of disc you are printing on.
B. Enable Masking: This option must be checked in order to activate the masking feature.
C. Outer Diameter: This is where to input your outer diameter measurement of your disc
D. Inner Diameter: This is where to input your inner diameter measurement of your disc
Once you have inputted the measurements, click the APPLY button, then the OK button.
NOTE: If you are using PRN files to print your labels, a new PRN file must be generated to include these changes.
B
A
C
D