Aftermarket manual, Operation – Lippert Components Flow Down Aftermarket User Manual
Page 3
3
Flow Down™
Aftermarket Manual
www.lippertcomponents.com (574) 537-8900
Rev: 01.15 - Flow Down Aftermarket Manual
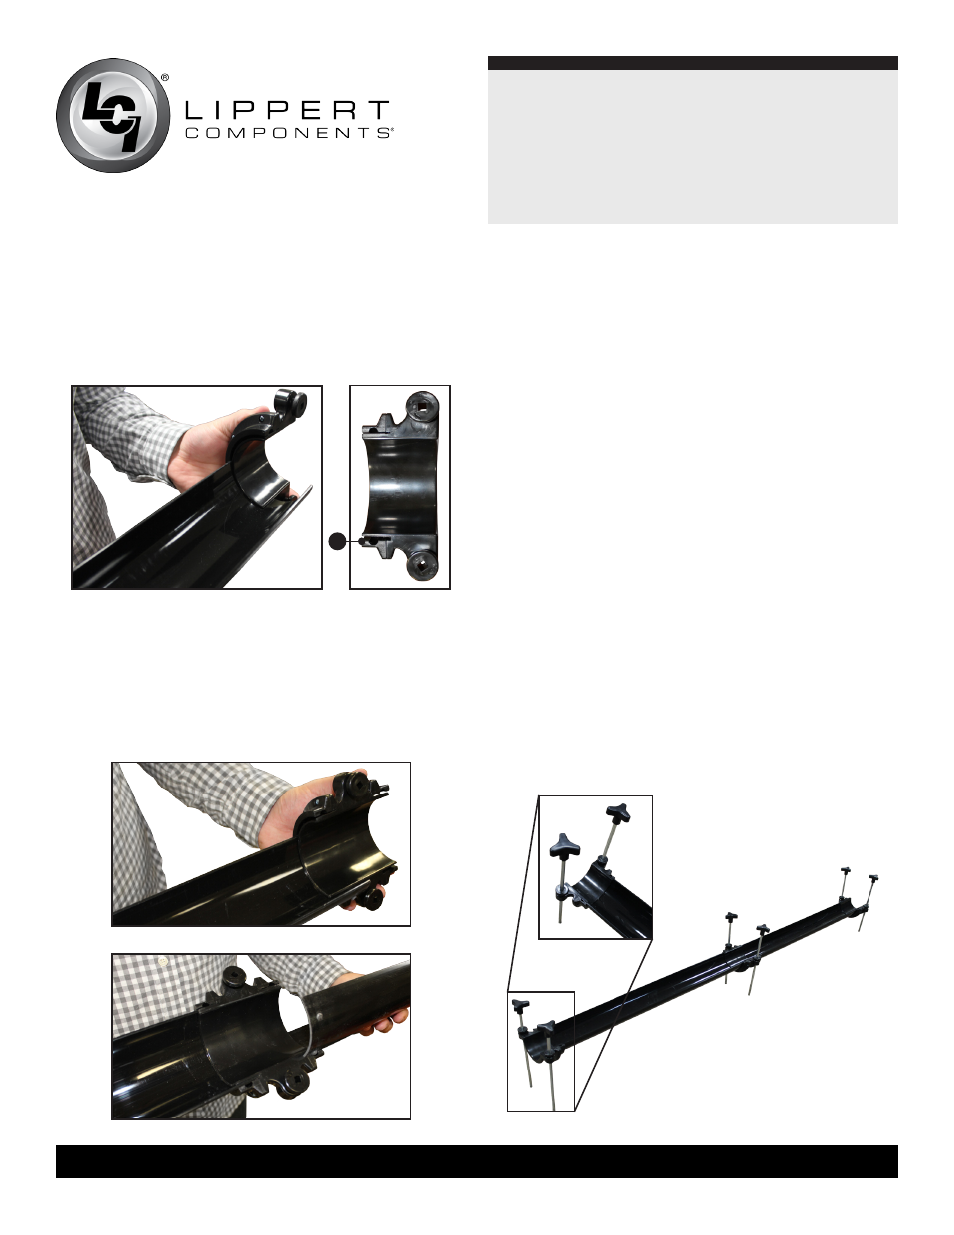
Operation
1. Holding a single end fitting and a half pipe, rotate the half pipe
into the end fitting (Fig. 1). (Fittings have only one opening and
a stop on the other side which allows for rotation one way only
(Fig. 2A).
Fig. 1
Fig. 2
Fig. 3
Fig. 5
Fig. 6
Fig. 4
2. Rotate a middle fitting onto the half pipe from Step 1 (Fig. 3).
3. Rotate a half pipe into the open end of the middle fitting (Fig. 4).
4. Repeat these steps until there is an end fitting on each end and
middle fittings in the center of the drain support.
5 . Now position one end close to the RV and the other end at the
sewer connection of the RV Park.
6 . Starting at the RV, slide a 10” stake down through the pinch
bolts but do not tighten (Fig. 5).
7. Repeat Step 6 on each fitting.
8 . After they are all in place, adjust the RV end of the Flow
Down so it is as high as possible but still under the RV Sewer
hookup . Now tighten the sliding square shafts snuggly,
but DO NOT OVER TIGHTEN.
9. Repeat this procedure on each fitting from the RV outward to
the park sewer connection, keeping in mind that there should
be at least 1/4 inch drop per foot in the Flow Down to allow the
black and gray water to flow and avoid back-up into the RV
(Fig. 6).
10 . You are now ready to lay your RV drain hose into the Flow
Down Fully Adjustable RV Drain Hose Support! Attach
one end to the RV and insert the other into the park sewer
connection .
A