Fig. 4 fig. 5, Rear anchor installation, Warranty information – Lippert Components CA-CGL User Manual
Page 2
All products manufactured by Happijac Co. are warranted to the retail customer for one year from date of purchase
against defects in material or workmanship. Any defective part(s) will be repaired or replaced (at Happijac’s option)
without charge, when returned transportation prepaid. There are no other expressed warranties except as set forth above
and any implied warranties are limited in duration to that of the expressed warranty. This warranty does not cover any
damage due to misuse, negligence, or accidents. There is no warranty covering consequential damages, incidental
damages, or incidental expenses including damage to property. This warranty gives you specific legal rights. You may
have other rights which may vary from state to state.
WARRANTY INFORMATION
All defective material must be returned to the factory via prepaid shipment. Upon inspection and determination of
claims warranted, the factory will repair/replace the material at no charge and return the repaired/replaced material to
the customer with delivery charges prepaid by Happijac via common carrier of Happijac's choosing. Upgrades and
changes to shipping mode resulting in additional shipping costs shall be at customers expense.
WARRANTY CLAIMS:
TERMS OF THE WARRANTY:
company
505 N. Kays Drive, Kaysville UT 84037
Phone: (801) 544-2585
Fax: (801) 546-5241
Email: [email protected]
Web Address: www.happijac.com
REAR ANCHOR INSTALLATION
REAR ANCHOR INSTALLATION
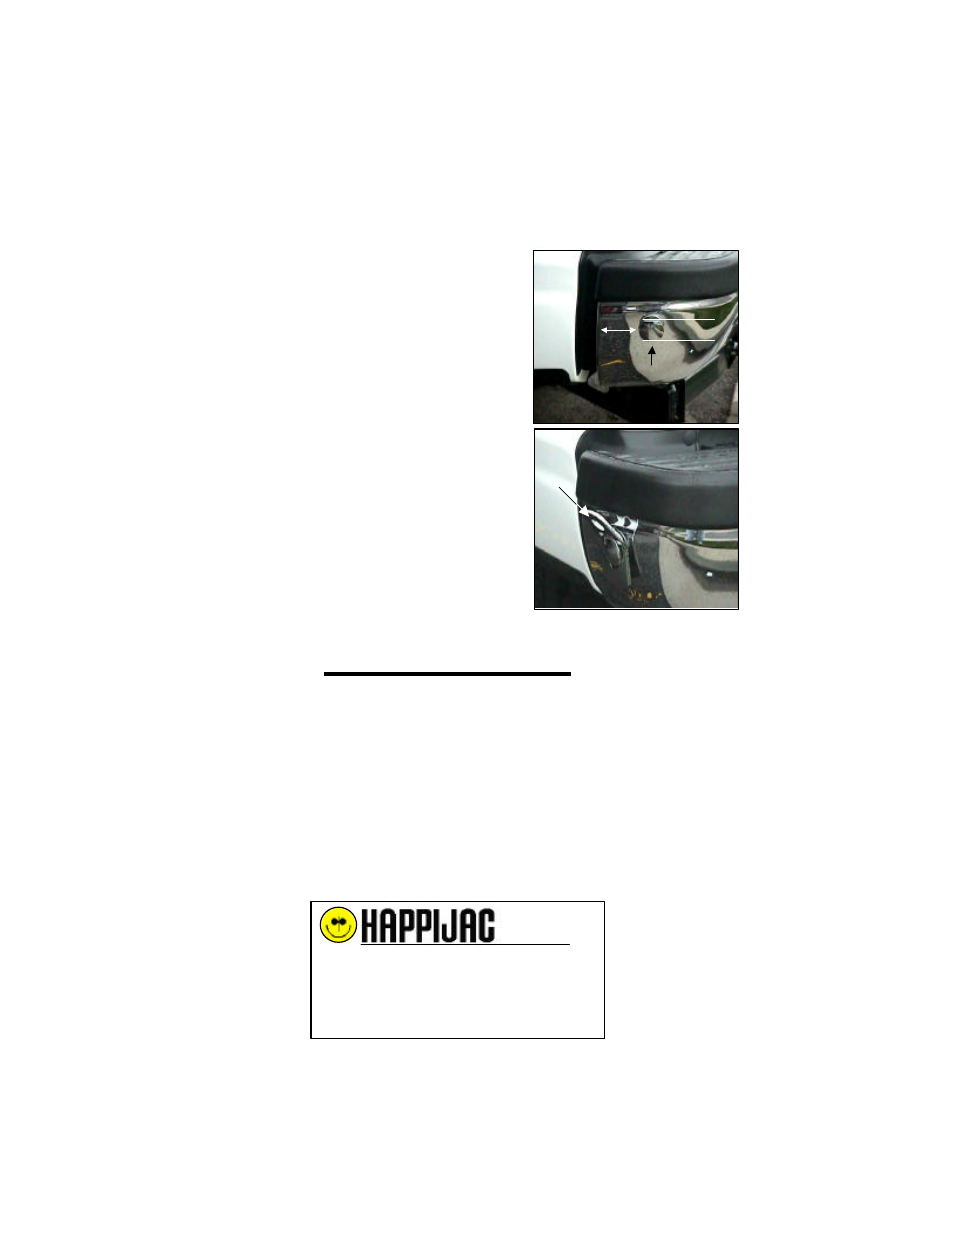
NOTE: Rear anchors are installed in the end of the bumper.
When properly installed, the bumper mount tiedowns
provide excellent performance and a clean attractive
appearance. There is no precise mounting location since
a variety of bumpers may be installed. The general
guidelines are as follows:
1. Mounting location should be as flat & vertical as
possible.
2. Be sure no moldings or bumper caps interfere
with the removable coupler.
3.
Warning: Mounting near the front edge of bumper could
result in bumper twist and poor performance.
Choose a location as far back as possible on the
flat end of the bumper. Don't go into the radius.
4. Check back side of selected mounting location to
ensure adequate access for tightening the nut,
then center punch and drill a
1
/
8
” pilot hole.
Enlarge to
1
/
2
” and install Anchor Bolt with 2”
fender washer, lock washer & nut.
Flat edges of Anchor Bolt must be horizontal
for proper operation. Be sure to remove slide on
coupler when unloading camper to avoid loosing
them.
Remove
coupler
when not
in use to
prevent
loss.
Flats
Horizontal
Place well back
from front edge
of bumper but not
on radius.
Fig.
4
Fig. 5
inscacgl110403