Assembling the stand, E-15, Unpacking – Casio PX700 User Manual
Page 17
E-15
406A-E-017B
Assembling the Stand
B Side panel
c Speaker box
A Side panel
G Screw
i 2
H Clip
i 2
D Screw
i 4
E Screw cap
(Brown)
i 4
I Bracket
i 2
J Screw cap
(Black)
i 2
K Butterfly bolt
i 2
F Pedal unit
i 1
When assembling the stand and speaker box C, lay
the stand down so it is on its side.
Getting Ready
• Use the four pieces of polystyrene foam to secure side
panels A and B in place. You will have an easier time
assembling the stand if you raise the side panels up off
the ground as shown in the illustration.
• If you do not have any packing material available, use a
magazine or some other thick item.
Assembling the Stand
CAUTION
• This stand should be assembled by two people
working together.
• The stand should be assembled on a flat surface.
• Do not remove the tape securing the keyboard cover
in place until assembly is complete. Removing the
tape can cause the keyboard cover to open and close
during assembly, creating the risk of personal injury
to your hands and fingers.
• Take care that you do not pinch your fingers between
parts when assembling them.
• When placing the digital piano unit on the floor, be sure
to place it on something soft (a blanket, cushion, etc.).
Do not place the digital piano directly onto the floor.
A
D
D
B
C
A
C
B
Foam
Foam
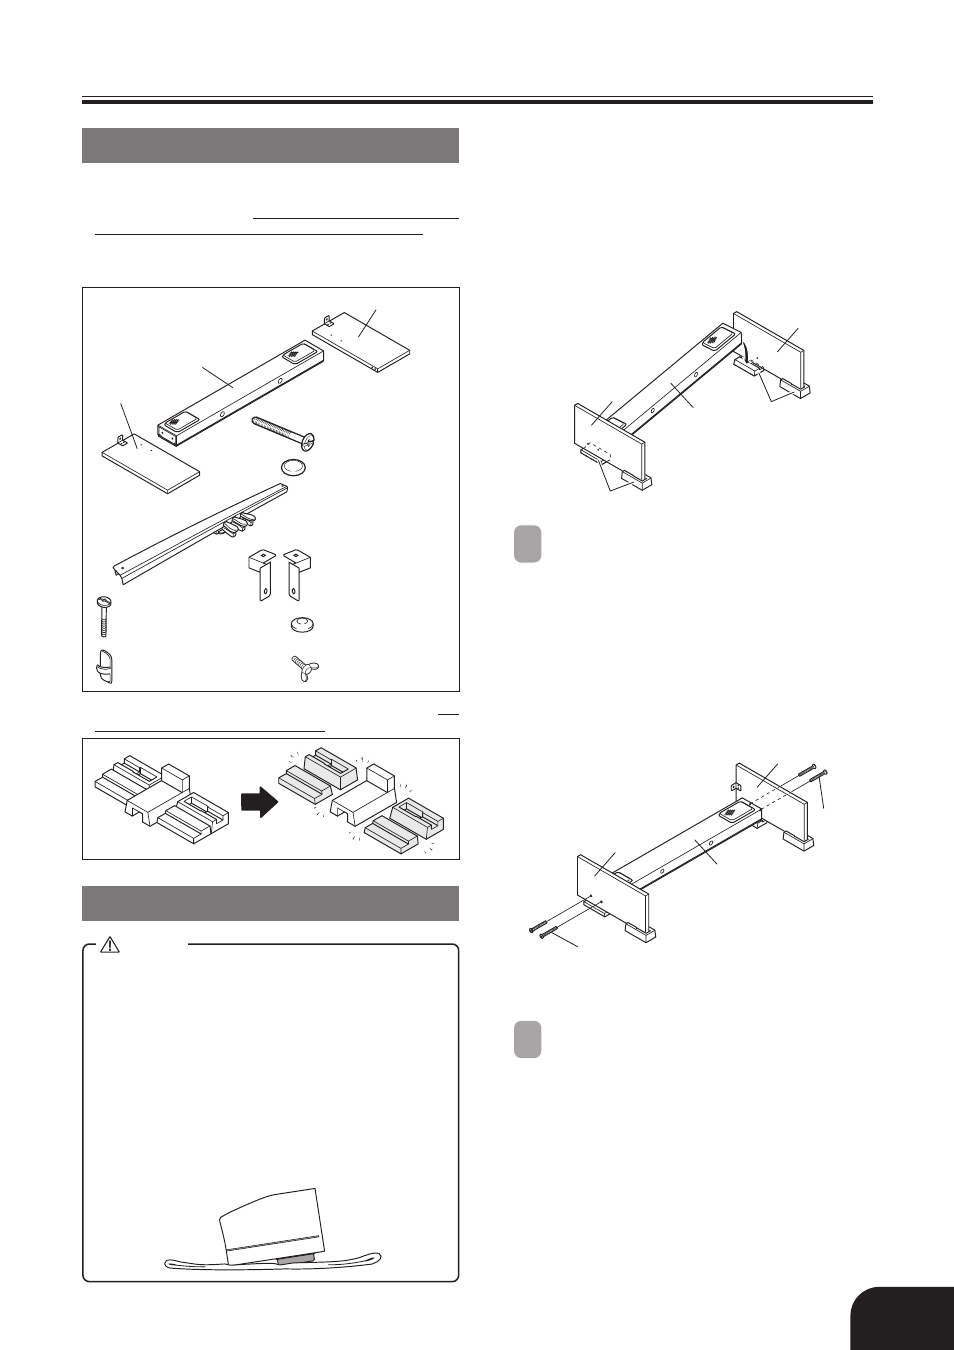
1
Attach side panels A and B to the speaker
box C. Secure the side panels using four
screws D.
• Align the holes in speaker box C with the holes
in the side panels, and secure them together
using the screws D.
• Partially tighten the screws on one side of the
speaker box C and then tighten the screws on
the other side completely.
• Next, fully tighten the screws that you partially
tightened.
*
You can also install the speaker box so it faces
outwards towards the back.
2
After ensuring that all of the screws are fully
tightened, remove the packing material and
stand up the stand.
Unpacking
Getting Ready
• Before starting assembly, check to make sure that you have
all the parts shown below. You can find the screws in a plastic
bag inside of the polystyrene foam packing material.
• This stand does not include any of the tools required for
assembly. It is up to you to prepare a large Philips head
(+) screwdriver for assembly.
• Before starting assembly of the stand, divide the
polystyrene foam packing material into four parts.