Vda100d88-6, Axis, lens adjustment, Waterproof processing of cable end connection – IC Realtime 690HTVL I-Sniper 690HTVL Vandal Day/Night Dome Camera (EL750) User Manual
Page 6
10
11
a. Power cable
b. RS-485 : Same as above
c.Video output cable
(Red)
(Black)
* Caution
Please make sure to seal these places with a tape
tightly enough to prevent water smearing into the
cable.
A lot of actual damages are happening by doing
improper finish on the spot.
6-3.
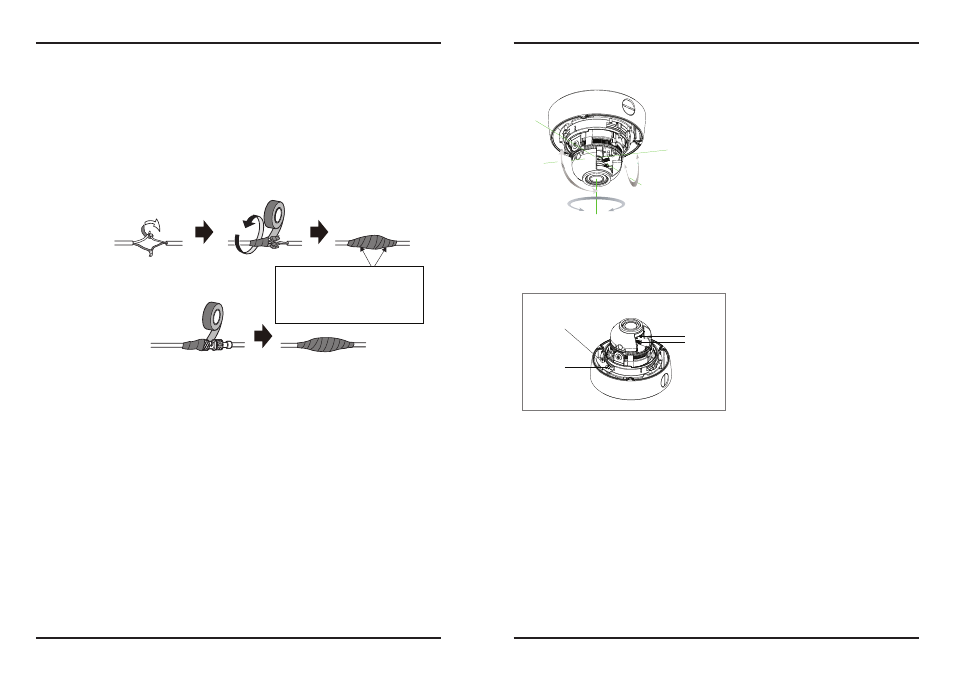
3-Axis, Lens adjustment
Pan 360˚
Rotation 360˚
Tilt 180˚
※ Tool-free 3-Axis mounting mechanism
Perfect Tri-axis!
· Panning axis up to 360˚ degree
· Tilting axis up to 180˚ degree
· Rotation axis up to 360˚ degree
No need to use a tool for adjustment!
All adjustments are done quick and easy
by hand!
☞
NOTE
Angle adjustment from each of 3 different axis can be positioned to its maximum angle
of view so that the camera gets the full central picture at any location.
Zoom Knob
Focus Knob
OSD Switch
Extra Video output cable
·Focus Knob
LEFT Control : ∞
RIGHT Control : Near
· Zoom Knob
LEFT Control : Tele
RIGHT Control : Wide
· Extra video output
To enable an installer to check and adjust the camera set up via service monitor on
the spot.
Make sure to use a butyl tape. (Do not use a sealing material on those parts)
① It is useful to connect the cable ends from camera to the extension cable for
waterproof.
② Connect and tape the power cables (Power-Power/Ground-Ground).
③ Bind the power cables together with the tape. When DC-Jack is used,
tape the DC-DC joint.
④ Connect and tape the RS485 cables (RS485+ㅡTRX+ /RS485- ㅡTRX-)
⑤ Tape the BNC-BNC joint.
6-2.
Waterproof processing of cable end connection