Get the model ready to fly, Check the control directions – Great Planes Yak-55 EP 3D ARF FlightFlex - GPMA1274 User Manual
Page 12
❏
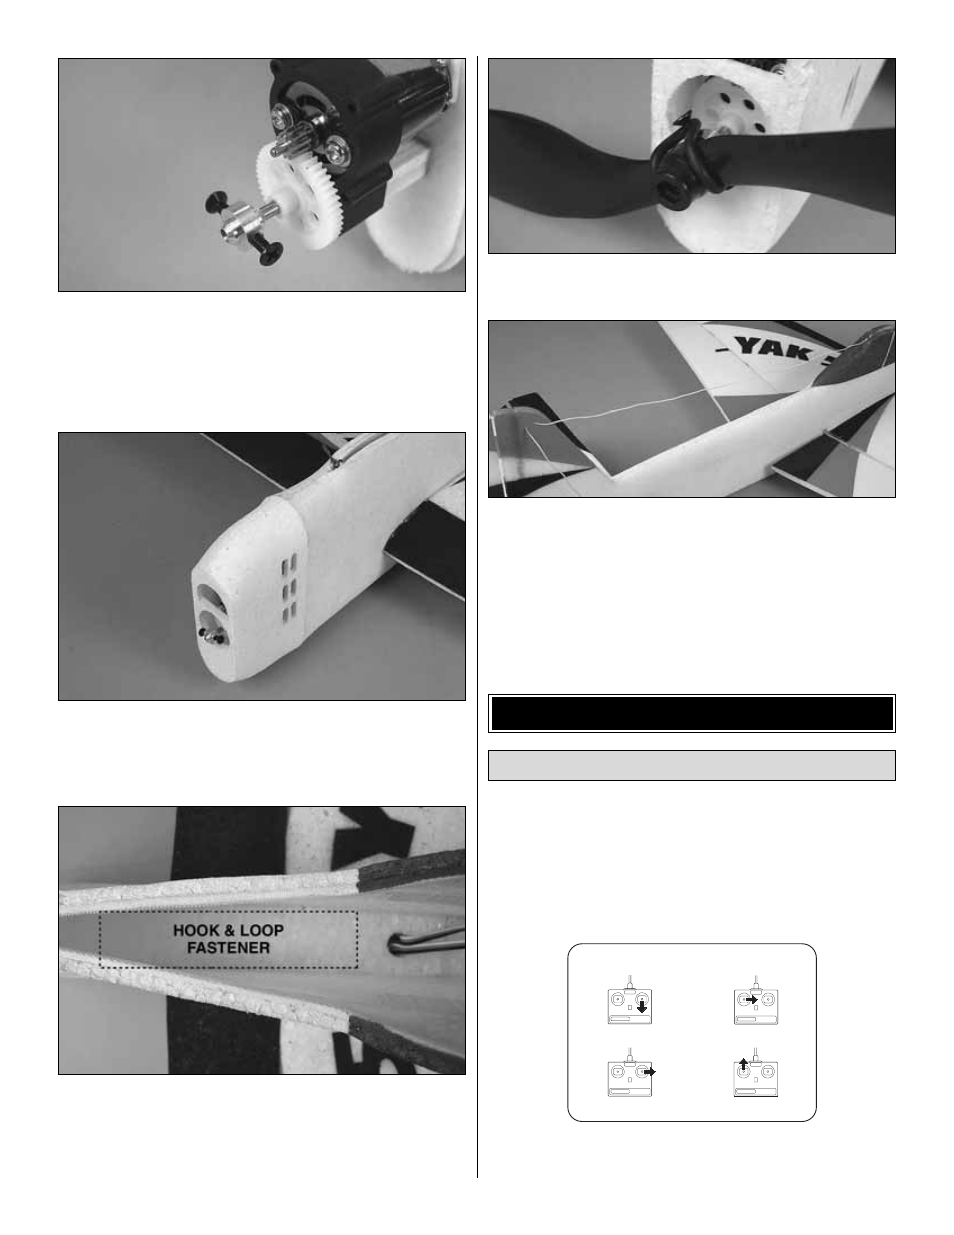
4. Test fit the prop saver against the hub of the included
propeller. The proper fitting side faces forward when installed.
Slide the prop saver onto the gearbox output shaft. Make sure
that the screws seat down into the two flat spots on the shaft.
Secure the screws with threadlocking compound.
❏
5. Install the cowl onto the nose. Secure it with 4 small
drops of hot glue. This will make it easy to remove if needed
for motor maintenance or replacement.
❏
6. Cut off a 1" piece of the hook and loop material (used
to install the receiver in step 8). Install the remaining hook
side of the hook and loop fastener into the battery
compartment. Stick the remaining loop side onto the battery
pack. The pack will sit on its side in the fuselage.
❏
7. Secure the propeller to the prop saver using one of the
included o-rings.
❏
8. Install the receiver behind the battery using hook and
loop fastener. Run the antenna out the back of the zippered
fuselage opening. Use a pin to puncture two holes 1/2"
[12mm] apart in the vertical fin. Stick the receiver antenna
through the holes as shown.
❏
9. The ESC can be tucked into the front of the fuselage
on either side of the battery.
❏
1. Turn on the transmitter and receiver and center the
trims. If necessary, remove the servo arms from the servos
and reposition them so they are centered. Reinstall the
screws that hold on the servo arms.
❏
2. With the transmitter and receiver still on, check all the
control surfaces to see if they are centered.
❏
3. Make certain that the control surfaces and the motor
respond in the correct direction as shown in the diagram. If any
FULL THROTTLE
RUDDER MOVES RIGHT
LEFT AILERON MOVES DOWN
RIGHT AILERON MOVES UP
ELEVATOR MOVES UP
4-CHANNEL
TRANSMITTER
(STANDARD MODE 2)
4-CHANNEL RADIO SETUP
TRANSMITTER
4-CHANNEL
TRANSMITTER
4-CHANNEL
TRANSMITTER
4-CHANNEL
Check the Control Directions
GET THE MODEL READY TO FLY
12