Great Planes Yak-55 EP 3D ARF FlightFlex - GPMA1274 User Manual
Page 11
servo. Slide a 3-1/8" X 1/32" [80mm x 1mm] carbon rod through
the clevises on the servo and the control horn. Adjust the linkage
by sliding the rod in the clevises until you have the elevator
straight when the servo is centered. Once you are satisfied with
the linkage, secure it with a
small drop of thin CA between the
clevises and the rod. Be very careful not to get CA in the
pivoting joint between the horns and the clevises.
❏
16. Set up the rudder linkage using the same technique.
❏
17. Set up the aileron linkages using the same techniques. In
this case, both servo arms should be installed perpendicular to
the fuselage when the ailerons are in the neutral position. This
will create a small amount of aileron differential.
❏
18. Check that all of the servo arm screws are installed
in the servos.
❏
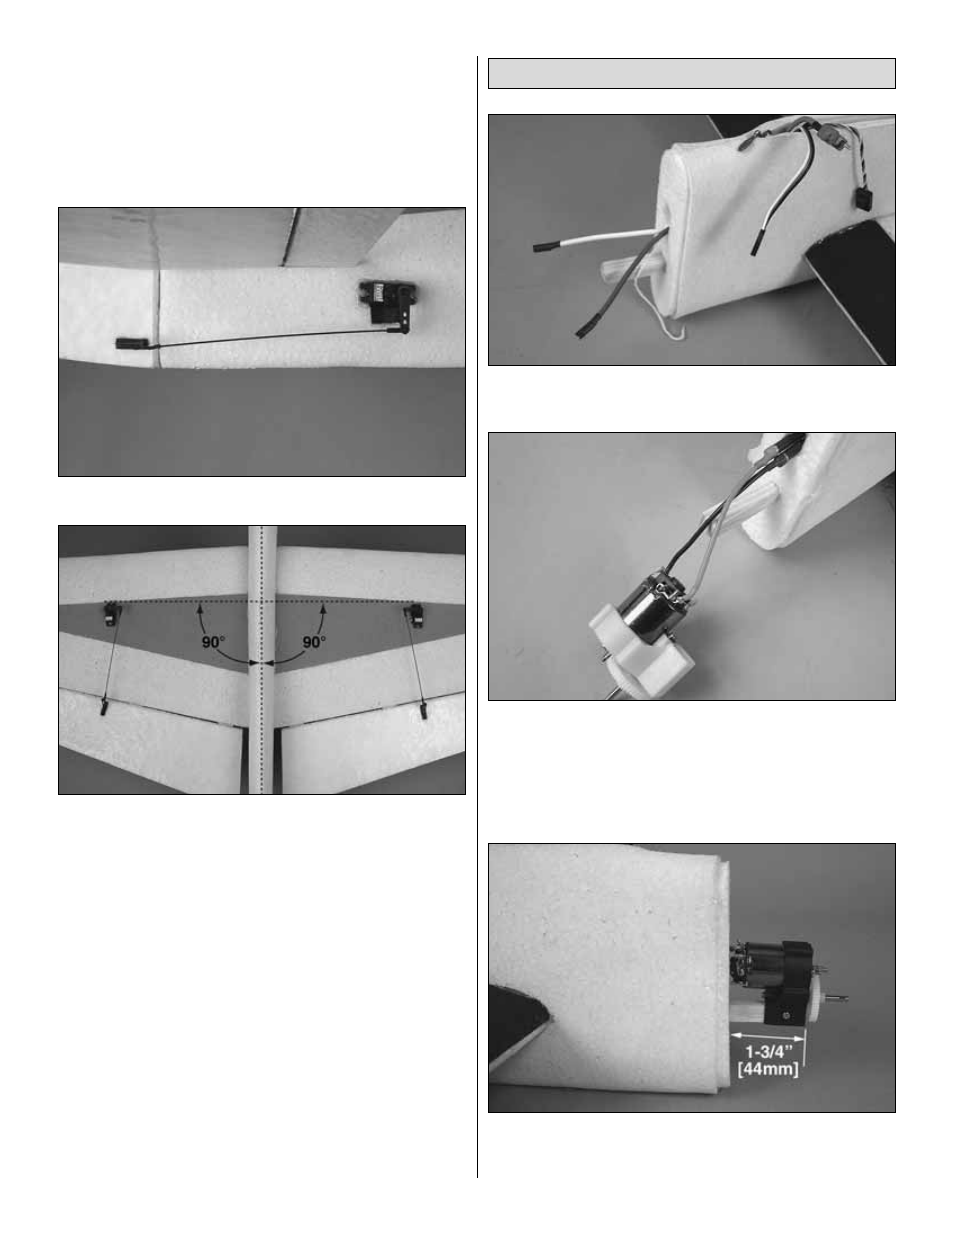
1. Pull the ESC output wires forward from the canopy and out
the hole in the firewall using the preinstalled string if necessary.
❏
2. Connect your ESC output wires to the motor. If using
a different ESC than the one recommended, soldering may
be necessary. If soldering, attach the wires to the same point
that the capacitors and brush wires are pre-soldered to. The
positive wire from the ESC connects to the identified red
post. Check for proper rotation before proceeding.
❏
3. Slide the gearbox assembly onto the motor stick. Align
the front of the gearbox 1-3/4" [44mm] from the firewall and
secure it with a 2 x 6mm [#2 x 1/4"] wood screw.
Install the Propulsion System
11