Mount the engine – Great Planes SlowPoke 15 Kit - GPMA0491 User Manual
Page 20
❏
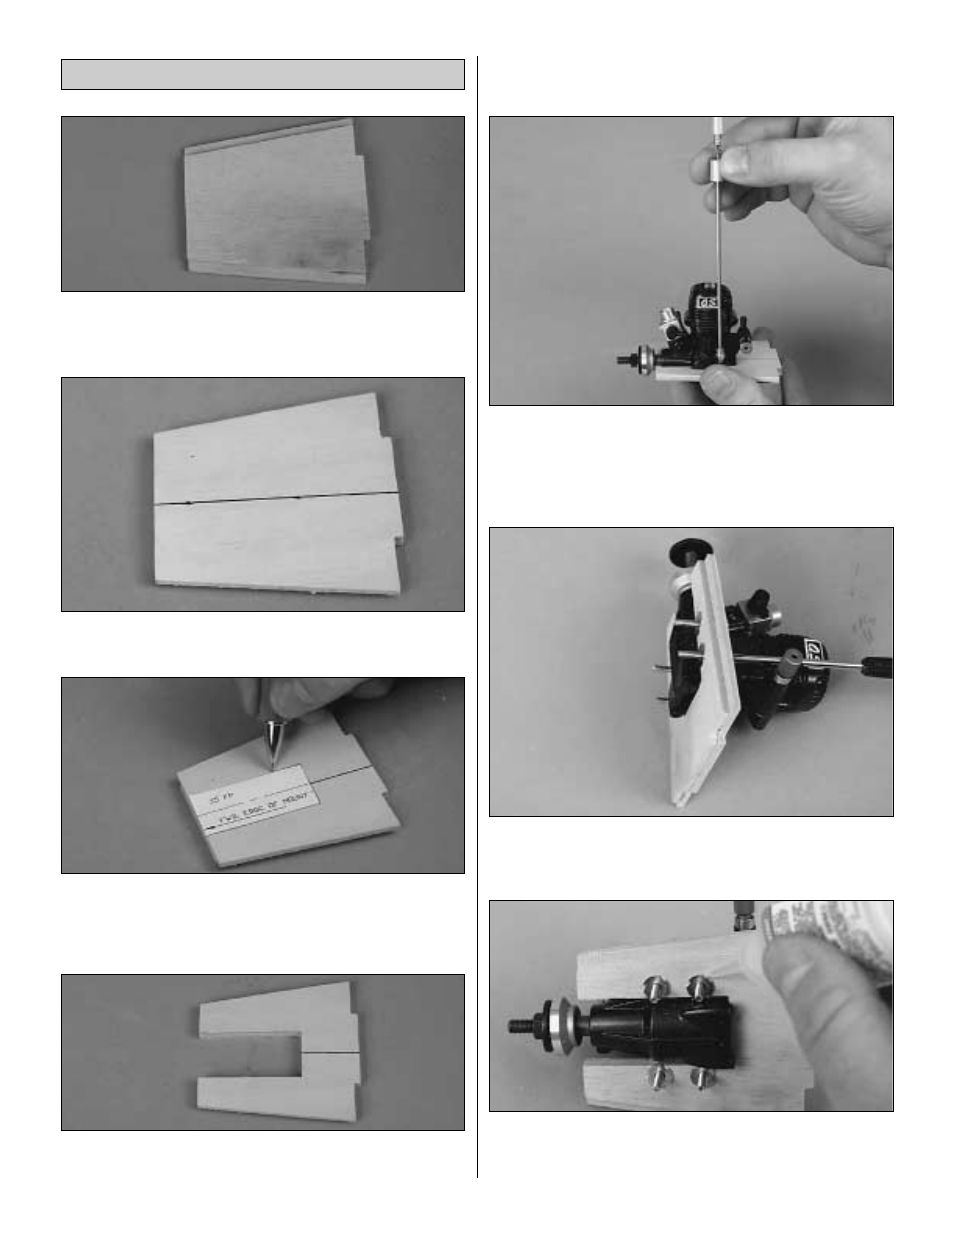
1. Laminate the two die-cut 1/8" ply engine mounts
together, with 6-minute epoxy, making sure to keep the punch
marks on the larger mount visible.
❏
2. Draw a line from front to back on the engine mount,
using the punch marks as a guide.
❏
3. Cut the template for your engine from the plan. Place
the template on the line you drew, aligning it with the front
of the engine mount. Trace around the edges of the
template onto the engine mount.
❏
4. Using your tracing as a guide, cut the engine mount to
accept your engine.
❏
5. Position the engine on the mount so there is a 1/16" gap
between the rear of the engine and the slot in the mount.
❏
6. Mark the engine mount holes with a pencil lead or a
T-pin. Remove the engine from the mount and drill four
9/64" holes at your marks. Hint: For greater accuracy use
the Great Planes Dead Center
™
Engine Mount Hole Locator
(GPMP8130) to mark the locations of the bolt holes.
❏
7. Use the four 4-40 x 3/4" bolts to pull the four 4-40 blind
nuts into the bottom of the engine mount or seat them with
a hammer.
❏
8. Glue the blind nuts into the engine mount by wicking
thin CA around the outside edges. Note: Be careful not to
glue the bolts to the blind nuts.
Mount the Engine
20