Great Planes Ryan STA-M 1.20 ARF - GPMA1355 User Manual
Page 10
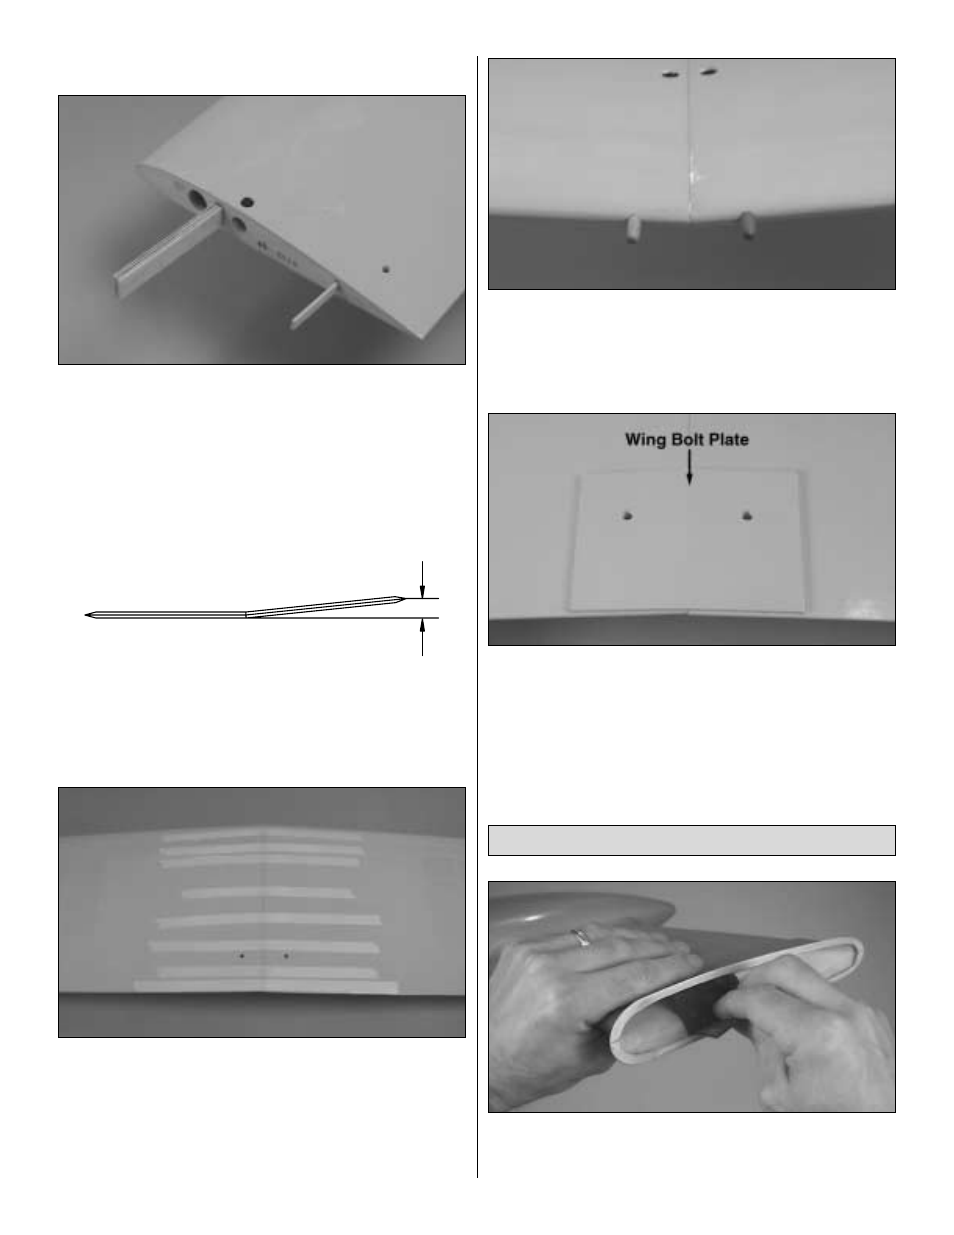
Refer to this photo for the following two steps.
❏
2. Cut the covering from the pre-drilled holes in both wing
halves for the servo wires, the wing dowels and the wing
bolts. Guide the end of the servo wires through the holes in
the top of both wing halves.
❏
3. Test fit the forward wing joiner and the plywood aft
wing joiner in both wing halves. Make adjustments where
necessary for a good fit.
❏
4. Test fit the wing halves together. There should be no
gap. When one wing is lying flat on the workbench, the tip of
the other wing should be approximately 6-5/8" [168mm] from
the workbench. Make adjustments where necessary.
❏
5. Separate the wings and remove the joiners. Thoroughly
coat all mating surfaces, including the inside of the wings
where the joiners fit, with 30-minute epoxy, then glue the wings
together. Use masking tape to tightly hold the wings together
until the epoxy has hardened. Excess epoxy that gets on the
covering can be easily removed before it hardens with a tissue
dampened with denatured alcohol or other suitable solvent.
❏
6. Round one end of both hardwood wing dowels. Use
epoxy to glue the dowels in the wing with the rounded ends
forward. Be certain approximately 1/2" [13mm] of the dowels
protrudes from the wing. While you've got some epoxy
mixed up, lightly coat the dowels to fuelproof them.
❏
7. Use a sharp, new #11 blade to trim the covering from
the bottom of the wing for the 1/8" [3mm] plywood wing bolt
plate. Use care to cut just through the covering, while not
cutting into the wood. Glue the wing bolt plate into position.
After the glue hardens, use the holes in the top of the wing
as a guide to drill 17/64" [6.7mm] (or 1/4" [6.4mm]) holes
through the wing bolt plate.
❏
1. Use coarse sandpaper to roughen the inside of the
rim
near the front and back of both wheel pants. The areas
specified are indicated by the brackets in the following photo.
Mount the Landing Gear
6-5/8"
10