Build the motor mount – Great Planes Ryan STA Electric Kit - GPMA0165 User Manual
Page 27
the fuse by temporarily inserting the retainer pin through the
backrest.
❏
15. Glue the two die-cut 3/32" [2.4mm] balsa instrument
panels (IP) to the battery hatch base. The center panel
should be glued perpendicular to the base. The front panel
should be against former F2B.
❏
16. Glue stringers between the two instrument panels.
❏
17. Remove the battery hatch and sand the edges of the
hatch base flush with the backrest and instrument panels.
❏
18. Reinstall the battery hatch with the plan protector
under it. From the remaining 1/16" balsa sheet, glue
sheeting on both sides of the battery hatch from the forward
instrument panel to the back rest.
❏
19. Sand the top of the sheeting and stringers flush with
the top of the instrument panels. Do not sand the sheeting
on the backrest.
❏
20. Glue the remaining 1/8" x 3" [3.2mm x 76.2mm]
sheeting to the top of the battery hatch from the forward IP
to the aft IP. Trim and sand the top sheeting flush with the
side sheeting.
❏
21. Place the battery hatch on the fuselage. Sand the
hatch to match the fuselage sides. Balsa filler can be used
to fill any gaps between the hatch and the fuselage.
❏
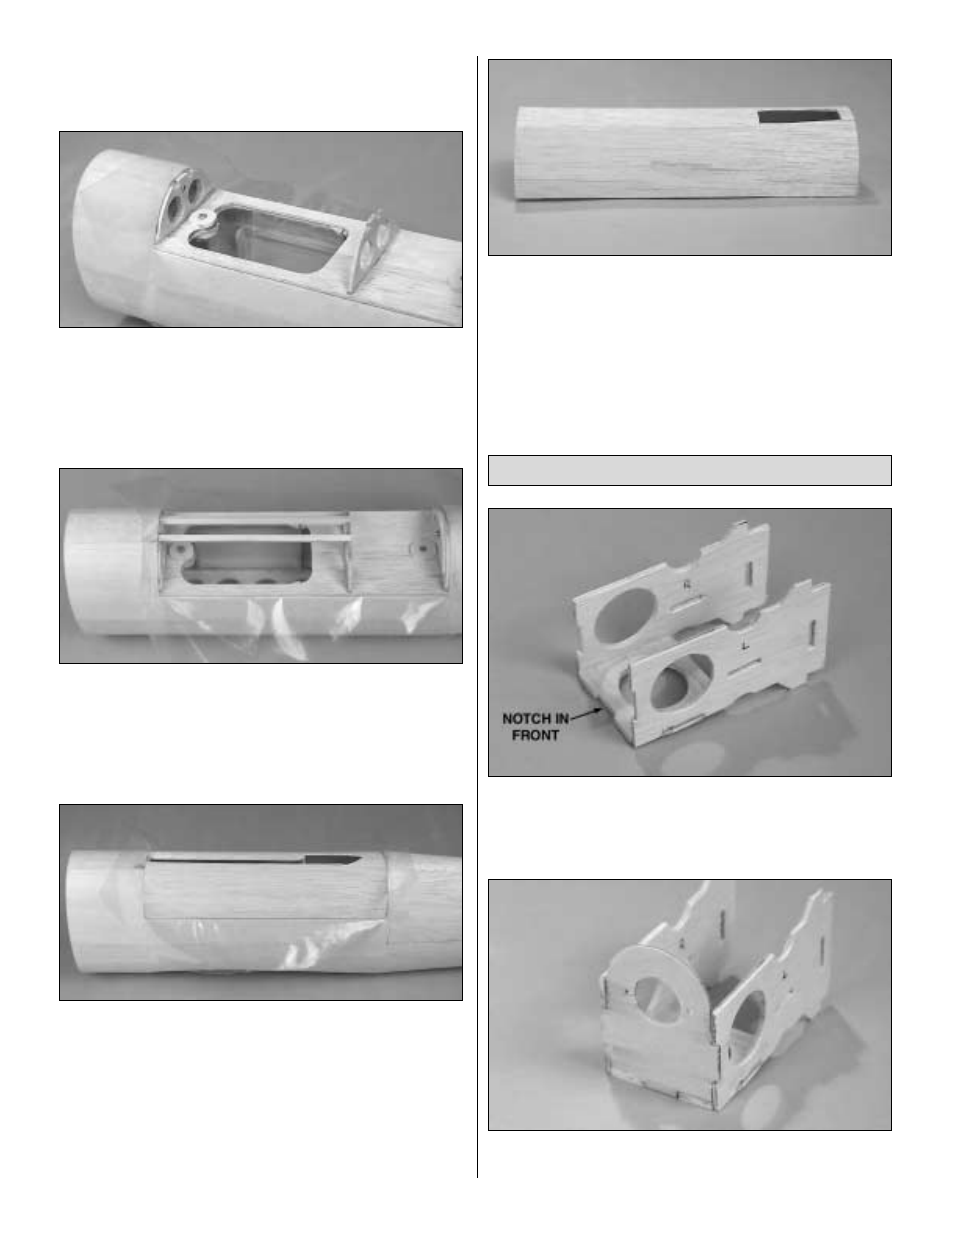
1. Glue the die-cut 3-ply left and right motor mount
sides perpendicular to the forward bottom motor mount.
Note that the forward bottom motor mount has a notch that
faces the front.
❏
2. Glue the die-cut 1/16" plywood motor mount front to the
sides and bottom. Reinforce the glue joints with medium CA.
Build the Motor Mount
27