Build the battery hatch cover – Great Planes Ryan STA Electric Kit - GPMA0165 User Manual
Page 25
❏
5. Glue 3/16" x 3/16" [4.8mm x 4.8mm] stringers from former
F6B to F8B. The stringers glue to the front of former F8B.
❏
6. Use a sanding bar to remove any excess glue from the
joint between former F1A and the fuselage base. Glue the
die-cut 3-ply former F1B to the top of F1A. Use a
straightedge to make sure that F1B is in line with F1A.
❏
7. Glue 3/16" x 3/16" [4.8mm x 4.8mm] balsa stringers
from F1B to F2B. Make sure that F2B is perpendicular to the
fuselage base.
❏
8. Use a sanding bar to sand the edges of the fuselage
base flush with the edge of the formers. Part of the stringers
will need to be sanded at former F8B.
❏
9. As on the bottom of the fuselage, sheet the top of the
fuselage with 1/16" x 3" x 30" [1.6mm x 76.2mm x 762mm]
balsa sheeting. Wetting the sheeting with water will allow the
sheeting to bend around the tight radius at the aft end of
the fuse.
❏
10. Trim and sand the upper fuselage sheeting flush with
the face of formers F1A and F9. Cut out the battery hatch
area. Sand the top of the sheeting and stringers flat with the
top of formers F1B and F2B and F6B and F8B.
❏
11. From the remaining 1/8" x 3" x 30" [3.2mm x 76.2mm
x 762mm] balsa sheet, cut in step 5 of
“Sheet the Lower
Half of the Fuselage,” fit and glue the top deck to the
stringers and upper sheeting.
❏
12. Use a razor plane and sanding bar to shape the fuselage
as shown in the cross-section drawings on the fuse plan.
❏
1. Sand the fuselage base smooth in the area for the
battery hatch cover.
❏
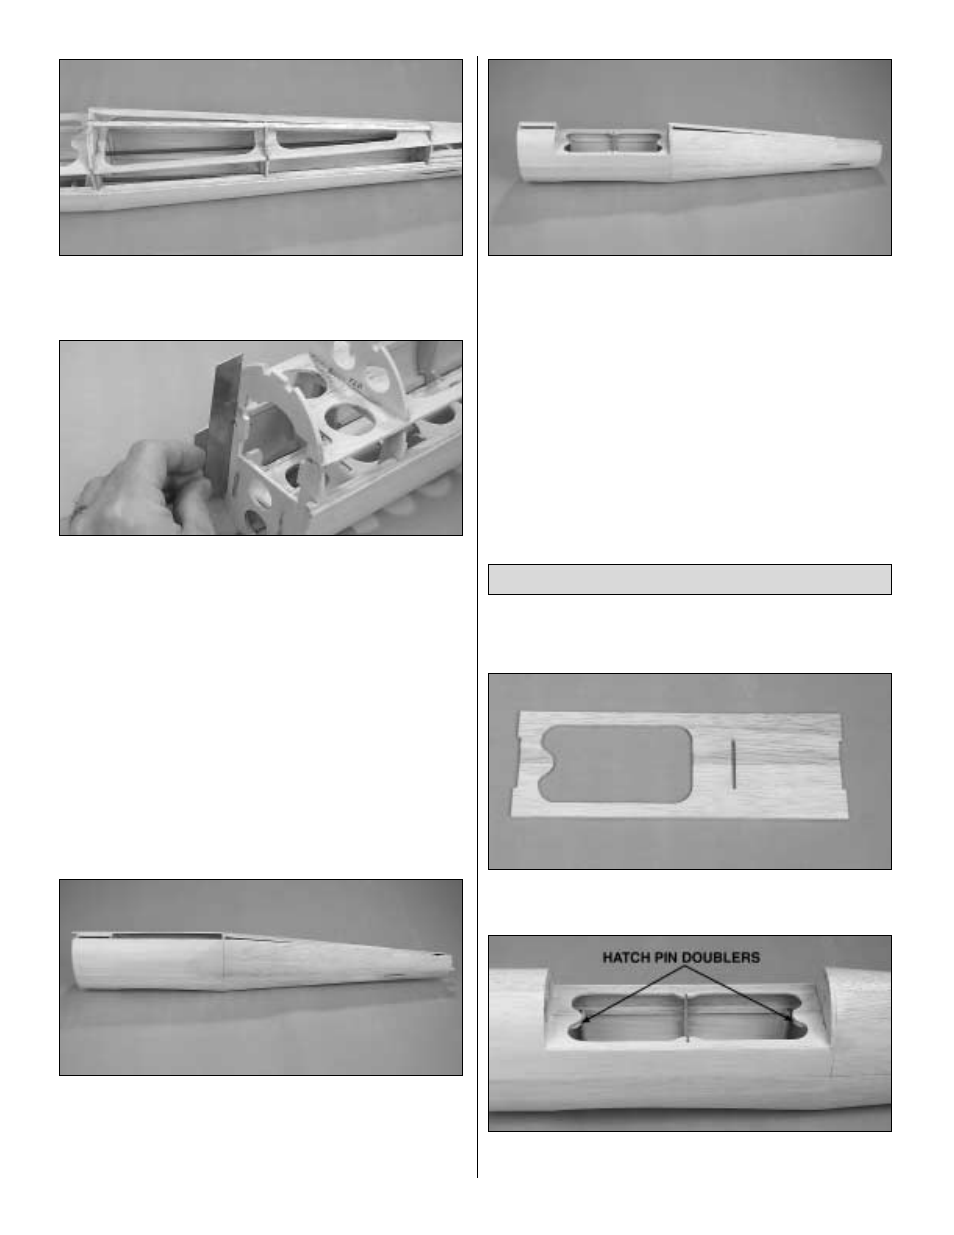
2. Glue the die-cut 3/32" [2.4mm] balsa battery hatch
base halves together.
❏
3. Glue the two die-cut 3-ply hatch pin doublers under
the fuselage base as shown on the fuse plan.
Build the Battery Hatch Cover
25