Great Planes Rapture 40 - GPMA0220 User Manual
Page 23
❏
2. Mix a small batch of 30-minute epoxy and microballoons.
Use the mixture to glue the guide tubes in the exit slots in
the back of the fuselage. Be sure to build up a small fillet
around both guide tubes on the inside and outside of the
fuselage. Allow the epoxy to fully harden.
❏
3. Use medium CA to glue the guide tubes to the rest of
the formers. After the epoxy from the previous step has
hardened, use coarse sandpaper to sand the guide tubes
even with the fuselage sides.
❏
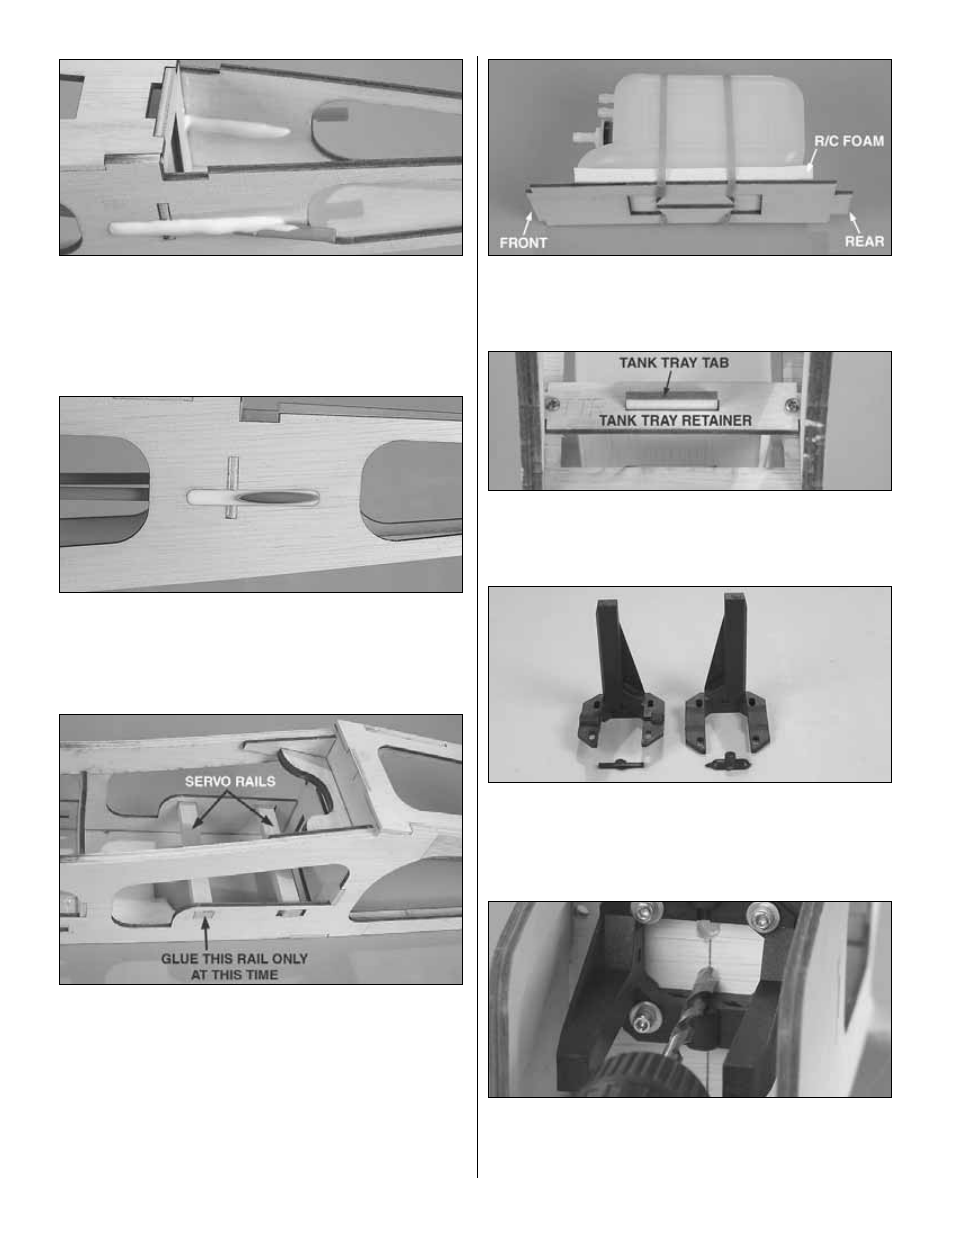
4. Cut the servo rails from the 1/4" x 3/8" x 9" [6.4 x 9.5 x
230mm] basswood stick to fit in the slots in the fuselage sides.
Install the rails, but glue only the front rail into position.
❏
5. Temporarily install two or three servos on the rails.
Using the servos to set the correct spacing, glue the aft rail
into position. Be sure to leave a small space between the
servos and the rails so the servos can be removed. After the
glue hardens remove the servos.
❏
6. Assemble the fuel tank (not included) according to the
instructions that came with it. Mount the fuel tank to the tank
tray (TT) with a #64 rubber band and a sheet of 1/4"
[6.4mm] R/C foam rubber in between.
❏
7. Temporarily mount the tank tray in the fuselage with
the tank tray retainer and two #2 x 1/2" [13mm] screws. Note
that the tab on the front of the tank tray keys into the notch
in the back of the firewall.
❏
8. Cut the spreader bar from both engine mount halves.
❏
9. Temporarily mount the engine mount to the firewall
with four 6-32 x 1" [25mm] socket head cap screws and #6
lock washers and #6 flat washers.
❏
10. Drill 15/64" [6mm] (or 1/4" [6.4mm]) holes through the
firewall for the fuel lines. Hint: If the engine mount is in the
way, draw the outline of the inside of the engine mount on
the firewall. Remove the mount, then drill the holes.
23