Great Planes Rapture 40 - GPMA0220 User Manual
Page 14
❏ ❏
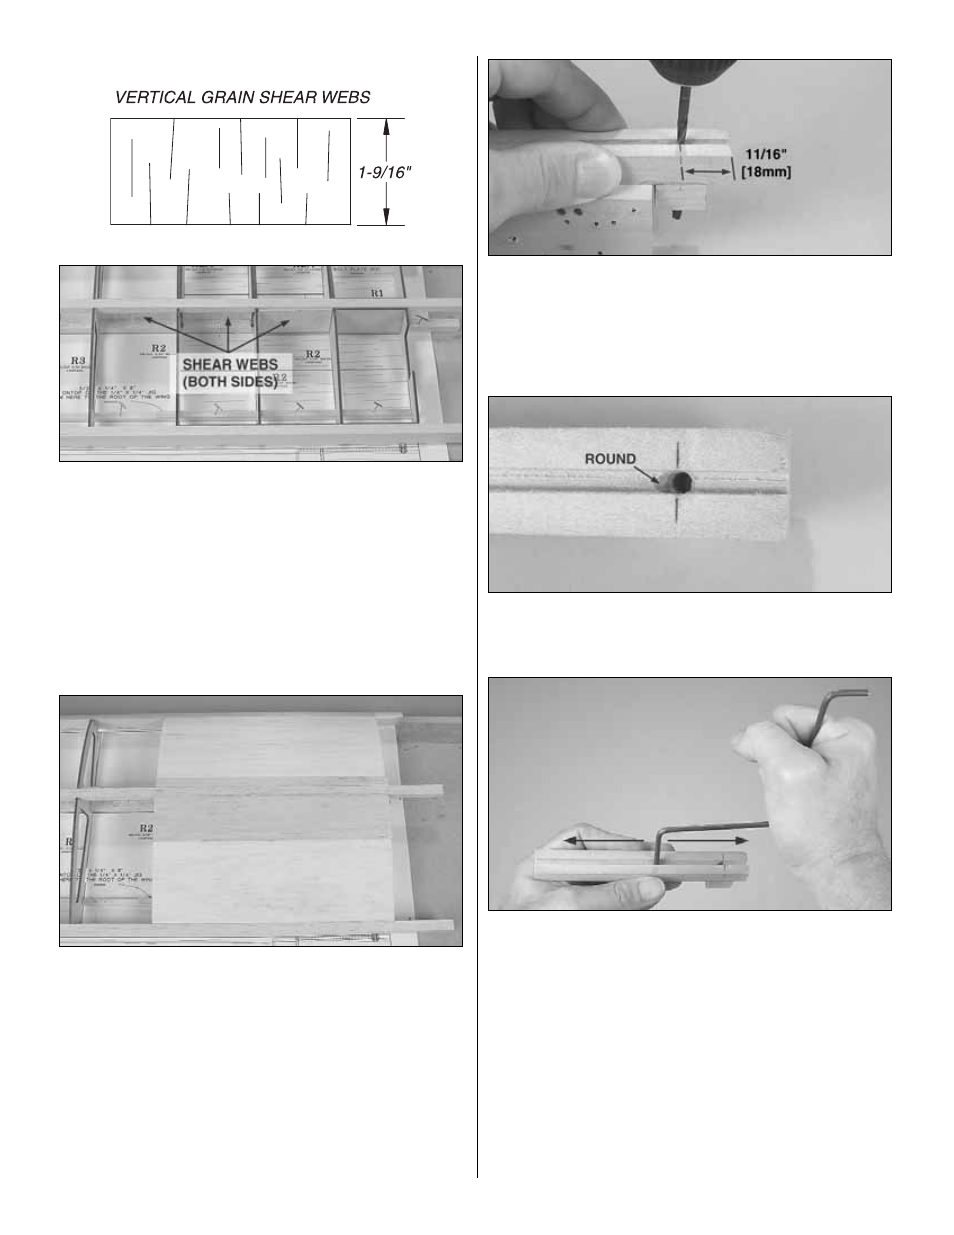
20. Cut four 1-9/16" [39mm] vertical grain shear
webs from the 3/32" x 3" x 24" [2.4 x 76 x 609mm] hard
balsa sheet. Trim the ends of the shear webs to fit between
the ribs where shown on the plan. The same as when gluing
the die-cut shear webs into position, use a piece of leftover
3/32" [2.4mm] balsa to raise the shear webs from the plan.
Note: Remove any T-pins that are in the way.
❏ ❏
21. Remove any T-pins that are in the bottom spar
between R1 and the last R2. Sheet the top of the wing with
a 3/32" x 3" x 36" [2.4 x 76 x 914mm] balsa sheet.
❏ ❏
22. Now the wing may be removed from the building
board. Use part of another 3/32" x 3" x 36" [2.4 x 76 x
914mm] balsa sheet to sheet the bottom of the wing, but
only between the trailing edge and the main spar.
❏ ❏
23. Drill a #20 or 5/32" [4mm] hole through the landing
gear rail and the landing gear block 11/16" [18mm] from the
end. (The wire is 5/32" [4mm], but using a #20 drill, which is
slightly larger than 5/32" [4mm], will make the gear a little
easier to install and remove during construction.)
❏ ❏
24. Use a hobby knife to round the edge of the hole to
accommodate the bend in the gear.
❏ ❏
25. Slightly widen the groove in the rail by pushing one
end of the gear back and forth. This will also make it easier to
install and remove the gear during test fitting and assembly.
❏ ❏
26. Test fit the gear in the rail. Make adjustments
where necessary.
❏ ❏
27. Use 30-minute epoxy to glue the previously prepared
landing gear rail assembly into position on the bottom of the
wing. Be certain to get a secure glue joint between the
maple landing gear block and the plywood doubler (excess
glue isn’t required–good contact is the way to a strong joint).
14