Install the aileron servos & pushrods – Great Planes PT-17 Stearman .91-1.20 ARF - GPMA1349 User Manual
Page 8
❏ ❏
2. A string is taped inside the servo bay. Carefully
remove the string from the servo bay and tape it to the
outside of the wing to prevent it from dropping back into the
wing. The other end of the string is taped to the root rib.
Remove the tape, thread the string through the small hole in
the top of the wing and tape it to the wing.
❏
3. Repeat steps 1 and 2 for the left bottom wing panel.
❏
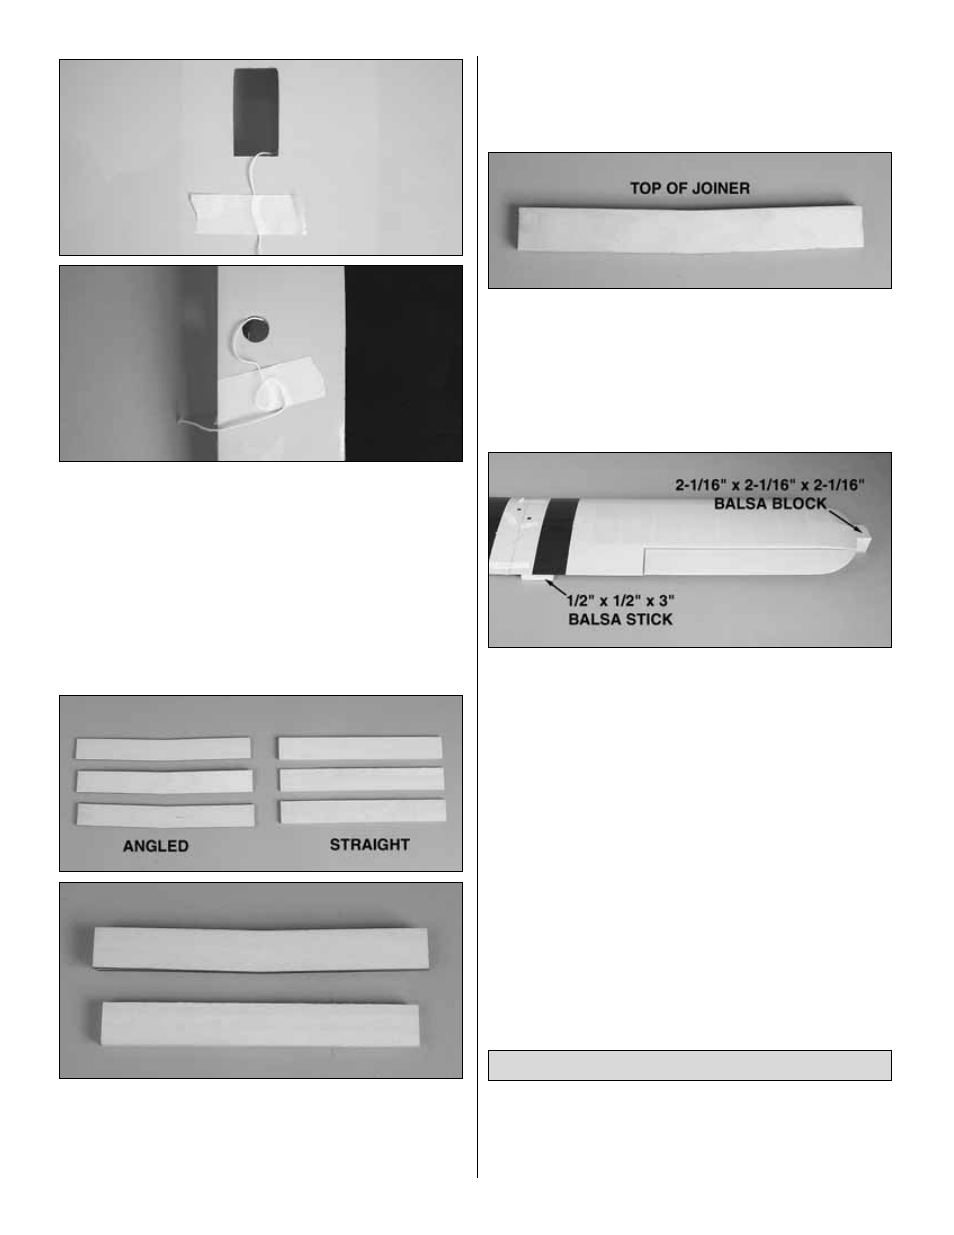
4. Locate three 1/8" [3mm] straight plywood wing joiners
and three 1/8" [3mm] angled plywood wing joiners. Using
6-minute epoxy, glue the straight ones together to form one
3/8" [9.5mm] straight wing joiner and glue the three angled
ones together forming the 3/8" [9.5mm] angled wing joiner.
❏
5. After the glue has cured, test fit the angled wing joiner
into the bottom wing panels and the straight wing joiner into
the top wing panels. Sand the joiners as needed to get a
good fit.
❏
6. When you are satisfied with the fit of the joiners, glue
the angled joiner into the bottom wing panels with 30-minute
epoxy. Be sure that the top of the joiner is towards the top of
the wing. When gluing the wing panels together be sure to
get glue into the joiner pockets in the wing. This can be done
by applying the glue into the pocket with a small stick. Apply
glue to the pocket, the joiner and the root rib of the wing.
Before the glue cures, set one wing half flat on your bench.
Insert the 1/2" x1/2" x 3" [13 x 13 x 76mm] balsa block under
the trailing edge of the wing that sits flat on the workbench.
Block up the wing tip of the other wing half with the 2-1/16" x
2-1/16" x 2-1/16" [52 x 52 x 52mm] balsa block included in the
kit. Put small weights on the wing half that is flat on the bench
to keep it lying flat and leave the block under the wing tip of the
other wing half while the glue cures.
❏
7. Hold the wing together with masking tape while the
glue is curing. Excess epoxy can be cleaned away with
denatured alcohol and a paper towel.
❏
8. Glue the top wing together using the straight wing
joiner and following the same gluing procedure used on the
bottom wing. Note: There is no dihedral on the top wing.
After gluing the wing together be sure it remains flat on the
workbench while the glue cures.
❏ ❏
1. On the right lower wing, install a 12" [305mm]
servo extension onto the servo lead. Secure the extension
to the lead with tape, a piece of heat-shrink tube or some
other method to keep them from coming unplugged.
Install the Aileron Servos & Pushrods
8