Preparations, Build the wing, Install the aileron servos and pushrods – Great Planes P-47 Thunderbolt GP/EP ARF - GPMA1479 User Manual
Page 7
PREPARATIONS
o
1.
If you have not done so already, remove the major parts
of the kit from the box and inspect for damage. If any parts
are damaged or missing, contact Product Support at the
address or telephone number listed in the “Kit Inspection”
section on page 5.
o
2.
Remove the tape and separate the aileron servo
hatches from the wing. Use a covering iron with a covering
sock to tighten the covering if necessary. Apply pressure
over sheeted areas to
thoroughly bond the covering to
the wood.
BUILD THE WING
Install the Aileron Servos
and Pushrods
o o
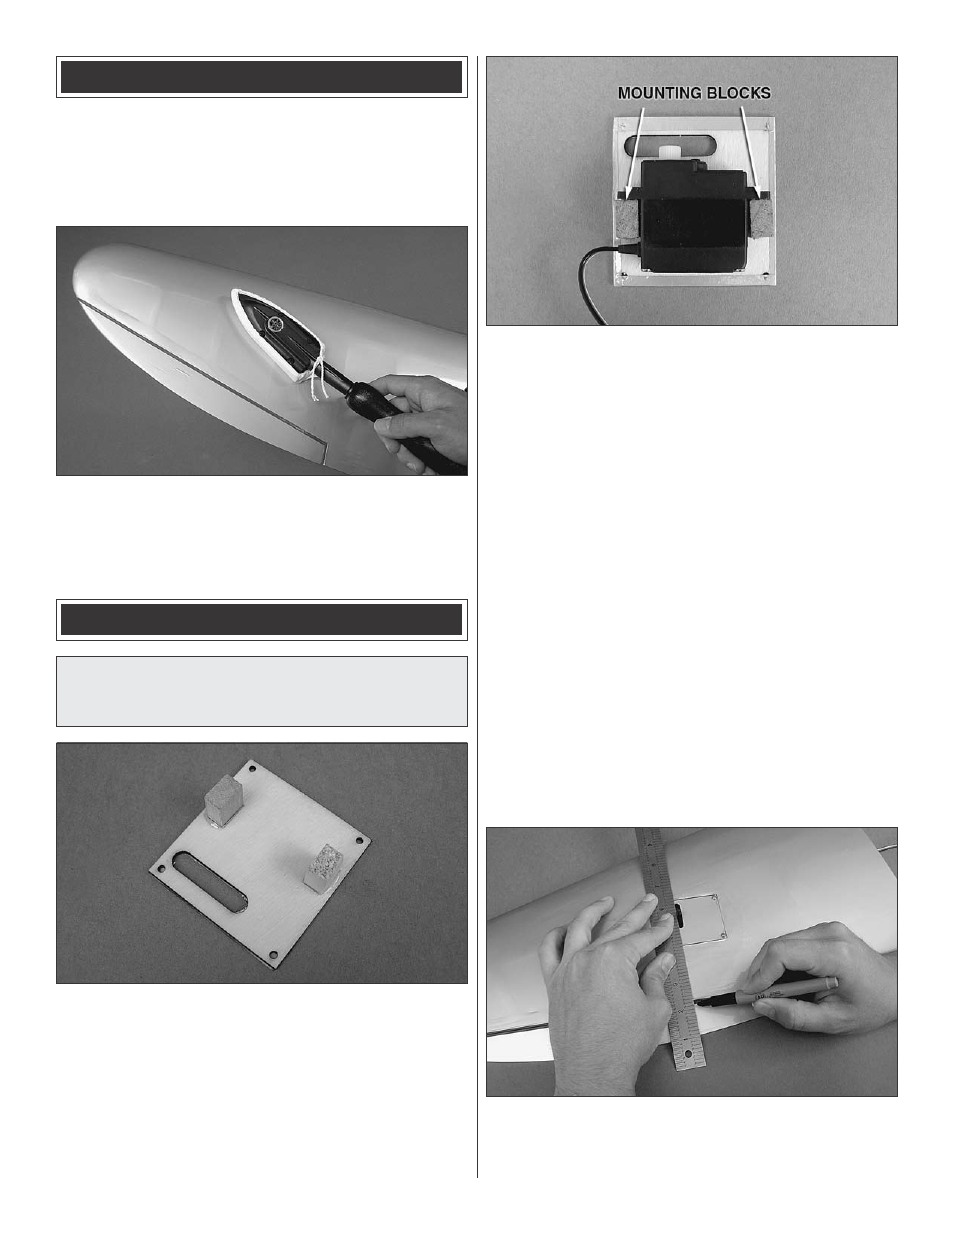
1. Locate the servo hatch from the underside of the
wing that was set aside and the four 1/2" x 15/64" x 3/8"
[12.7mm x 6mm x 9.5mm] blocks of wood. These will be
used to hold the aileron servos to the servo hatch. The
location of the servo blocks has been marked for you on
the underside of the aileron servo hatch. If you are using a
different servo from the recommended Futaba S3115, you
will need to verify these markings are in the appropriate
location for your servo. Glue the mounting blocks to the
underside of the hatch using 6 minute epoxy.
o o
2. Place the servo onto the hatch in the location it is
going to be mounted. Mark the center of each of the servo
mounting holes on the blocks. Using a 1/16" (1.6mm) drill
bit, drill a pilot hole in the location of the mark. Install the
rubber grommets and eyelets that were included with the
servo, and mount the servo to the blocks using the servo
screws included with the servo. Remove the servo screw
and servo, and apply two drops of thin CA to the holes.
Allow a few moments for the glue to cure. Once the glue
has cured, center the servo, using the radio, and install the
servo using the hardware provided with the servo. Remove
the extra arms from the servo horn.
o o
3. Locate a 9" [229mm] servo extension and attach
it to the aileron servo. Secure the extension using a length
of 3/8" [9.5mm] heat shrink tubing, or electrical tape. Look
inside the wing and locate the string. Tie the end of the string
to the end of the extension. The other end of the string is
taped to the root of the wing half. Using the string, guide the
servo extension through the wing and out of the wing root.
Untie the string from the servo extension and feed the end
of the servo extension through the hole located in the top of
the wing.
o o
4. Install the aileron servo hatch using four of the 2mm
wood screws provided. Hold a straight edge flush with the
top of the servo arm and mark where the ruler intersects the
aileron leading edge.
7