Great Planes P-47 Thunderbolt GP/EP ARF - GPMA1479 User Manual
Page 11
11
o
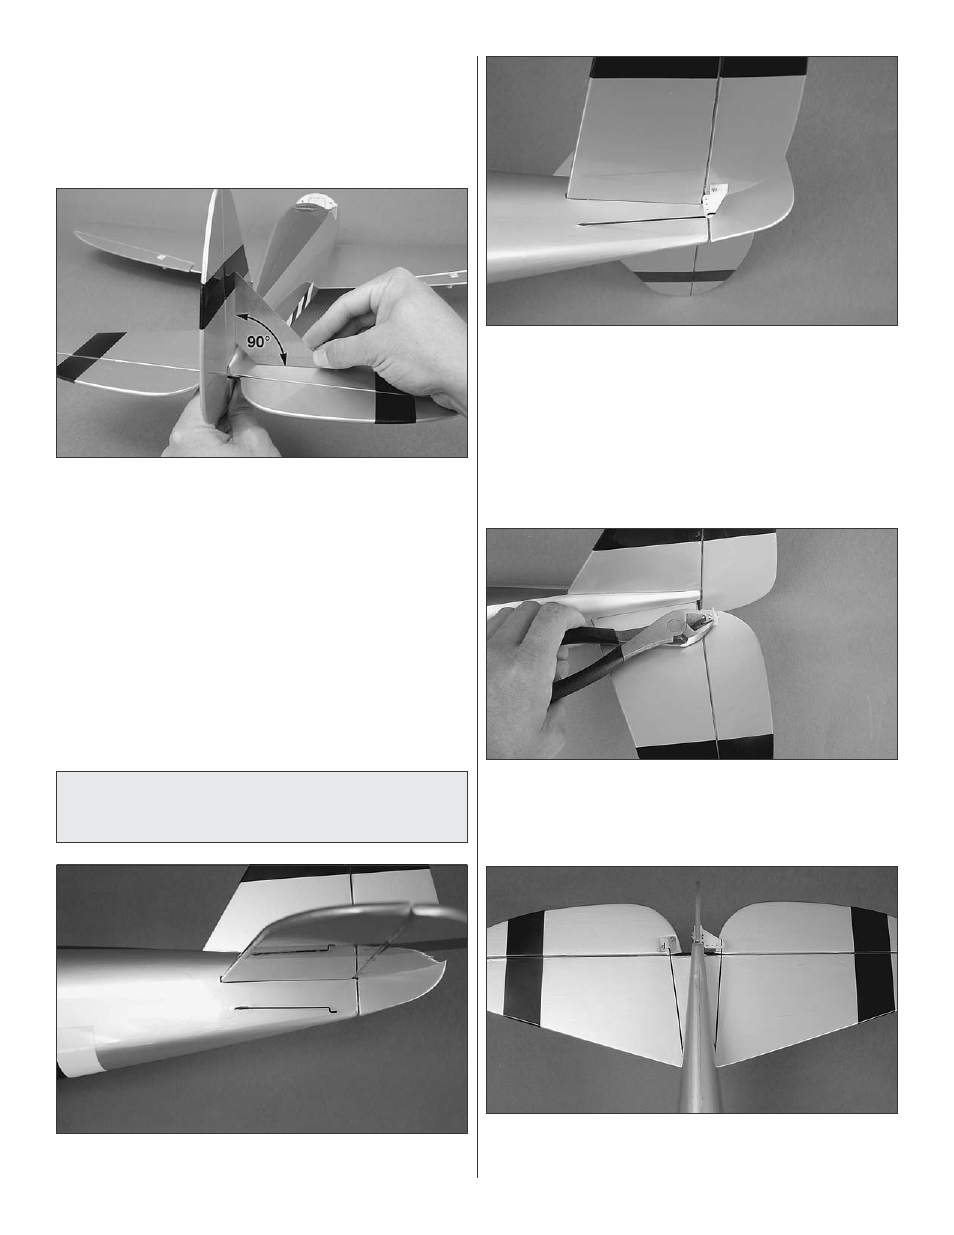
2. Hook a small hole nylon control horn onto the Z-bend in
the pushrod wire. Align the control horn onto the underside
of the left elevator half and position the holes over the hinge
line, matching the angle of the pushrod. When satisfied,
mark the locations for the control horn mounting screws.
Drill the holes using a 5/64" [2mm] drill bit and install a small
hole control horn with two 2 x 15mm [5/8"] machine screws
and a control horn back plate.
o
3. Using a pair of diagonal pliers, remove the ends
of the machine screw that protrude through the control
horn backplate.
o
4. With the other 19-3/4" [502mm] long pushrod, install a
small hole control horn on the right side of the rudder in the
same manner.
o
10. Insert the vertical stabilizer into the slot in the fuselage.
When you slide the vertical into place, slide the other half
of the rudder hinge into the bottom of the fuselage. Once
the vertical stabilizer has been inserted into the fuselage
and the rudder hinge is in place, remove the T-pin from the
rudder hinge.
o
11. Use a builder’s triangle to be sure the vertical stabilizer
is at a 90 degree angle with the horizontal stabilizer. If it is
not, apply masking tape to the fuselage and to the tip of the
vertical stabilizer to gently position it. Once you are certain
the alignment is correct, use thin CA or epoxy to glue the
stabilizer in place. Allow a few minutes for the glue to cure
and then remove the tape.
o
12. Add six drops of thin CA glue to each side of the
rudder hinge you installed. Allow a few minutes for the glue
to cure. Free the rudder hinge by flexing it.
Install the Elevator and Rudder
Pushrods and Servos
o
1. Insert one of the 19-3/4" [502mm] long pushrod wires
through the left pushrod exit slot into the fuselage.