Great Planes Extra 300S 40 ARF MonoKote - GPMA1240 User Manual
Page 9
❏
16. Wrap the tank with 1/4" foam rubber secured with a
couple of rubber bands. Tie a piece of string to the loop in
the back of the tank so you can pull it out of the fuselage
when you do your seasonal fuel tank inspection (you do
perform a fuel tank inspection at the beginning of each
flying season, don’t you?)
❏
17. Remove your engine mount. Drill 15/64" (or 1/4") holes
through the firewall for your fuel lines. Make sure you drill
the holes where they will not interfere with the engine mount.
❏
18. Fit approximately 12" to 14" of fuel line on the pickup
and vent lines of your fuel tank. Pull the fuel lines through
the holes you drilled in the firewall as you install your tank.
Be certain you do not kink the fuel lines.
❏
19. Secure your fuel tank by stuffing extra foam rubber
in the fuselage behind the tank.
Before we move on, we might as well finish up the rest of
the “front end.”
❏
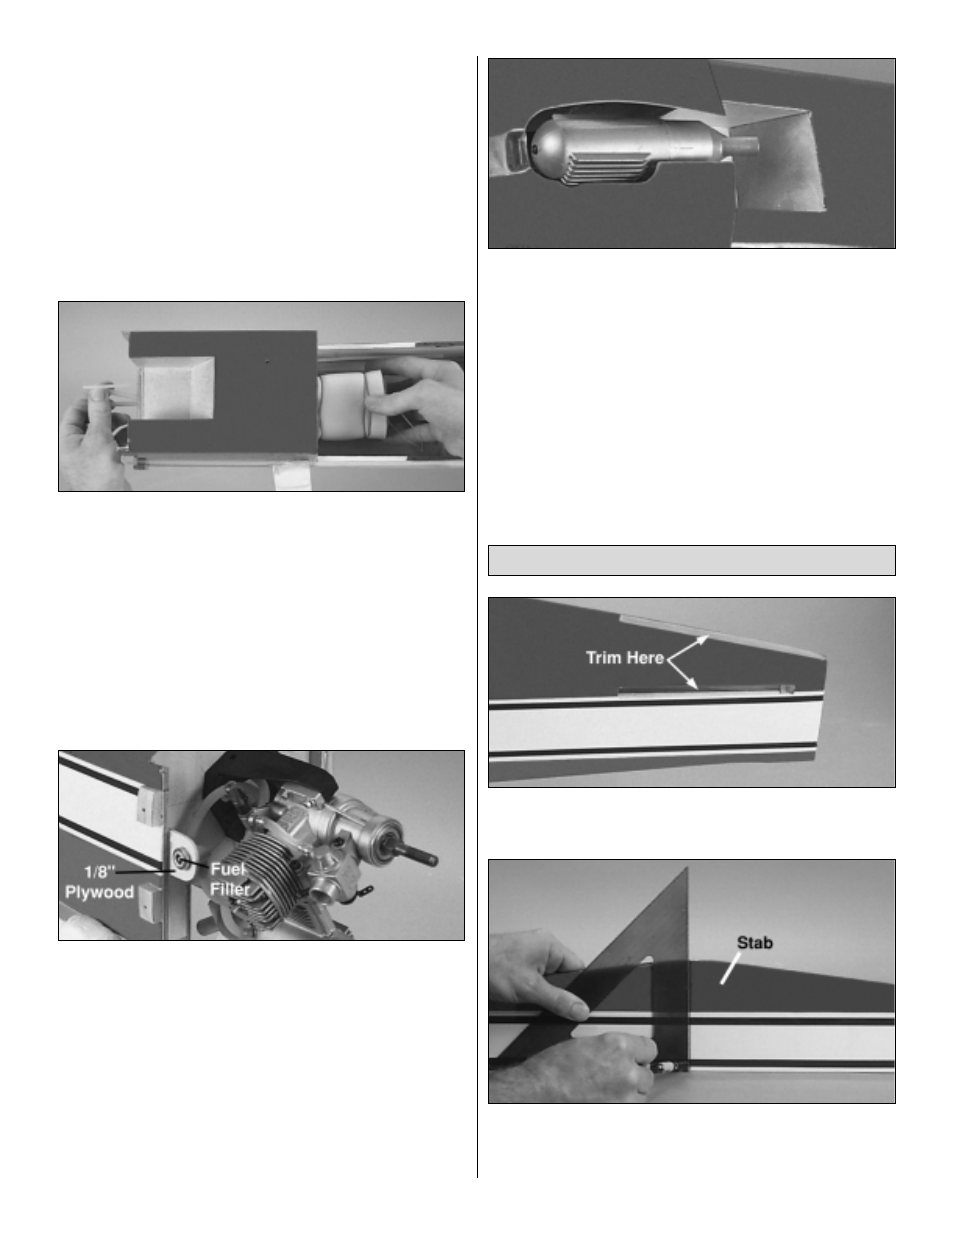
20. Mount your fueling system. We used a Great Planes
Easy Fueler
™
Fuel Filling Valve (GPMQ4160, not included
with this kit). Mount the filler valve on the carb inlet side of
the engine compartment on a scrap piece of 1/8" plywood
(not included).
❏
21. Enlarge the four 1/16" mounting holes you drilled in
the cowl with a 1/8" drill. Fit the cowl on the fuse over the
cowl mounting blocks. If necessary, trim the cowl mounting
blocks to accommodate the added thickness of the glass
cloth so you don’t have to force the cowl into place.
❏
22. Mount your muffler to your engine. Trim the cowl
where necessary so it does not interfere with the muffler
allowing an approximate 1/8" clearance all the way around.
Trim the cowl to accommodate your fuel filler and needle
valve as well.
❏
1. Use a fresh #11 blade to trim the covering from the
slots in the aft end of the fuse for the stab and fin.
❏
2. Measure the top of the stab and accurately mark the
center with a felt-tip pen. Use a 90° triangle to mark a
vertical centerline across the mark you made.
Mount the Stab & Fin
9