Great Planes Edge 540 3D Indoor EP ARF - GPMA1128 User Manual
Page 13
13
of the pushrod guides so that the pushrods are straight and
the guides are 90° to the fuselage. Glue the pushrod guides
to the fuselage with foam-safe CA.
❏
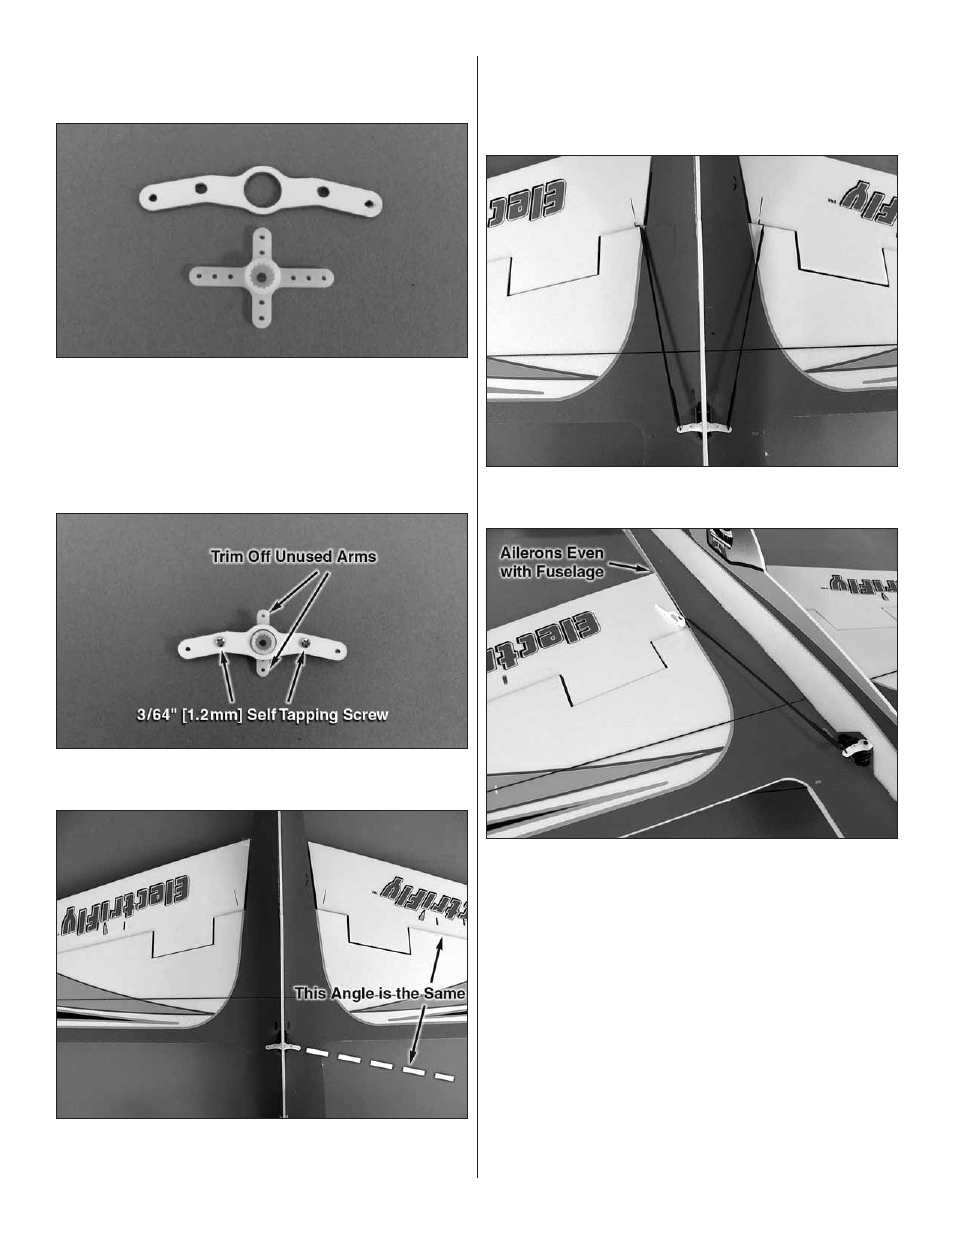
7. Locate the
anti-differential arm
. Place the anti-differential
arm on the underside of the servo arm. If you are using Futaba
servo arms, the holes in the servo arm and the holes in the
anti-differential arm will align. If you are using another brand
of servo arm, you will need to use a #60 [1mm] drill bit to drill
a pilot hole through the servo arm that will align the servo
arm with the anti-differential arm.
❏
8. Attach the anti-differential arm to the servo arm using
two
3/64" [1.2mm] self tapping screws.
❏
9. Insert the aileron servo in the fuselage. Center the aileron
servo trims and attach the servo arm to the servo using the
servo screw. Note the direction of the anti-differential arm. The
angle is the same as the aileron hinge line.
❏
10. Use foam-safe CA to glue the aileron servo to the
fuselage.
❏
11. Insert the z-bend of both
aileron pushrods
in the
anti-differential arm.
❏
12. Insert an aileron control horn onto each end of the
aileron pushrods. Insert the control horns in the slot of the
ailerons. Center the aileron trim on the transmitter. Check that
the ailerons are centered. If they are not, adjust the length of
the pushrods as needed. Then, glue the aileron control horns
in the ailerons, adjust the pushrods and apply a drop of thin
CA to the end of the heat shrink tubing.