Great Planes PT-60 Kit - GPMA0119 User Manual
Page 30
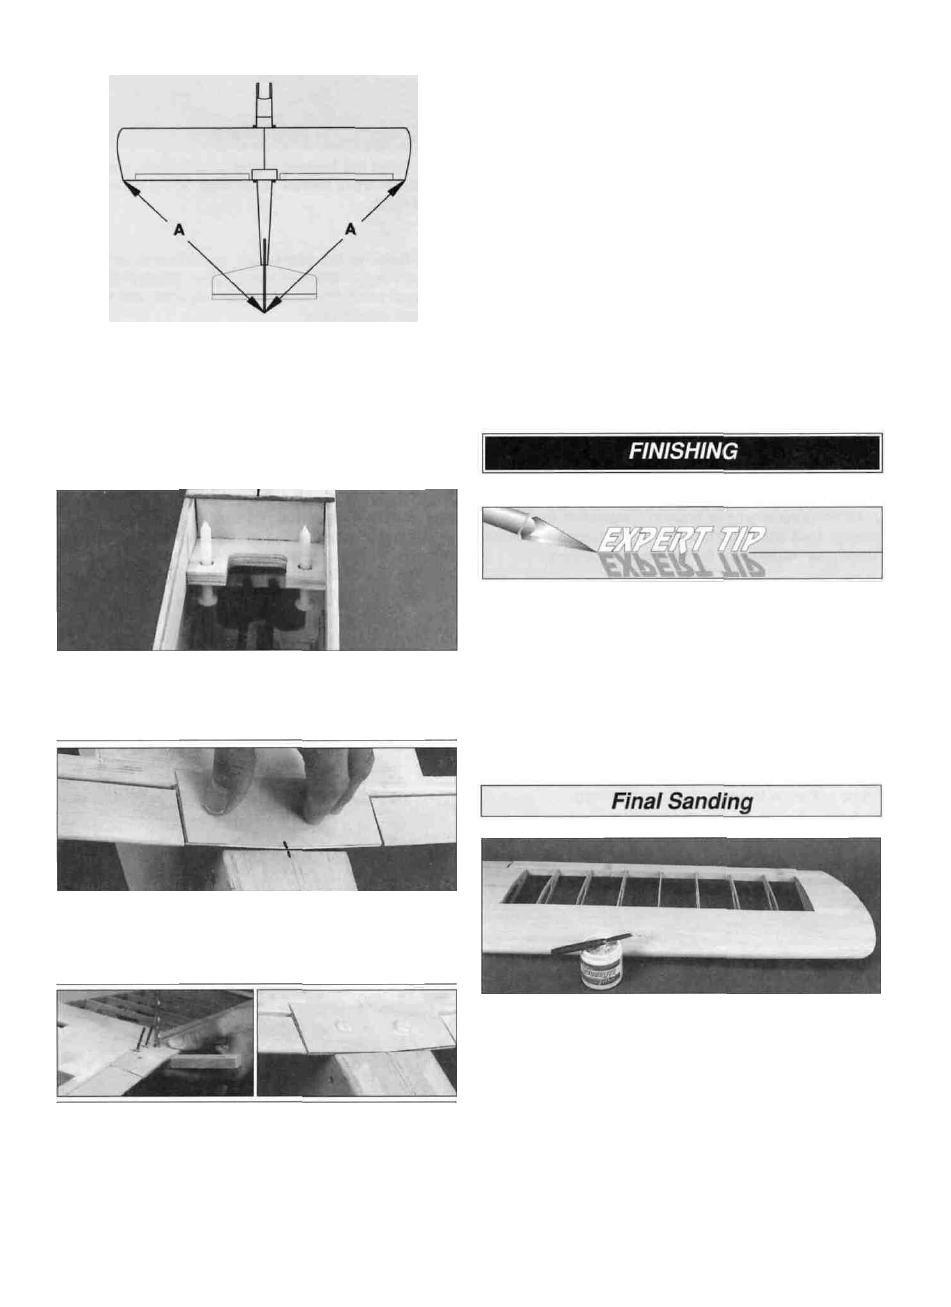
ALIGN THE WING
while holding the drill so the bit is perpendicular to the
top surface of the wing. Use a hardwood "backup" to
prevent the ply TE plate from splintering.
CAUTION: Keep your fingers out of the way and stop
drilling as soon as you feel the drill cut through the TE
plate. Enlarge the holes with a round file if needed, then
test fit the wing using the bolts.
Well, you are through the framing stage and you've given
life to a box of balsa. Looks pretty neat, eh? Time to clean
up your workbench once again, have a soda, and forge
ahead to the "finishing" stage.
A=A
(FROM WINGTIP TO FIN)
D 17. Align the wing by using a string or tape measure
to equalize the distance from each wing tip to the TE of
the fin. Once aligned, lightly draw matching reference
marks on the ply TE plate and the fuse top (See photo at
step 19.) Remove the wing.
D 18. Sharpen the tips of both nylon wing bolts to a
point as shown. Screw the bolts through the blind nuts
from underneath the wing bolt plate. The points should
be 1/8" above the height of the wing saddle.
REPAIRING SURFACE "DINGS"
Many surface blemishes on a framed model are caused
by bumps and balsa chips on the work surface. This type
of ding is best repaired by applying a drop or two of
window cleaner or tap water to the blemish, then running
a hot sealing iron over the spot to expand the wood
fibers. After the surface has dried, sand the expanded
area smooth.
D 19. Plug the wing dowel into F-2 and gently lower the
TE. After the wing is aligned with your reference marks,
press down on the TE to mark the bolt hole locations by
"dimpling" the TE with the sharpened wing bolts.
D 20. Remove the wing, then drill 1/4" (or 17/64" if you
have that size bit) holes through the TE at both marks,
D 1. Fill any scuffs, dings and the forward end of the
pushrod tube exit slots with balsa filler (Hobbico HobbyLite
HCAR3401 recommended). After the filler has hardened,
cut and sand the pushrod tubes flush with the fuse sides,
then sand the entire structure with progressively finer
grades of sandpaper, ending with 320-grit. When you think
the job looks good, sand some more to make it better. You'll
be glad you did.
30