Assemble the cowl – Great Planes Extra 300S 60 Kit - GPMA0236 User Manual
Page 38
❏
14. After the filler cures, wet sand the wheel pants with
400-grit sandpaper to prepare them for primer.
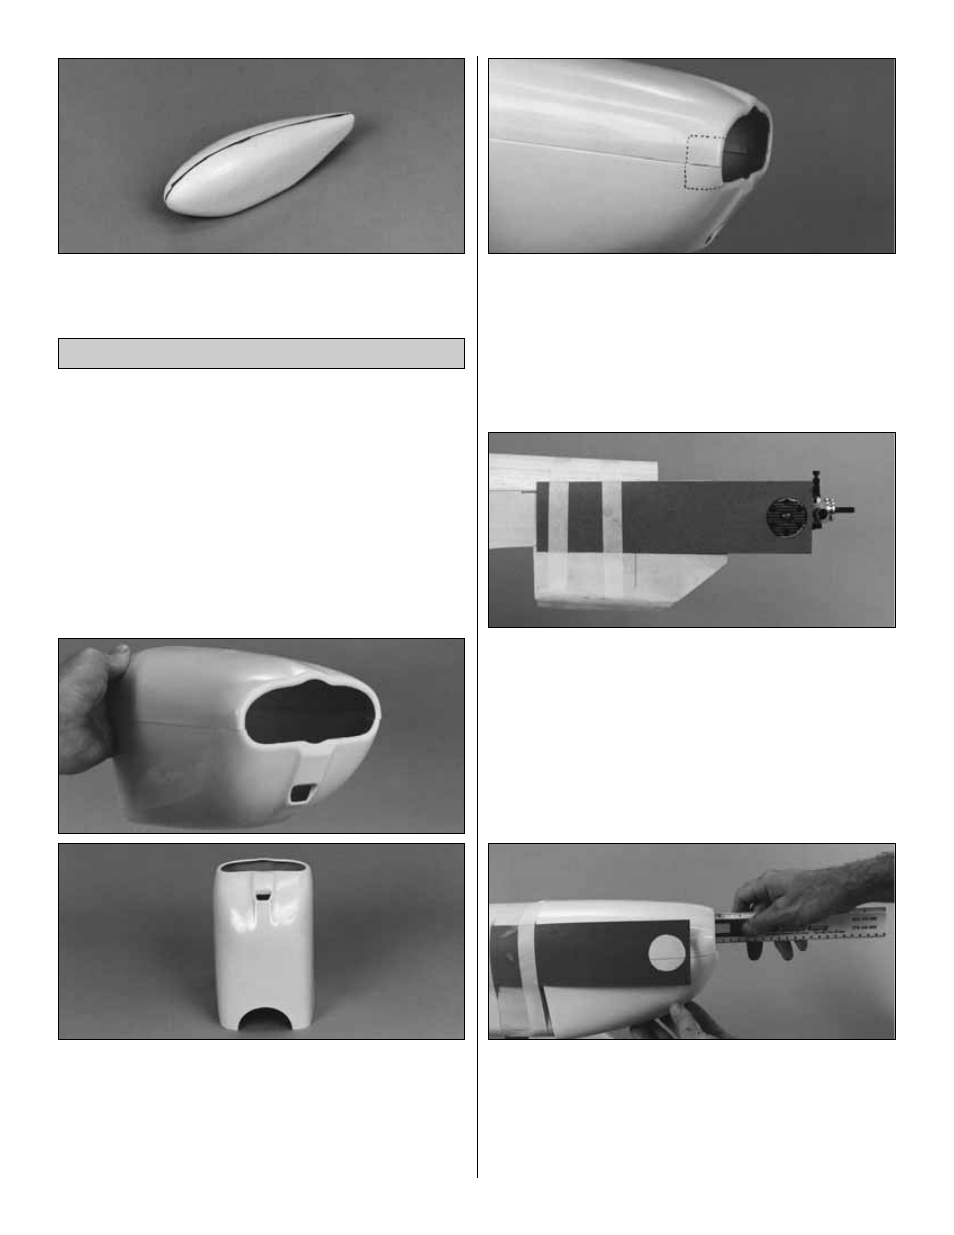
❏
1. The cowl is assembled the same as the wheel pants.
Cut the cowl along the cut lines, then use your bar sander
to true all the edges. For now, the opening in the front of
each cowl half only needs to be roughly cut out. Use
coarse sandpaper to roughen all the overlapping areas so
the glue will stick.
❏
2. Tape the two pieces together, then wick a small
amount of thin CA along the seams of the overlapping
joints. After the CA has cured remove the tape and make
sure you have thoroughly glued the two pieces together by
inspecting the glue joints and adding thin CA if necessary.
❏
3. Use a sharp hobby knife or a Dremel Multi-Tool with a
sanding drum to accurately cut the engine openings at the
front of the cowl and the air exit at the rear of the cowl.
❏
4. Use coarse sandpaper to thoroughly scuff the inside
of the front of the cowl on both sides where there is no
overlapping glue joint.
❏
5. Use 30-minute epoxy to glue a 1" strip of glass cloth
across the glue joint inside the front of the cowl on both sides.
❏
6. Use a piece of thin cardboard or plastic to make a
template for the cutout in the cowl for the head of the
engine. Tape the template to the fuselage side, accurately
indicating the position of the head.
❏
7. Place the backplate of your spinner on the engine and
measure the distance between the firewall and the
backplate (it should be 6-1/4"). Remove the engine from
the fuselage, then position the cowl on the fuselage so it is
1/8" aft of the measurement you just made. Use a ballpoint
pen to lightly mark the location of the rear of the cowl on
the fuselage top.
Assemble the Cowl
38