Install the servos & make the pushrods – Great Planes Extra 300S 60 Kit - GPMA0236 User Manual
Page 33
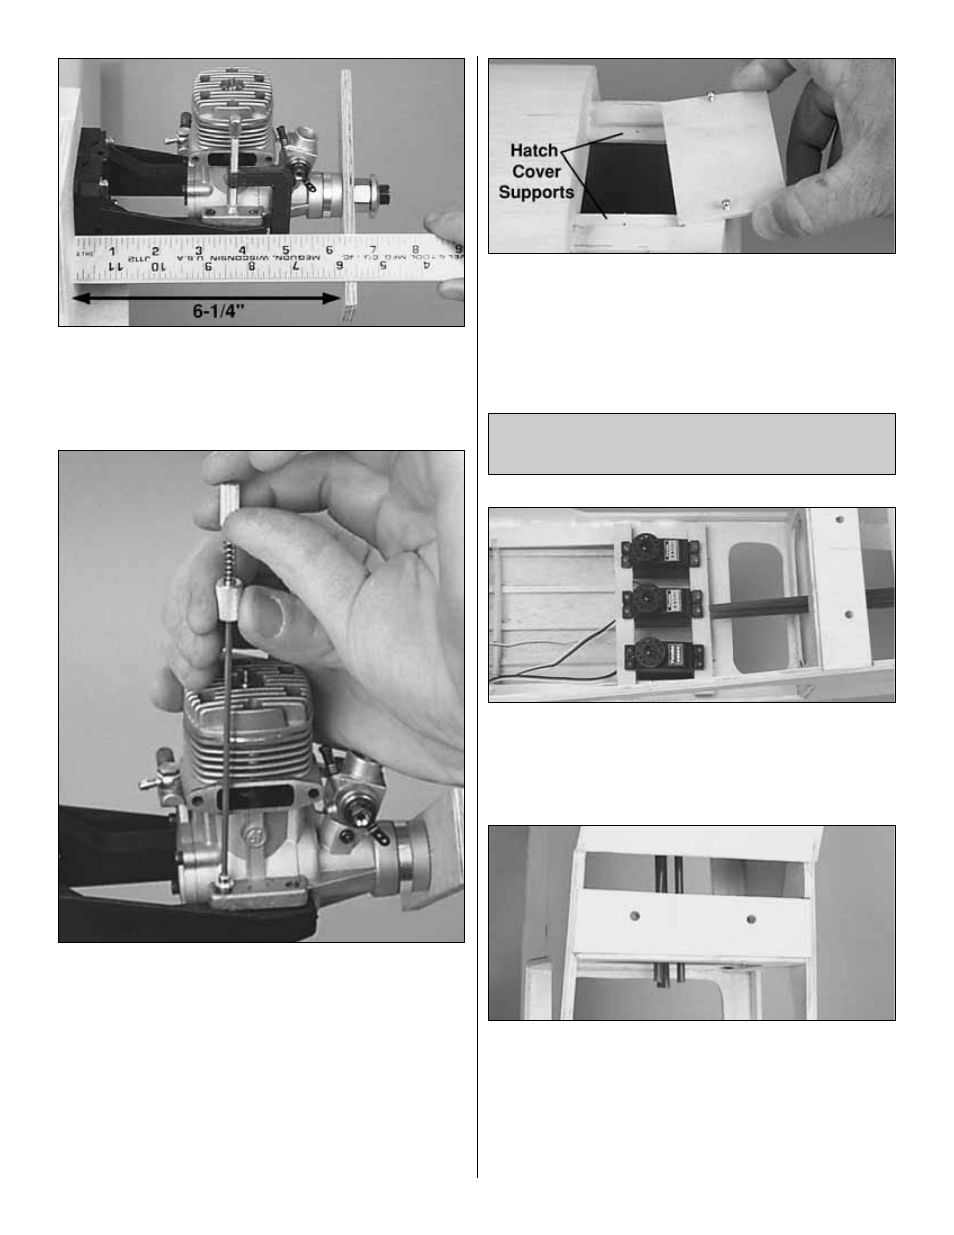
❏
4. Position the engine on the mount so the drive washer
(or the back of the spinner) is 6-1/4" away from the firewall
and clamp in place.
❏
5. Use the Great Planes Dead Center
™
Engine Mount
Hole Locator (GPMP8130) to mark the locations of the bolt
holes. Remove the engine from the mount and drill four
9/64" holes. Tap the engine mount with an 8-32 tap for the
#8 x 3/4" socket head engine mounting bolts.
❏
6. Glue the die-cut 1/8" ply tank floor (part #13) in
place. Note: If you are using a pumped engine you can
mount the fuel tank floor to part #26 and support it on both
ends with leftover ply.
❏
7. Glue the die-cut 1/8" ply hatch cover supports to the
underside of the forward fuse top as shown on the plan.
Test fit the hatch cover and make adjustments if needed.
With the hatch cover in position, drill a 1/16" hole through
the hatch cover and supports where indicated on the plan.
Then, remove the hatch cover and drill 3/32" holes in the
hatch cover only.
❏
1. Glue the 3/8" x 1/2" x 5" basswood rear servo rail in
place with medium CA, aligning it with part #27.
❏
2. Use your servos to locate the 3/8" x 1/2" x 5" basswood
forward servo rail and glue in place.
❏
3. Cut the pushrod tubes roughly 1/2" in front of former
8 as shown in the photo. Save one of these cut off pieces
for the throttle pushrod.
❏
4. Use coarse sandpaper to roughen the outside of the
throttle pushrod tube so glue will stick. Use medium CA to
glue the pushrod tube into the firewall. Cut the pushrod
tube flush with the outside of the firewall.
Install the Servos & Make
the Pushrods
33