Pushrod, control horn and servo installation – Great Planes Waco YMF-5D Biplane ARF - GPMA1295 User Manual
Page 16
16
❏
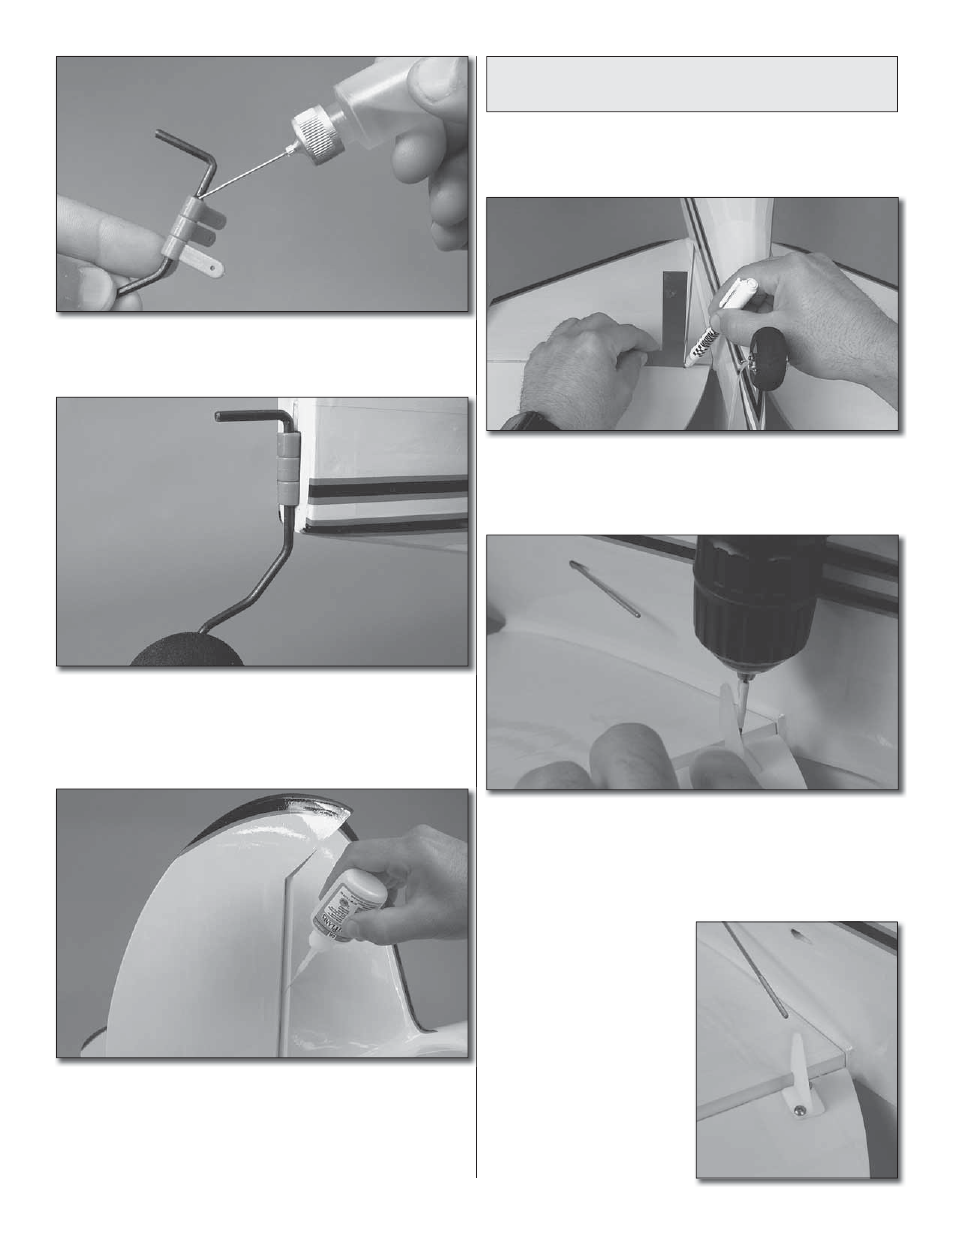
8. Remove the tailwheel assembly and add a few drops
of lightweight machine oil to each hinge bushing. Clean the
surface of the hinge straps with some alcohol.
❏
9. Apply 30-minute epoxy to the hinge straps and fit the
tailwheel to the fuselage. Wipe up any excess epoxy to keep
it from interfering with the operation of the tailwheel steering.
Apply some epoxy to the tip of the tailwheel guide wire and
into the corresponding hole in the rudder.
❏
10. Fit the rudder. Remove the T-pins and deflect the
rudder right and left several times as you push the rudder up
against the hinge line. Hold the rudder up against the hinge
line as you deflect it one direction. Wick about 5-8 drops
of thin CA into each hinge. Deflect the rudder the opposite
direction and wick CA into the other side of each hinge.
Pushrod, Control Horn and
Servo Installation
❏
1. Turn the model over. Slide two 36" [914mm] pushrods
into the left and right elevator pushrod guide tubes so that
the unthreaded end goes to the servo tray inside of the fuse.
❏
2. Using the pushrods as a guide, mark the elevators
where you will install the control horns. Use a builder’s
square or triangle to help you project the line directly down
from the pushrod or use the control horn to help you do this.
❏
3. Remove the pushrods or slide them forward out of your
way. Center a control horn over the line you drew on each
elevator so that the pushrod holes in the horn are directly
over the hinge line. Hold the horn in position and drill two 1/2"
[12.7mm] deep holes using a 1/16" [1.6mm] drill. Be careful
not to drill completely through the elevators.
❏
4. Install the control horns
using two #2 x 1/2" [12.7mm]
sheet metal screws per horn.
Harden the screw holes with
thin CA.