Great Planes Waco YMF-5D Biplane ARF - GPMA1295 User Manual
Page 14
14
❏
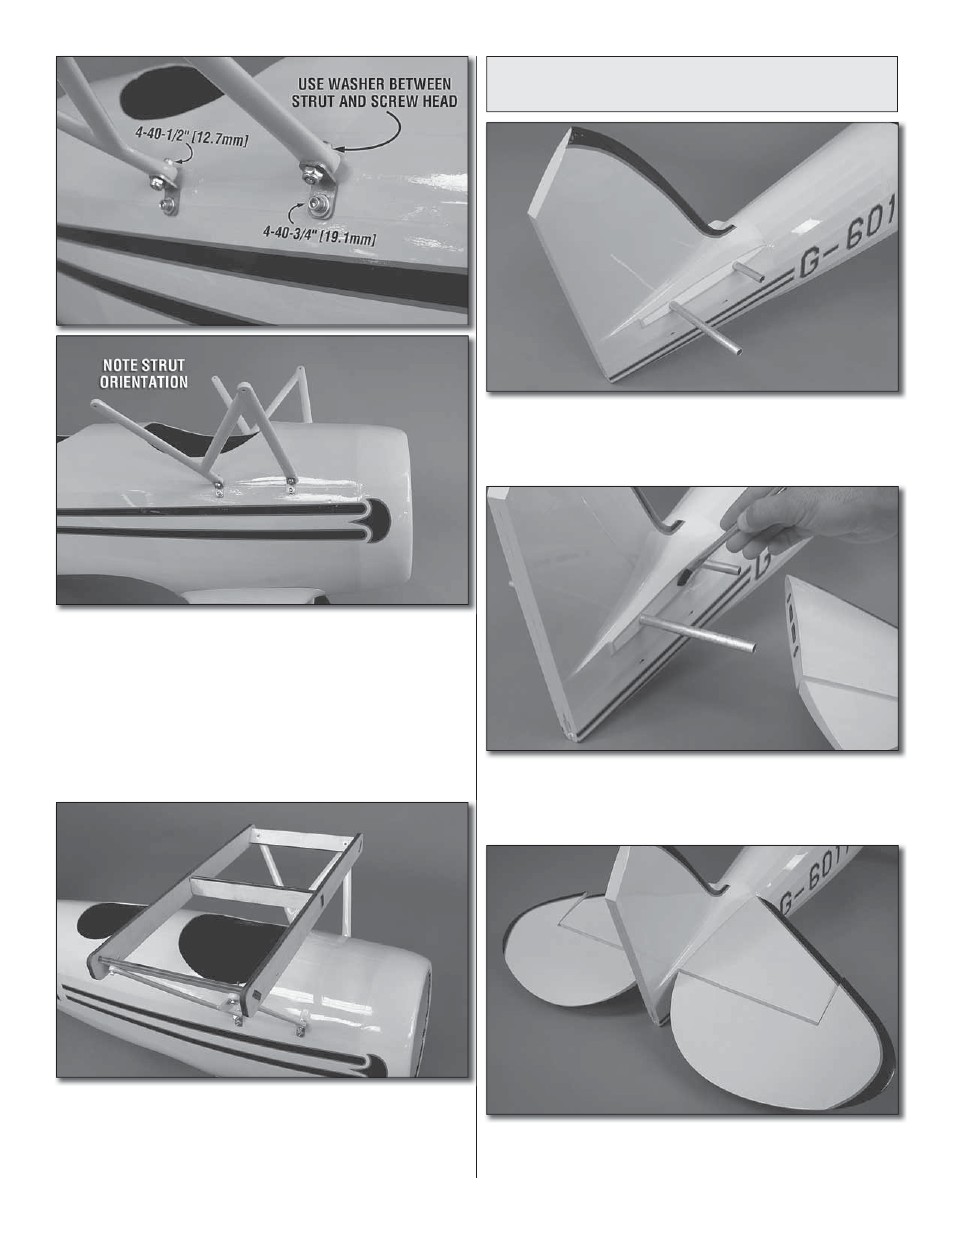
3. Identify the cabane bracket set for the fuselage. These
four brackets are bent at 115° (the second flattest bend). Bolt
these brackets to the fuselage using four 4-40 x 3/4" [19.1mm]
SHCS, four #4 lock washers, and four #4 flat washers. Use
a drop of thread locking compound on the screw threads.
Note the orientation of the cabane struts. Use four 4-40 x 1/2"
[12.7mm] SHCS, four #4 flat washers, and four #4 lock nuts to
bolt the struts to the brackets. Bolt these on so that the heads
of the screws face up with the washer under the screw head.
❏
4. Using four 4-40 x 3/4" [19.1mm] SHCS and four #4
flat washers, bolt the finished carrying handle to the cabane
struts. Leave the handle in place whenever the wings are off
of the fuselage. This will prevent accidental damage to the
cabanes and brackets.
Horizontal Stabilizer, Tailwheel
and Rudder Installation
❏
1. Once again, you’ll need to have your epoxy supplies
nearby and ready. Set the model down on its wheels. Fit the
short 165mm x 10mm aluminum tube into the L.E. hole in the
fuselage and the long 270mm x 10mm tube into the T.E. hole.
❏
2. Mix up a batch of 30-minute epoxy. Coat the stabilizer
tubes and the root rib of each stabilizer with epoxy. Note:
There is no left or right stabilizer. Any stabilizer can be placed
on any side.
❏
3. Fit the stabilizers to the fuselage. Hold the stabs tight
up against the fuse with masking tape. Clean up any excess
epoxy with denatured alcohol and paper towels.