Assembly instructions test-mount the motor – Great Planes Rifle 1M EP Sport ARF - GPMA1806 User Manual
Page 5
5
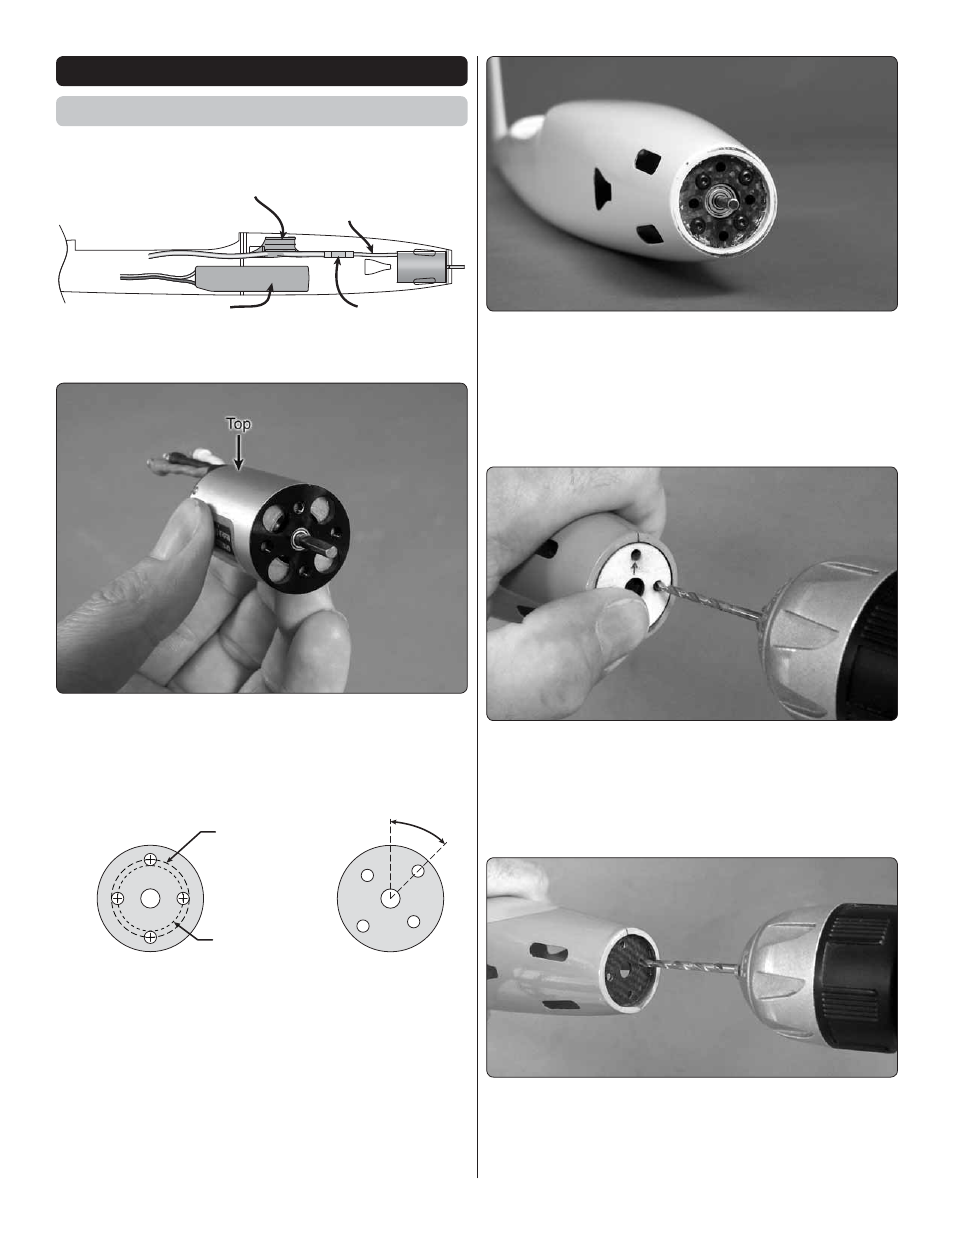
ASSEMBLY INSTRUCTIONS
Test-Mount the Motor
ESC
Bullet
connectors
Battery
Motor
wires
❏
1. Determine how to orient the mounting holes in your
motor so the wires will be positioned as preferred—usually
it’s best to have the wires coming out the top positioning the
ESC over the battery.
19mm dia.
16mm dia.
45°
Plywood motor mount template
(for Ammo and other motors with
standard 16mm/19mm spacing)
Rotate 45° for
Neu motors
❏
2. If using the recommended Ammo motor (or any other
motor with the same, standard “16mm/19mm” screw hole
spacing), position the included plywood motor mount
template on the motor mount in the fuselage to get the
mounting holes oriented as described in the previous step.
NOTE: If contemplating switching to a different motor in the
future, don’t be too concerned about the possibility of new
motor mounting screw holes that may overlap or interfere with
the old holes. Most of the mounting patterns are standard.
We’ve mounted both Ammo motors and other motors to a
couple of different Rifl es, and although four more holes were
required, this didn’t present any problems.
❏
3. Using the plywood template as a guide, drill #40 – #37
(.098" – .104" [2.5mm – 2.6mm]) pilot holes through the
motor mount. Note: The motor mount is made from carbon
fi ber which can be diffi cult to drill, so although the fuselage
is held horizontally in the image, it will be easier to drill the
holes if holding the fuselage vertically resting on its tail.
❏
4. If using a motor that uses 2.5mm mounting screws
skip this step. If using an Ammo motor (or any other motor
that uses 3mm mounting screws), remove the template and
enlarge the pilot holes with a #32 – #30 (.116" – .128") or
1/8" [3.2mm] drill.