Great Planes Rifle 1M EP Sport ARF - GPMA1806 User Manual
Page 11
11
❏
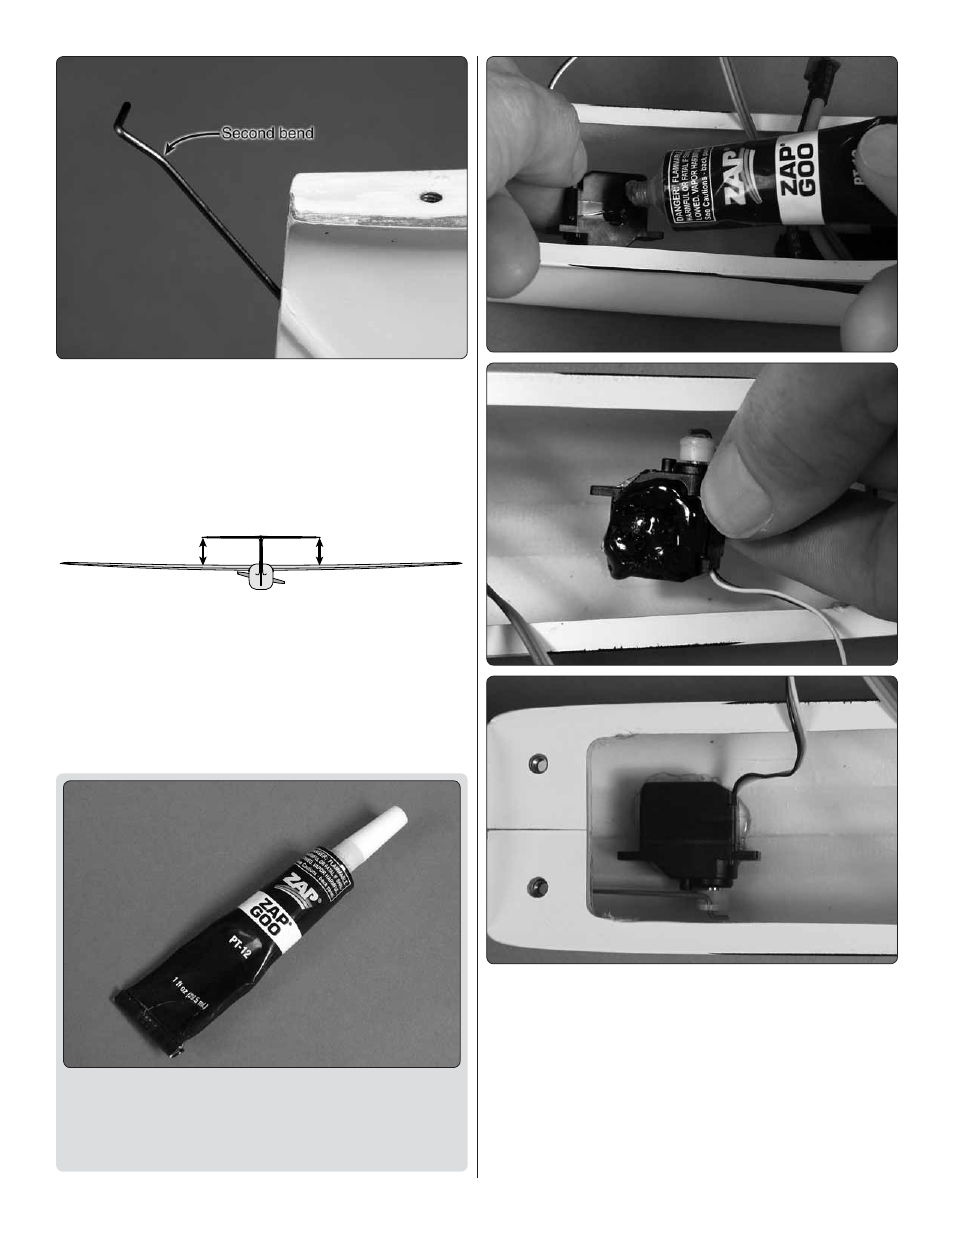
13. Remove the stabilizer and disconnect the pushrod,
make that additional bend back, remount the stab and
then test the elevator movement again. Adjust the angle of
the bend as necessary until the elevator moves smoothly
around center. Note: If, for some reason, you ever need to
make a new elevator pushrod, one can be made from K&S
.047" [1.2mm] music wire.
❏
14. Mount the wing to the fuselage and check the
alignment of the horizontal stab. If necessary, remove the
stab and sand the “high side” of the stab saddle to get the
stab aligned with the wing.
❏
15. Once you have the elevator working the way you want
it, wet the threads of the stab screws with threadlocker and
remount.
Zap
Goo
(PAAR3200) is recommended for gluing in the
servos. “Goo” adheres extremely well, yet is just fl exible
enough so that if ever necessary, the servos can be extracted.
Any residual Goo can be peeled off the servos and the plane,
making it easier to remount new servos again.
❏
16. Clean the servo mounting surface and the bottom of
the fuselage with a cloth dampened with denatured alcohol.
Turn on your transmitter and power up the servo by connecting
a battery. With the radio on and the servo centered, use Zap
Goo
to securely glue the servo to the bottom of the fuselage,
positioned so the elevator will be centered. Clamping or
sustained pressure is not necessary—just push down on the
servo, make sure some of the glue squeezes out, double-
check that the elevator has remained centered, and then
disconnect the battery. Turn off the transmitter and allow the
glue to dry overnight.