Great Planes Goldberg Super Chipmunk EP ARF - GPMA1928 User Manual
Page 7
7
Now you can mount the wheel pants…
5. Use a hobby knife to chamfer the top of the hole on the
inside of both wheel pants so it will fi t all the way to the wire
gear leg.
6. Mount the pants and wheels to the landing gears with
a humped mounting strap and two 2 x 4mm Phillips wood
screws in the predrilled holes. Same as has been done all
along, remove the screws, add a drop of thin CA to the screw
holes, allow to harden, and then remount the pants.
ASSEMBLE THE FUSELAGE
GLUE IN THE HORIZONTAL STABILIZER (STAB)
Disregard the elevator and stab in the fi rst two pictures. They
are not actually installed until step 16.
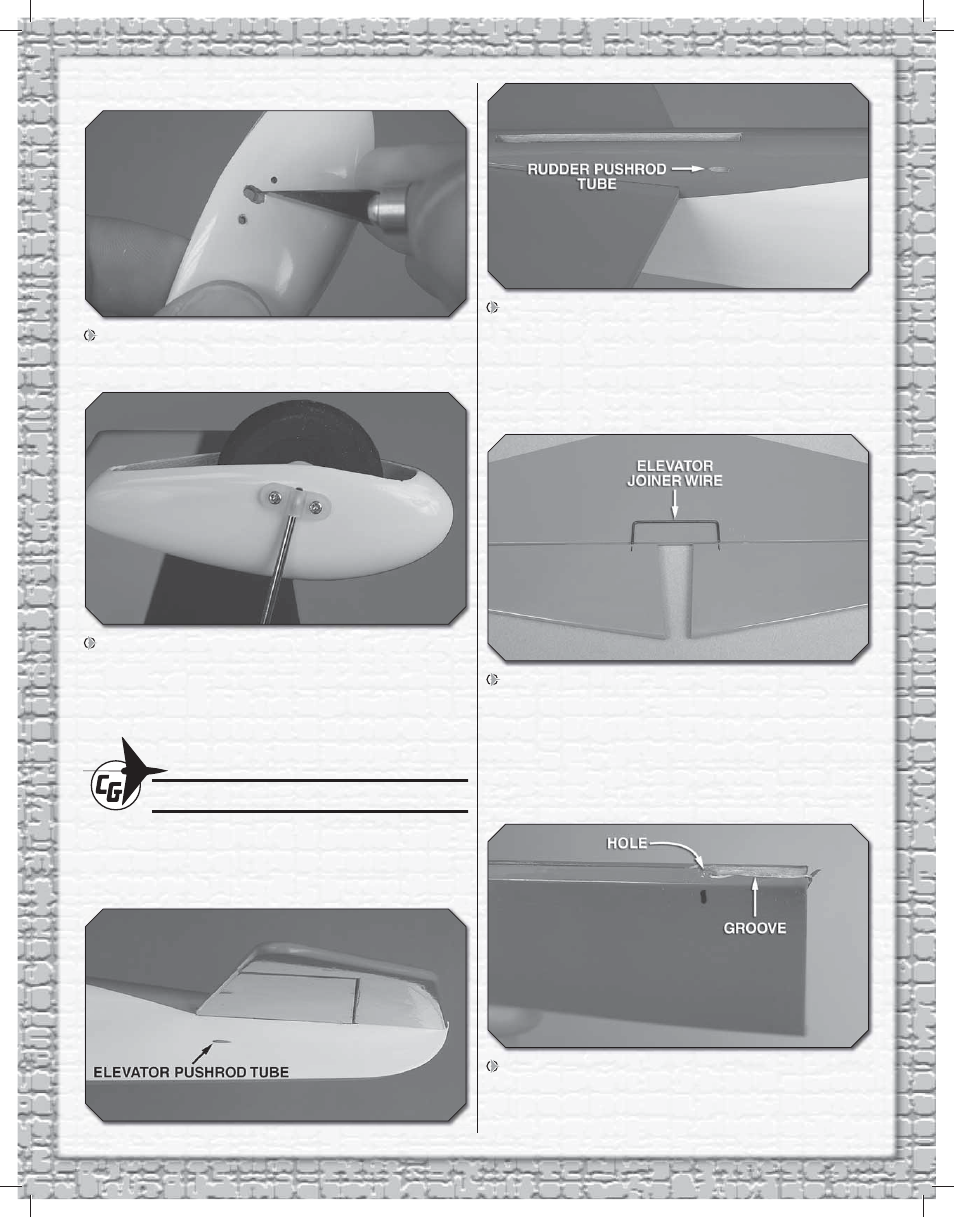
1. Use a hobby knife with a sharp blade to cut the covering
from the fuselage over the exit slot for the elevator pushrod
guide tube (located just under the leading edge of the slot
for the horizontal stabilizer) and from the exit slot for the
rudder pushrod guide tube (located just behind and below
the slot for the vertical stabilizer). The stab is shown already
in position, but yours should not yet be in place.
2. Temporarily join the elevators to the horizontal
stabilizer (stab) with two hinges in each side—at this time,
the centering pins aren’t required—they will be used when
permanently installing the hinges later. Make certain there
is a small gap between the ends of the elevators and the
balance tabs on the elevators. Center the elevator joiner
wire on the stab as shown on the previous page. Mark both
elevators at the ends of the wire.
3. Drill a 1/16" [1.6mm] hole into the leading edge of both
elevators at the marks. Use a hobby knife or a 1/16" [1.6mm]
drill to cut grooves in the leading edge of the elevators to
accommodate the joiner wire.