Great Planes Goldberg Super Chipmunk EP ARF - GPMA1928 User Manual
Page 5
5
7. Mount your other aileron servo in the other wing the
same way.
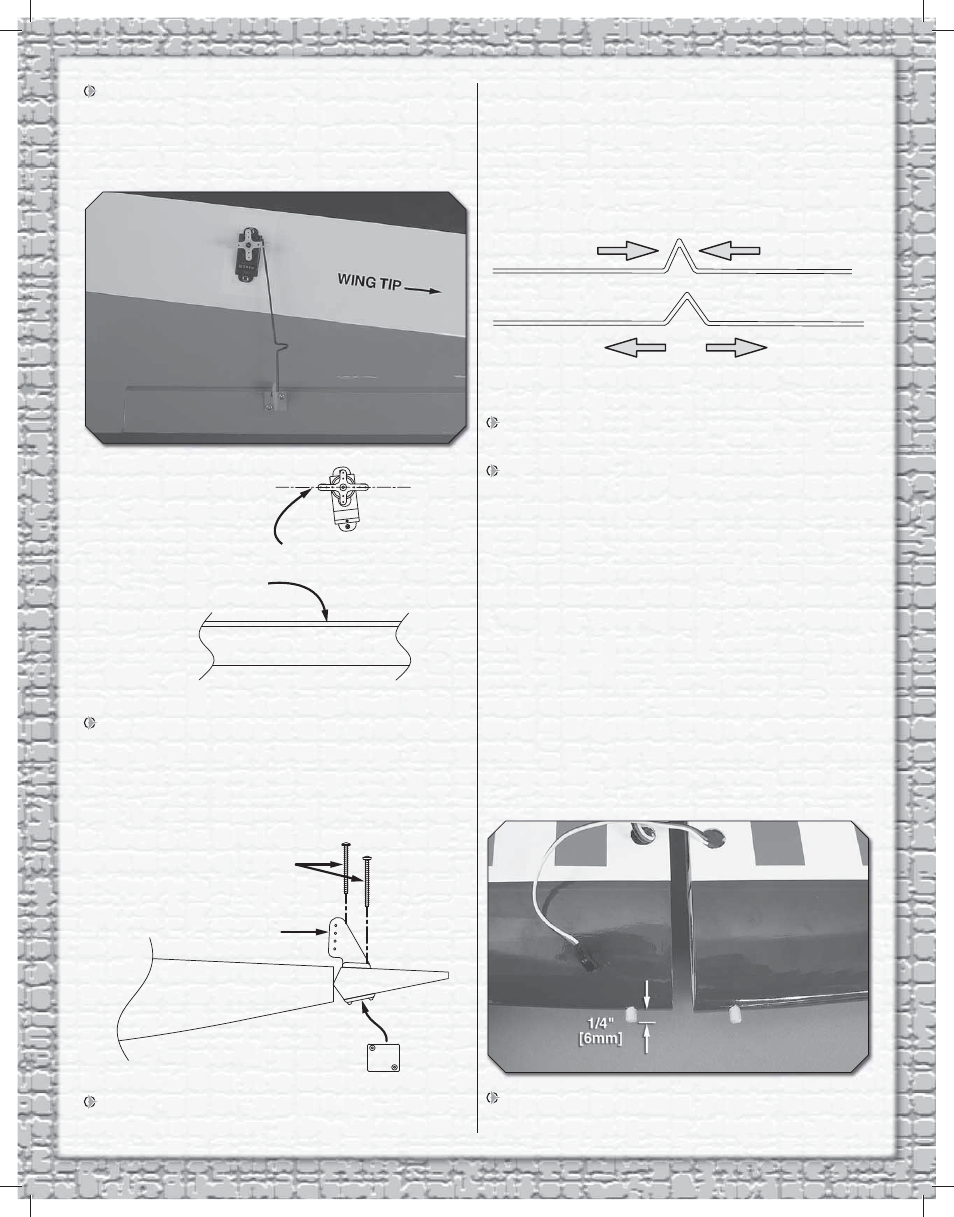
HOOK UP THE AILERONS
Refer to this photo while hooking up the ailerons.
WING TRAILING EDGE
PARALLEL WITH WING
TRAILING EDGE
1. Connect one of the aileron servos in the wing to your
receiver. Turn on the transmitter and hook up a charged
battery and the ESC so you can operate the servo with
the transmitter. With the trims on the transmitter centered,
mount the arm to the servo so it will be parallel (or as close
to parallel as you can reasonably get) with the trailing edge.
HORN MOUNTING PLATE
CONTROL HORN
2x10mm MACHINE THREAD
PHILLIPS SCREWS
2. Enlarge the holes in one of the control horns included
with this kit with a #57 (.043” [1mm]) drill or a hobby knife so
the aileron pushrod wire will fi t. Drill 5/64” [2mm] (or 3/32”
[2.4mm]) holes through the aileron for the horn mounting
screws and hook up the aileron as shown—note in the photo
that the horn is located on the aileron so the pushrod will be
perpendicular to the wing trailing edge and the servo arm.
ADJUST THE “V” BEND
3. Use pliers to adjust the V-bend in the wire so the aileron
will be centered.
4. Hook up the other aileron the same way. Note that the
aileron pushrods are connected to the servo arms nearest
the wing tips. This will allow the ailerons to move in opposition
(as they should).
JOIN THE WINGS
1. Use epoxy to glue the wing dowels into each wing with
1/4" [6mm] protruding.