Tighten the covering, Install the aileron servos – Great Planes Escapade MX GP/EP ARF - GPMA1202 User Manual
Page 6
6
TIGHTEN THE COVERING
Refer to the separate instruction sheet titled How To Tighten
Covering On ARF Models. Follow the instructions to tighten
the covering. If you prefer to get started on assembly right
away, the tightening process could be done later (but it is
usually easiest to do while the model is still in separate pieces).
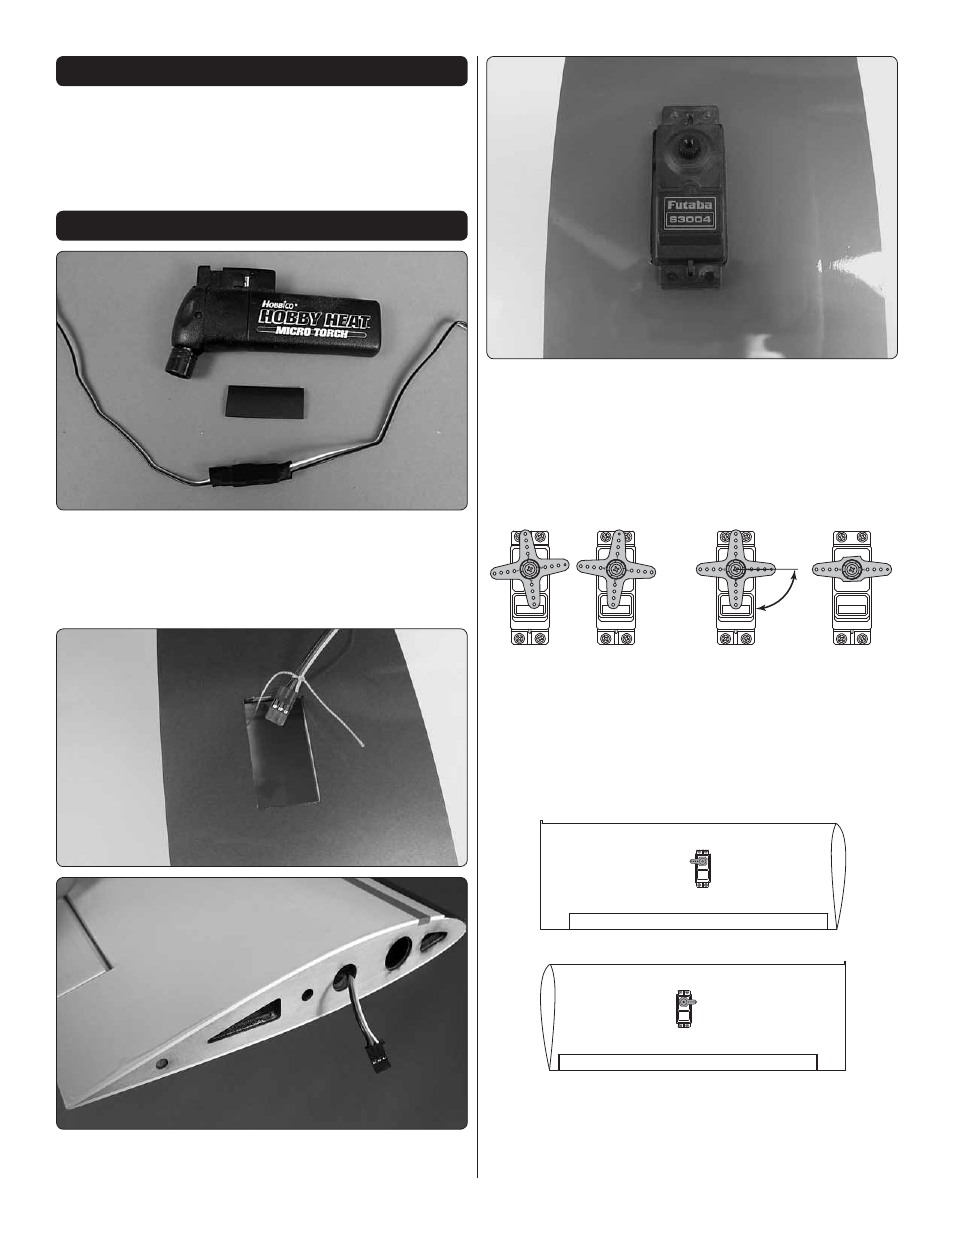
INSTALL THE AILERON SERVOS
❏
❏
1. Connect a 6" [152 mm] servo extension to the aileron
servo and secure the connection with a 1-1/2" [40mm] piece
of heat shrink tubing included with this kit—shrink the tubing
with a heat gun, match or a hobby torch—use care not to
scorch the wires!
❏
❏
2. Use the string in the wing to pull the servo extension
out the end and place the aileron servo in the wing.
❏
❏
3. Temporarily mount the servo with the screws that came
with it. Drill 1/16" [1.6mm] holes for the servo mounting screws.
Remove the screws and take out the servo. Add a few drops of
thin CA to each screw hole. Wait a minute for the CA to harden
and remount the servo. Don’t over tighten the servo mounting
screws—just make sure the heads of the screws apply a little
pressure to the grommets and that the servo is secure.
NO
NO
Cut off the
unused arms.
90°
YES
❏
❏
4. Temporarily connect the servo to the receiver with
the battery and switch. Turn on the transmitter and receiver
and center all the trims on the transmitter. With the radio on,
fi t the servo arm onto the splined output shaft so it will be 90°
as shown in the sketch.
Left Wing
Right Wing
❏
❏
5. Note the position of the servo arms in the sketch. Cut
off the unused arm(s) from each aileron servo arm.