Great Planes ElectroStik EP RxR - GPMA7500 User Manual
Page 8
8
❏
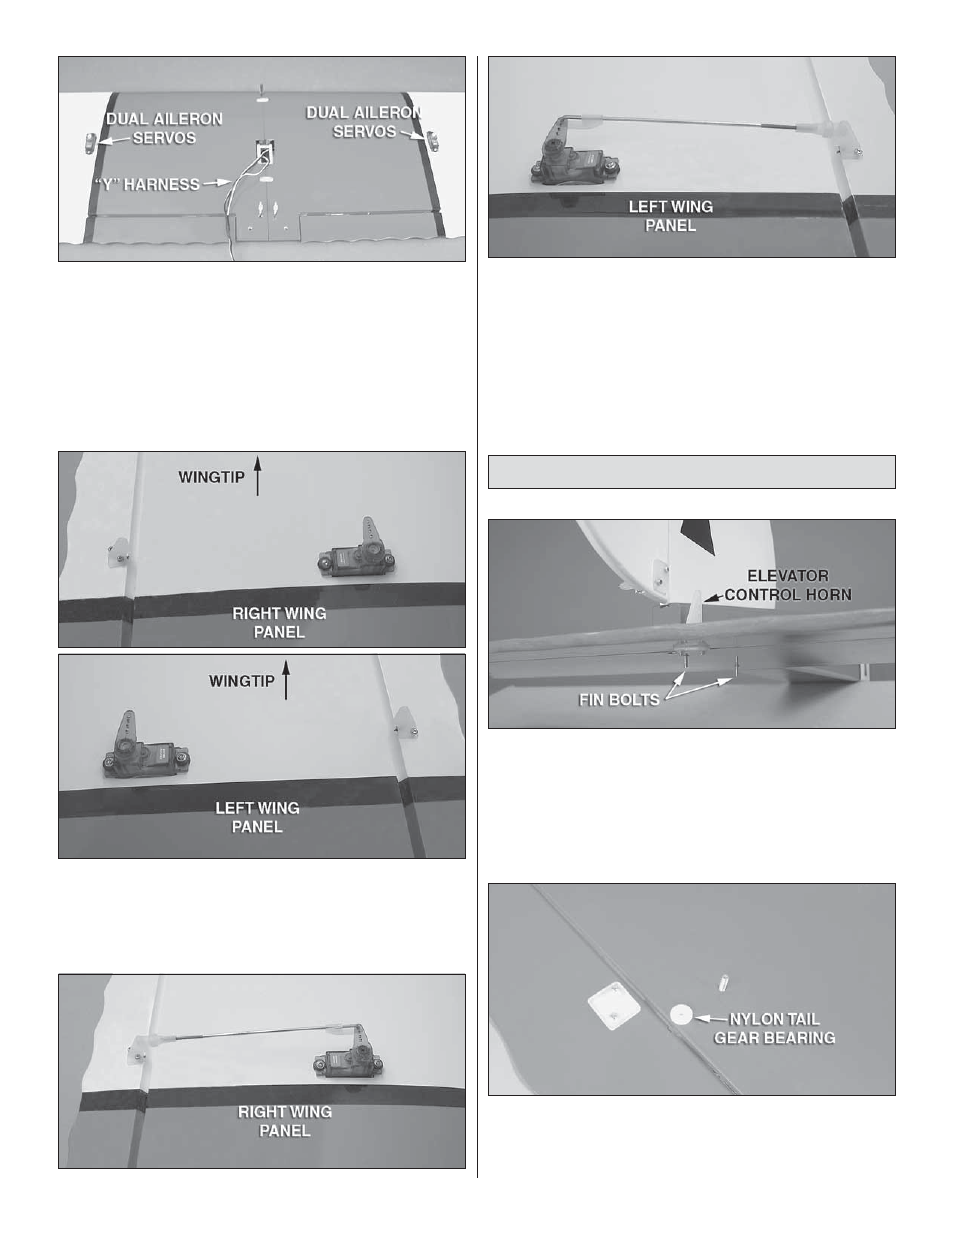
5. Connect both servos to the “Y” harness. Make sure
the “Y” harness exits through the hole in the center of the
wing. Use the strings pre-installed inside the wings to pull
the servo leads. Install the aileron servos into the trays. Make
sure to secure the servo lead/”Y” harness connection with
electrical tape or heat shrink tubing. Re-join the wing.
❏
6. Install the aileron control horns (not included) into the
hardwood blocks on the ailerons as shown above. Make
sure you use thin CA to reinforce the holes in the ailerons.
❏
7. Cut the servo arms as shown above. Use a 6" [152mm]
pushrod, a clevis, clevis retainer and FasLink to make each
aileron pushrod.
❏
8. Set-up your new dual servos on your radio to have the
same aileron throw as the original airplane. Center the servo
arms and install the servo arm screws.
Your dual aileron servo installation is now fi nished.
Assemble the Fuselage
❏
1. Insert the vertical fi n/rudder assembly into the slot
so that the two fi n bolts protrude through the bottom of the
fuselage and through the horizontal stabilizer/elevator
assembly as shown. During installation, make sure that the
elevator control horn is toward the top of the airplane.
Note: The fuselage is inverted for the following steps.
❏
2. Apply CA or epoxy to the outside of the nylon tail gear
bearing and insert it into the hole at the rear of the fuselage
by gently tapping it into place until fully seated. Be sure not
to get glue into the hole in the bushing.
8