Great Planes ElectroStik EP RxR - GPMA7500 User Manual
Page 7
7
PREPARATIONS
Use a covering iron with a covering sock on medium/high heat
to tighten any loose covering if necessary. Apply pressure over
sheeted areas to thoroughly bond the covering to the wood.
ASSEMBLY
Assemble the Wing
❏
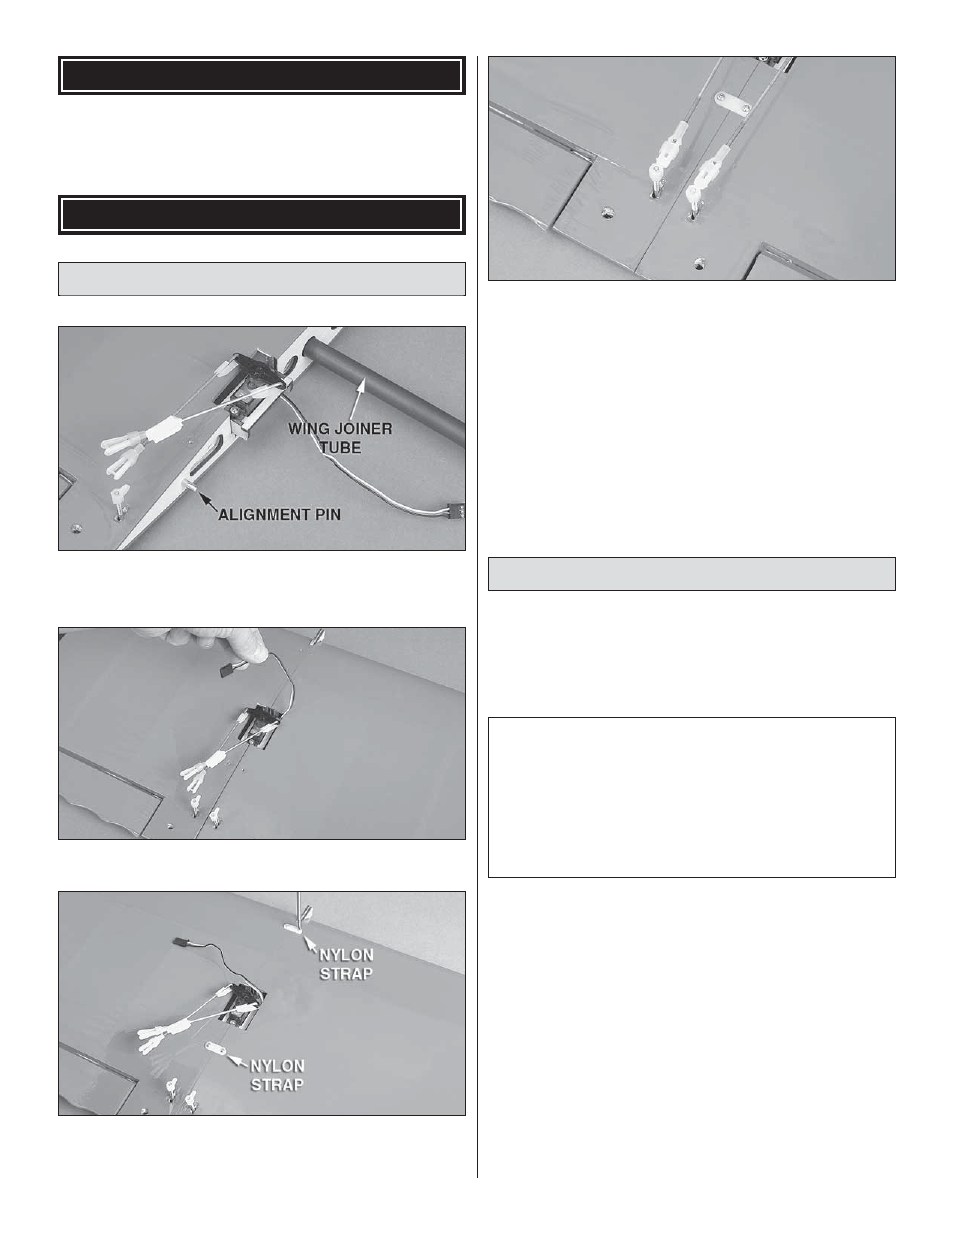
1. Install the 20-7/8" [530mm] carbon fi ber wing joiner
tube and the 1" [25.4mm] steel alignment pin into the right
wing panel as shown.
❏
2. Carefully slide the left wing panel in place as shown,
making sure that the servo lead does not get pinched.
❏
3. Fasten the wing halves together using the two included
nylon straps and four #2 x 3/8" [9.5mm] self-tapping screws
as shown.
❏
4. Use your radio system to center the servo. Position the
ailerons in the neutral position with tape or small clamps
and connect the clevises to the aileron torque rod horns.
Make any necessary adjustments by threading the clevises
up or down the pushrod. When satisfi ed, slide the silicone
clevis retainers to the ends of the clevises.
Wing assembly is complete.
Optional - Dual Aileron Servos
The Great Planes ElectroStik EP RXR comes equipped with
dual aileron servo trays for dual aileron servos. To install
the dual aileron servos, follow these instructions:
For this section you will need:
1
Additional Servo (same
type as your existing
aileron servo.)
1 “Y”
harness
2 6" [152mm] Pushrods
2 Nylon
Clevises
2 Silicone Clevis Retainers
2 FasLinks
1 Servo
Mounting
Hardware
Set
1 Screwdriver
1 Wire
Cutter
1 Pliers
1 Thin
CA
1 Trim Sealing Iron
❏
1. Disconnect the aileron servo pushrods from the aileron
horns and remove the original aileron servo.
❏
2. Remove the two nylon straps and separate the
wing panels.
❏
3. Locate the dual aileron servo tray in each wing panel.
They are located on the underside of the wing at the 4th bay
in from the wing tip. Trim the covering over the opening and
use a sealing iron to seal the covering to the tray.
❏
4. Use a 1.5mm [1/16"] drill bit and drill mounting holes for
the servos. Insert and then remove a servo mounting screw
into each hole and put a drop of thin CA into each hole to
harden the threads.
7