Great Planes Cherokee GP/EP ARF - GPMA1033 User Manual
Page 9
❏ ❏
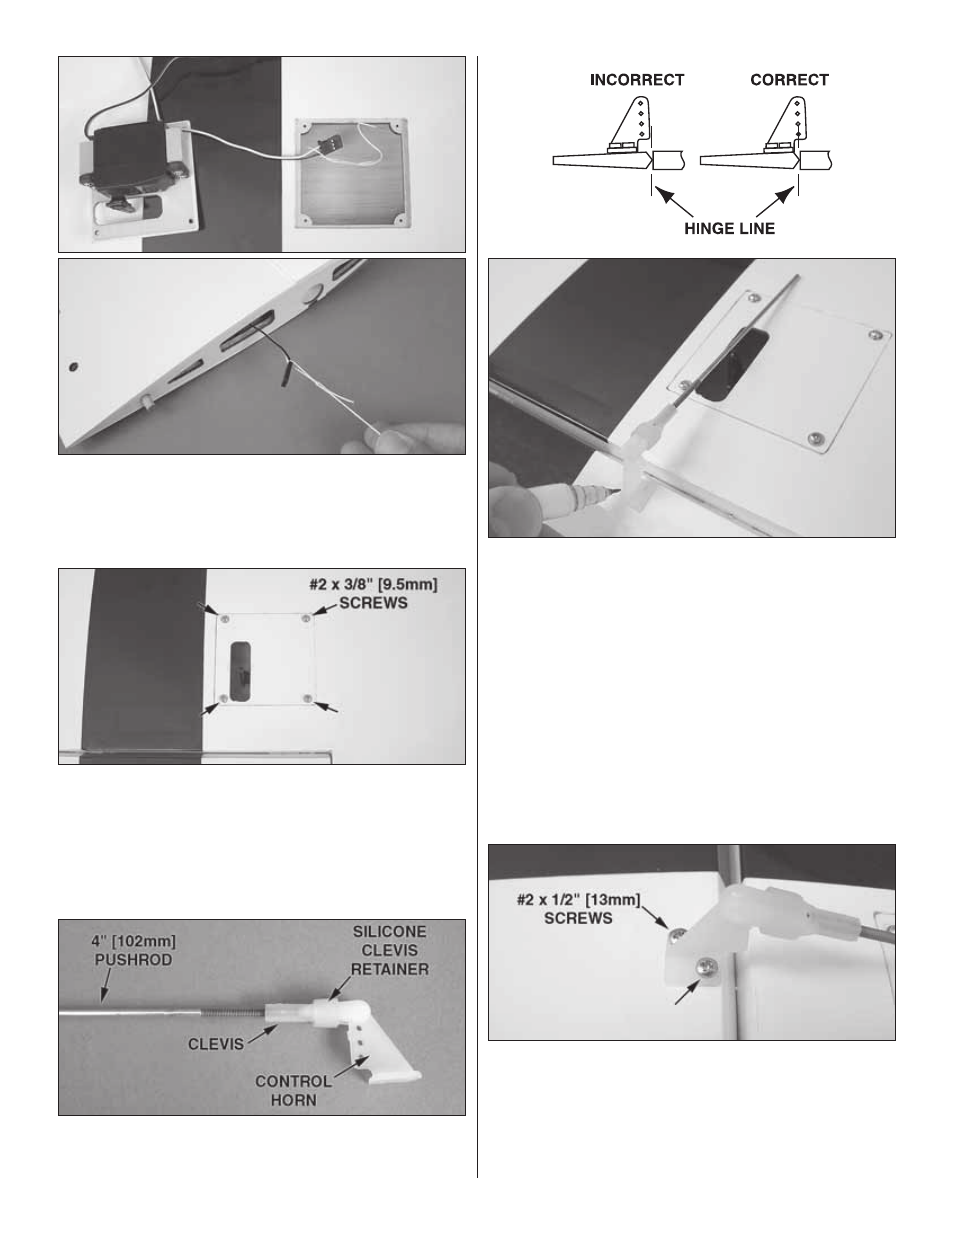
5. Use the string taped inside the aileron servo bay to
pull the servo lead through the wing ribs.
❏ ❏
6. Thread a #2 x 3/8" [9.5mm] self-tapping screw into
each servo hatch mounting hole in the wing panel and back it
out. Apply a drop of thin CA to each hole to harden the wood.
Install the aileron hatch cover to the wing panel using four
#2 x 3/8" [9.5mm] self-tapping screws and four #2 fl at washers.
❏ ❏
7. Thread a nylon clevis 20 complete turns onto a
4" [102mm] pushrod. Slide a silicone clevis retainer onto the
clevis and connect the clevis to the outer hole of a control horn.
❏ ❏
8. Position the control horn over the plywood plate in the
aileron (if you cannot see it, hold the aileron at a shallow angle
in good lighting or use a small pin to puncture the covering),
using the position of the servo arm as a guide. Align the holes
in the control horns directly over the aileron hinge line and
mark the location of the control horn mounting holes.
❏ ❏
9. Drill 1/16" [1.6mm] holes at the marks you made
through the plywood plate. Do not drill all the way through
the aileron! Thread a #2 x 1/2" [13mm] self-tapping screw
through each hole and back it out. Apply a couple drops of
thin CA glue to each hole to harden the wood. When the glue
has dried, install the control horn onto the aileron using two
#2 x 1/2" [13mm] self-tapping screws.
9