Great Planes Avistar Elite .46 ARF - GPMA1005 User Manual
Page 10
10
❏
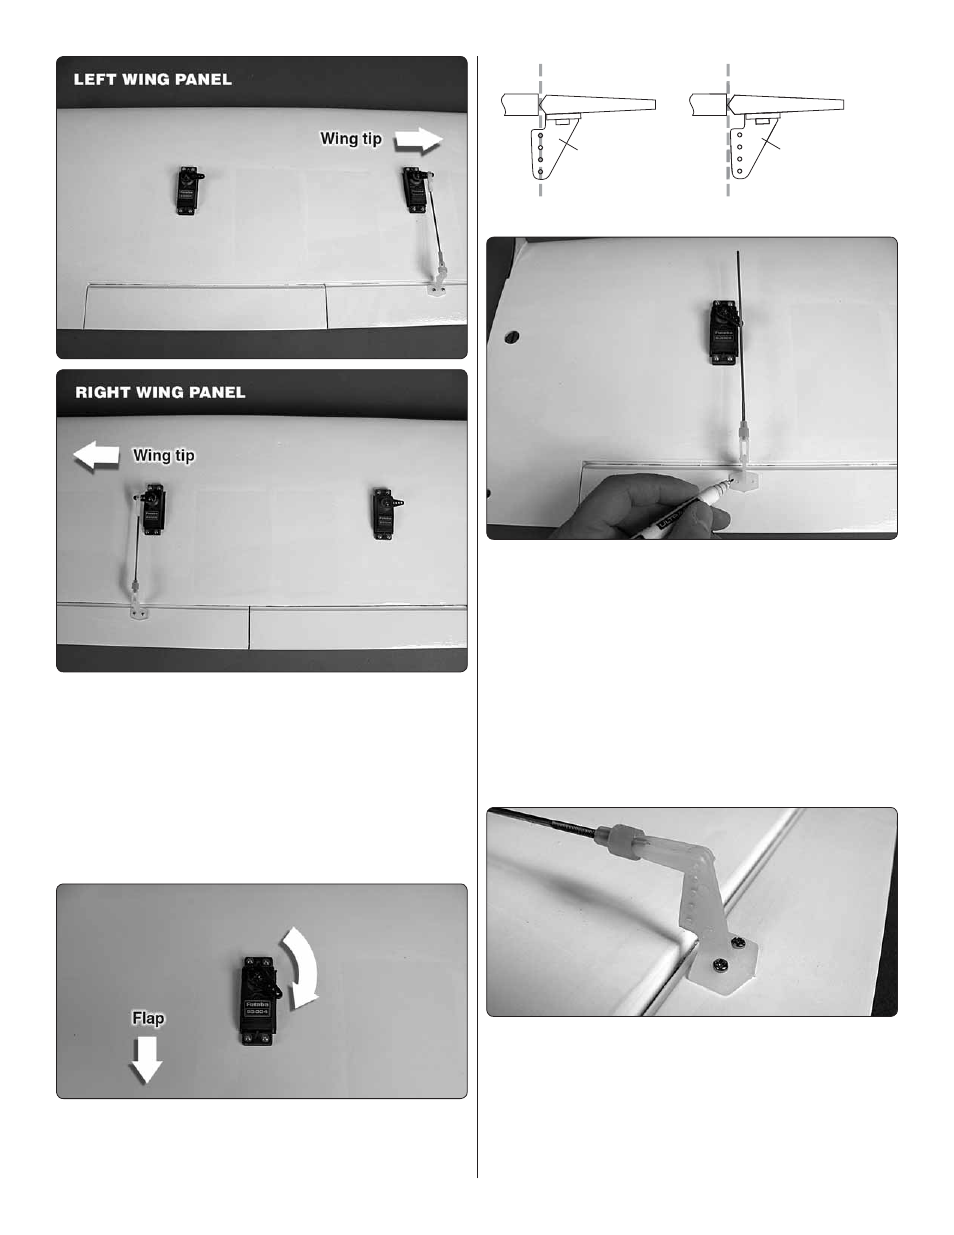
3. Install the rubber grommets and eyelets on the servos.
Route the servo leads through the wing ribs and out the root
ribs (the distance through the wing for the fl ap servo leads is
shorter than the ailerons so using string to pull them through
is not necessary). Fit the servos in place and drill the servo
mounting holes using a 1/16" [1.6mm] drill bit. Apply a drop of
thin CA to each hole. Then install the servos using the screws
provided in the servo hardware bag. The servo arm of the left
fl ap servo should point to the wing tip and the servo arm of
the right fl ap servo should point to the wing root.
❏
4. Now connect each fl ap servo to the fl ap channel on
your radio and use the fl ap dial on your transmitter to rotate
the servo arms toward the fl aps as far as the radio will allow.
Hinge Line
Hinge Line
CORRECT
INCORRECT
❏
5. As you did with the aileron pushrods, install a clevis 20
complete turns onto two 6 -1/4" [159 mm] pushrods and slide a
silicone clevis retainer onto each clevis. Connect the clevises
to the outer holes of two control horns. Hardwood plates are
installed beneath the covering of the fl aps for mounting the
control horns. The edges of the plates can be seen by viewing
the wing at a shallow angle. Position the control horns over
the hardwood plates with the pushrods parallel to the servo
cases and aligned over the outer holes of the servo arms. The
holes in the control horns should be directly over the hinge
line of the fl aps. When satisfi ed with the position of the control
horns, use a felt-tip pen to mark the location of the control
horn mounting holes onto the fl aps.
❏
6. Drill 1/16" [1.6mm] holes through the hardwood plates
at the marks you made on the fl aps. Take care to only drill
through the plates. Do not drill completely through the
fl aps! The holes only need to be 3/8" [9.5mm] deep. Thread
a #2 x 3/8" [9.5mm] self-tapping screw into each hole and
back it out. Apply a drop or two of thin CA glue to each hole
and allow the glue to harden. Install the control horns onto
the fl aps using four #2 x 3/8" [9.5mm] self-tapping screws.