GME TX3440 User Manual
Page 15
t X 3 4 4 0
i n s t r u c t i o n m A n uA l
PA G E 1 5
sEtting sEEK moDE FrEQuEncy limits
When in seek mode, the default frequency band to scan is
the entire receiver tuning bandwidth of 403 mHz-50 mHz.
However, in many cases you may only be interested
in searching for signals within a small section of the
available frequency band. to make searching easier the
tX3440 allows you to set upper and lower frequency limits.
the seek function will then only search within the specified
range, thereby increasing the chance of finding an active
frequency of interest.
there are two seek limit points available, lim-1 and
lim-. While in the frequency edit mode, press and hold
the scan key until a beep is heard to store the current
frequency as a limit. to select and jump to the next limit,
press the pWr key.
to select and display a limit point
While in frequency edit mode, briefly press the pWr key.
the next frequency limit point will be selected, the display
will briefly show ‘lim-1’ or ‘lim’ and then the frequency
of the limit point will be shown. At this stage the radio is
also tuned to this frequency, and if there is activity on this
frequency, it can be heard in the speaker.
to set or edit a limit point
1. select the desired limit point to edit as described in the
previous paragraph.
. Press the or keys until the display shows the
frequency of the desired limit point.
3. Press and hold the scan key until a beep is heard.
the current frequency is now stored to the current limit
point. the display will briefly show ‘lim-1’ or ‘lim-’,
and then revert to showing the frequency again.
4. repeat steps -3 to update the current limit point with
a new frequency if desired.
to erase a limit point
1. select the desired limit point to erase as described above.
. Press the key until the frequency display reads ‘oFF’.
3. Press and hold the scan key until a low beep is heard.
the selected seek limit point is now erased.
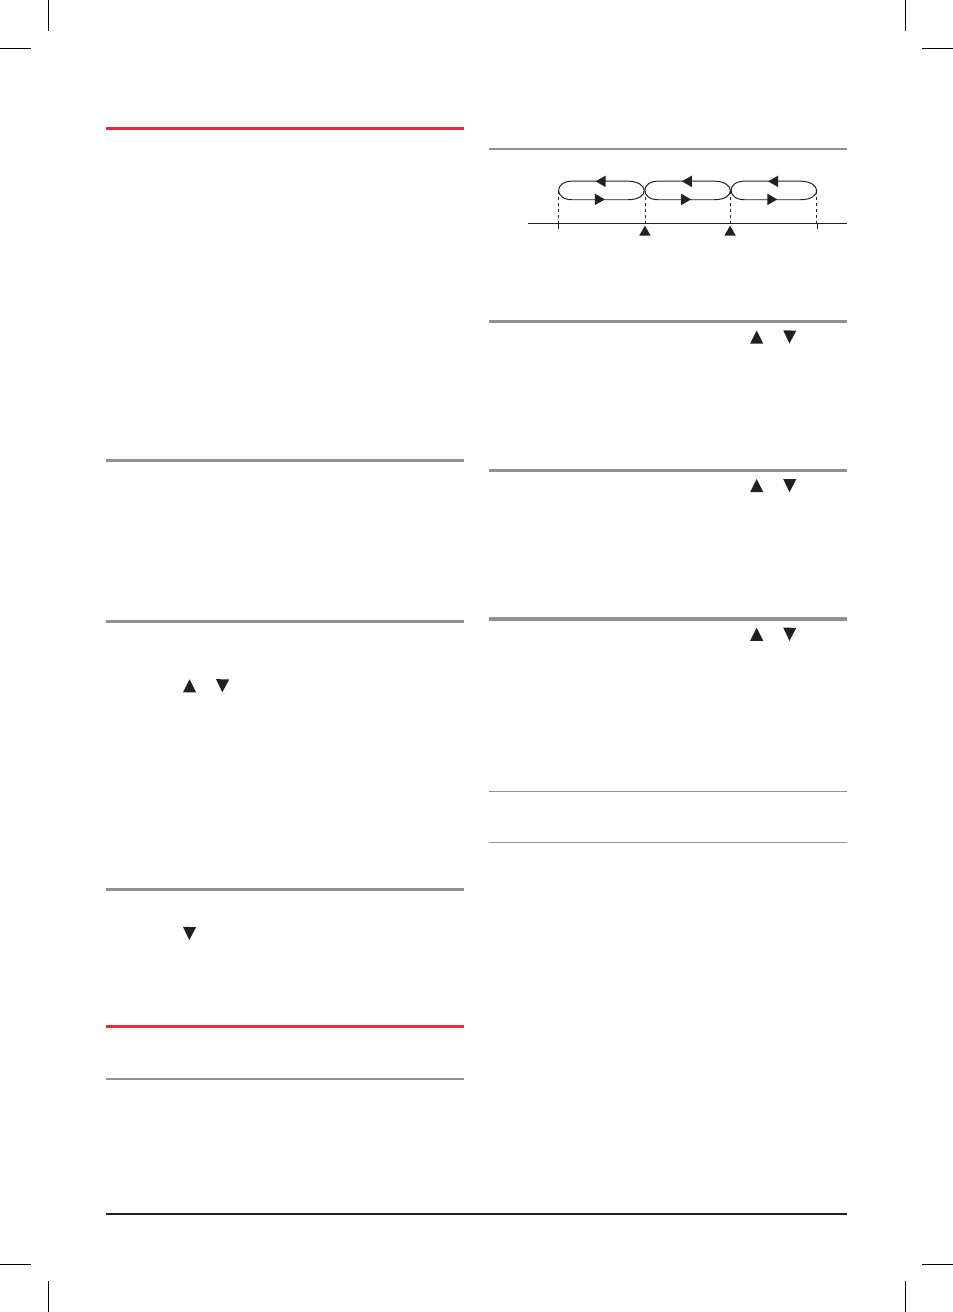
using thE FrEQuEncy limits to scan
once the seek mode frequency limits are set, the frequency
band is effectively split into three segments.
tip: it is easiest to picture the limit points as the first limit
being lower in frequency than the second, but this is not
really necessary. Even if the frequencies programmed so
that the limit points are reversed, the tX3440 will always
scan inside a selected frequency range, in the upwards
direction. the initial frequency where the seek was started
determines which frequency band will be scanned.
to start seeking between
the first and second frequency limit
1. While in Frequency Edit mode, press the or keys
to select a frequency that is between the two frequency
limit points.
. start seeking by briefly pressing the scan button.
to start seeking between
the higher frequency limit point and 520 mhz
1. While in Frequency Edit mode, press the or keys
to select a frequency that is above the frequency of the
higher limit point.
. start seeking by briefly pressing the scan button.
to start seeking between
403 mhz and the lower frequency limit point
1. While in Frequency Edit mode, press the or keys
to select a frequency that is below the frequency of the
lower frequency limit point.
. start seeking by briefly pressing the
scan button.
if the scan button is pressed while seeking, the radio will
exit seek mode immediately and stay tuned to the current
frequency.
note: at this point that the menu will time out after
0 seconds of inactivity.
if a busy frequency is found during seek mode, the radio
will pause on this frequency for 5 seconds before resuming
scan. to save this frequency to the current listening channel,
press and hold the pri key to exit seek, save the frequency
and stay in the menu or press and hold the mEnu key to
save the frequency and exit the menu.
520
MHz
Limit 1
Limit 2
403