Removing the radio fitting the microphone, Removing the microphone, Disconnecting the microphone – GME TX3420 User Manual
Page 19
t X 3 4 2 0
i n s t r u c t i o n m A n uA l
PA G E 1 9
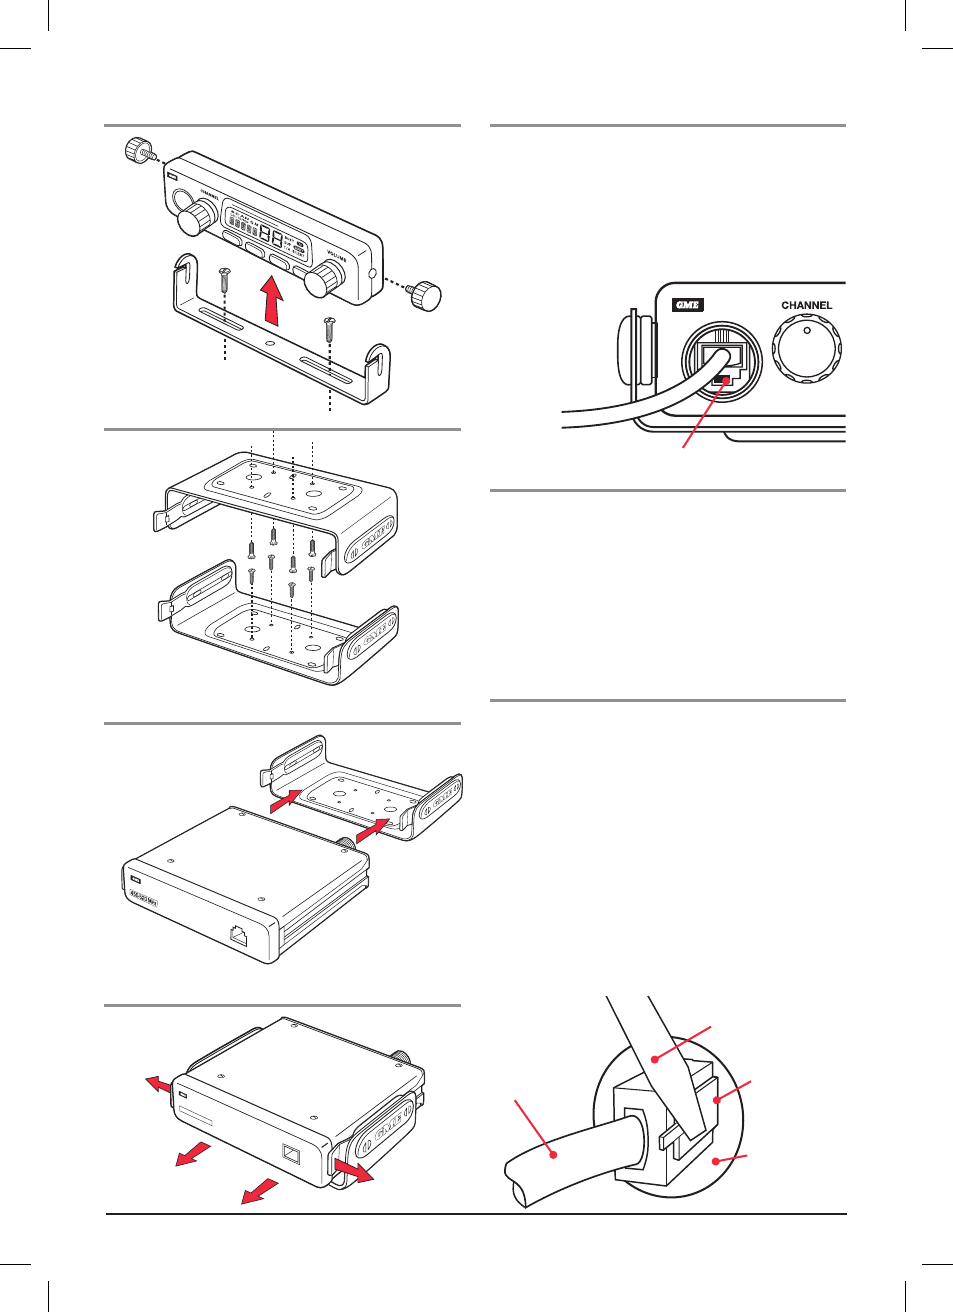
cable
screwdriver
locking lever
move to left to
release Plug
cable entry hole
SQL
Plastic tab
T X 3
4 2
0
Fitting remote head bracket
mounting the cradle
Fitting the radio
slide radio fully into cradle
until it clicks into place .
removing the radio
Fitting the microphone
the microphone uses a miniature 6 pin telephone style plug
and socket . to fit the microphone:
1 . Position the microphone plug so the plastic tab faces
downwards, and press the plug into the socket until
it ‘clicks’ .
2 . Gently press the rubber strain relief into the hole
surrounding the socket
so that the slot
around the
strain relief fits
neatly inside the
lip of the hole .
removing the microphone
1 . squeeze the rubber strain relief near the front panel to
disengage the slot, and slide the strain relief back along
the microphone cord .
2 . squeeze the plastic tab on the microphone plug
towards the plug to unlock it while gently pulling the
plug outwards . if the plug does not come out easily,
the tab has not released correctly and should be
squeezed again .
Disconnecting the microphone
it is recommended that the microphone be left permanently
connected to the tX3420, but if it must be disconnected,
proceed as follows:
1 . insert a small screwdriver between the rubber boot and
the lip of the raised area on the front panel .
2 . Ease the rubber boot out of the cable entry hole and
slide it along the cable away from the front panel .
3 . identify the plug locking lever, work the screwdriver
blade behind it and move the lever towards the plug
body . At the same time gently pull the plug from the
socket (see diagram below) .
if required, replacement microphones are available with
plug and rubber
boot already fitted .
UH
F R
AD
IO
Gently spread
tabs
slide radio from cradle
Gently
spread tabs