Dynaflite GPMA1052 Bird of Time User Manual
Page 7
❏ ❏
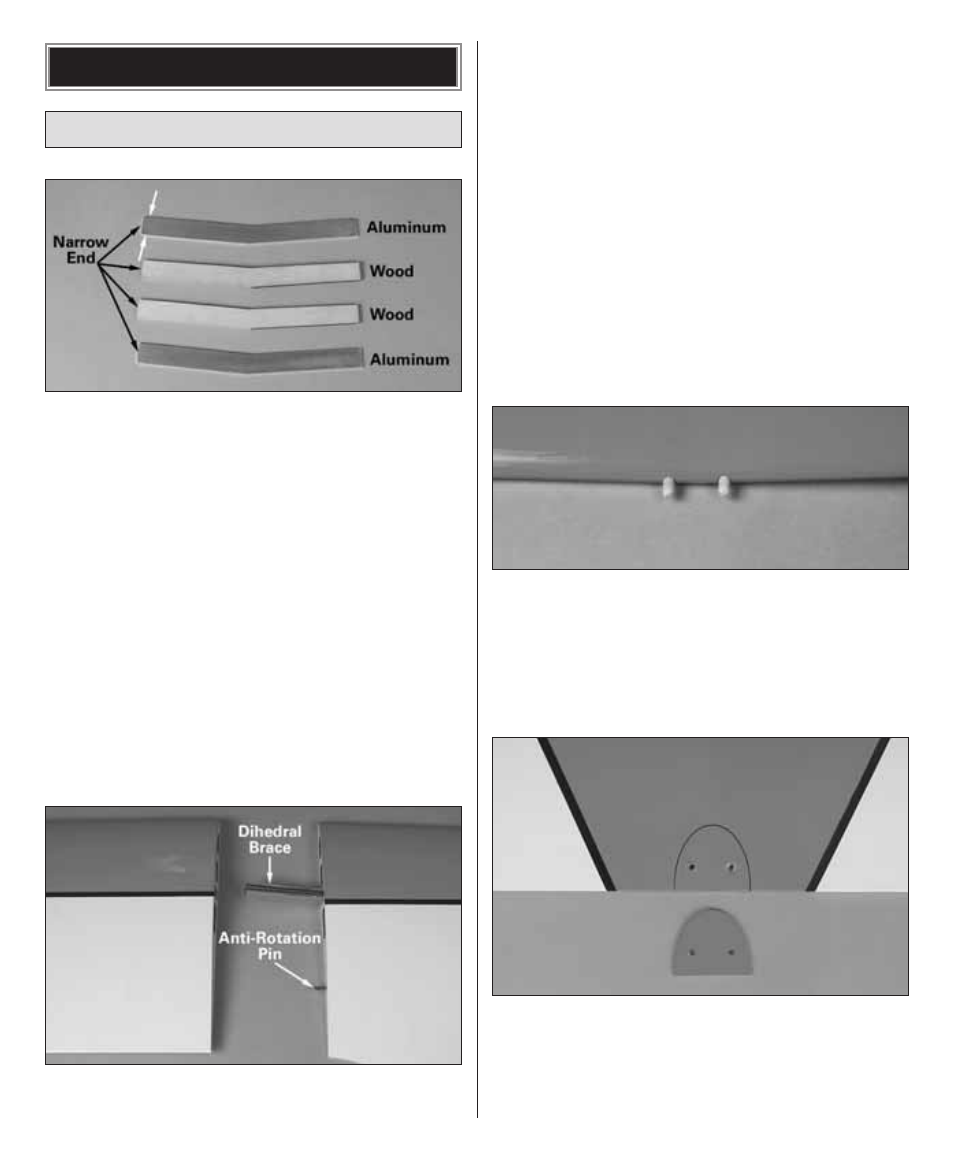
1. Locate two wood dihedral braces and
two aluminum dihedral braces. Using 6-minute
epoxy, glue the four pieces together with the
aluminum pieces on the outside. Mark the
narrow end. Important: One end of the parts is
slightly
narrower than the other. It is important
that all four narrow ends are aligned with each
other. The narrow end is inserted into the outer
wing tip panels. If you have a LARGE transport
vehicle and model storage area, you might
want to permanently glue the wing tip panels to
the center section. If not, you can assemble the
wing at the flying field by installing the tip
panels to the center section and holding them
in place with some clear tape, such as Scotch
®
Magic Tape. This will allow you to remove the
panels when you finish flying for the day.
❏ ❏
2. Trim any excess glue from the assembled
dihedral brace. Test fit the narrow end of the
dihedral brace into the right outer wing tip panel.
It should be a tight fit. Also insert one of the short
1" [25.4mm] metal anti-rotation pins into the
panel. Test fit the panel to the wing center section.
Be sure the dihedral brace and anti-rotation pin fit
properly and that the wing tip panel fits tightly to
the center section. Make any adjustments needed.
❏ ❏
3. When satisfied with the fit, remove the
wing tip panel from the center section. Glue the
dihedral brace and anti-rotation pin into the outer
wing tip panel only with 6-minute epoxy. Clean
any excess epoxy that oozes from the joint.
❏
4. Return to step 1 and complete the left
wing panel.
❏
5. Cut the covering from the holes in the
leading edge of the wing center section for the
two dowels. Round one end of each of the
dowels and glue them into the center section
with 6-minute epoxy. The rounded ends should
stick out of the wing at least 5/16" [8mm].
❏
6. Cut the covering from the holes in the top
and bottom of the trailing edge of the wing center
section for the hold down screws. Also cut the
covering from the holes in the ply reinforcement
plate. Line the holes up in the plate and TE and
Assemble the Wing
ASSEMBLY
7