Installation – Drawmer D62 Digital Module User Manual
Page 6
D62 OPERATORS’ MANUAL
2
INSTALLATION
The D62 Digital modules are only designed for operation within a Drawmer 1962
analogue unit. Under no circumstances should the units be installed into any other
manufacturers’ or custom device. Installation into the existing 1962 analogue unit is
very simple, however if you have any doubts or problems, please refer to your local
Drawmer dealer or a competent qualified electronic engineer.
Correct handling with consideration for static discharge will prevent
damage to the sensitive circuitry of the digital module. It is often the
case that static discharge does not fully destroy IC circuitry; it is
more likely that the IC circuits are taken to within 90% of their
lifetime expectancy. Failure to observe correct procedures could
void any product warranty.
To perform this installation:
<
Disconnect the mains power cable from the unit.
<
With a number 1 pozidrive screwdriver, remove the 8 screws that retain the top
cover. (ie: two on each side; two at the rear and two counter-sunk screws along
the top at the front edge).
<
Remove the blanking panel from the rear of the unit.
<
Observing static handling procedures, slide the digital module into the 1962 unit
from the rear. Use the 4 pozi-pan screws to secure the digital module firmly into
place.
<
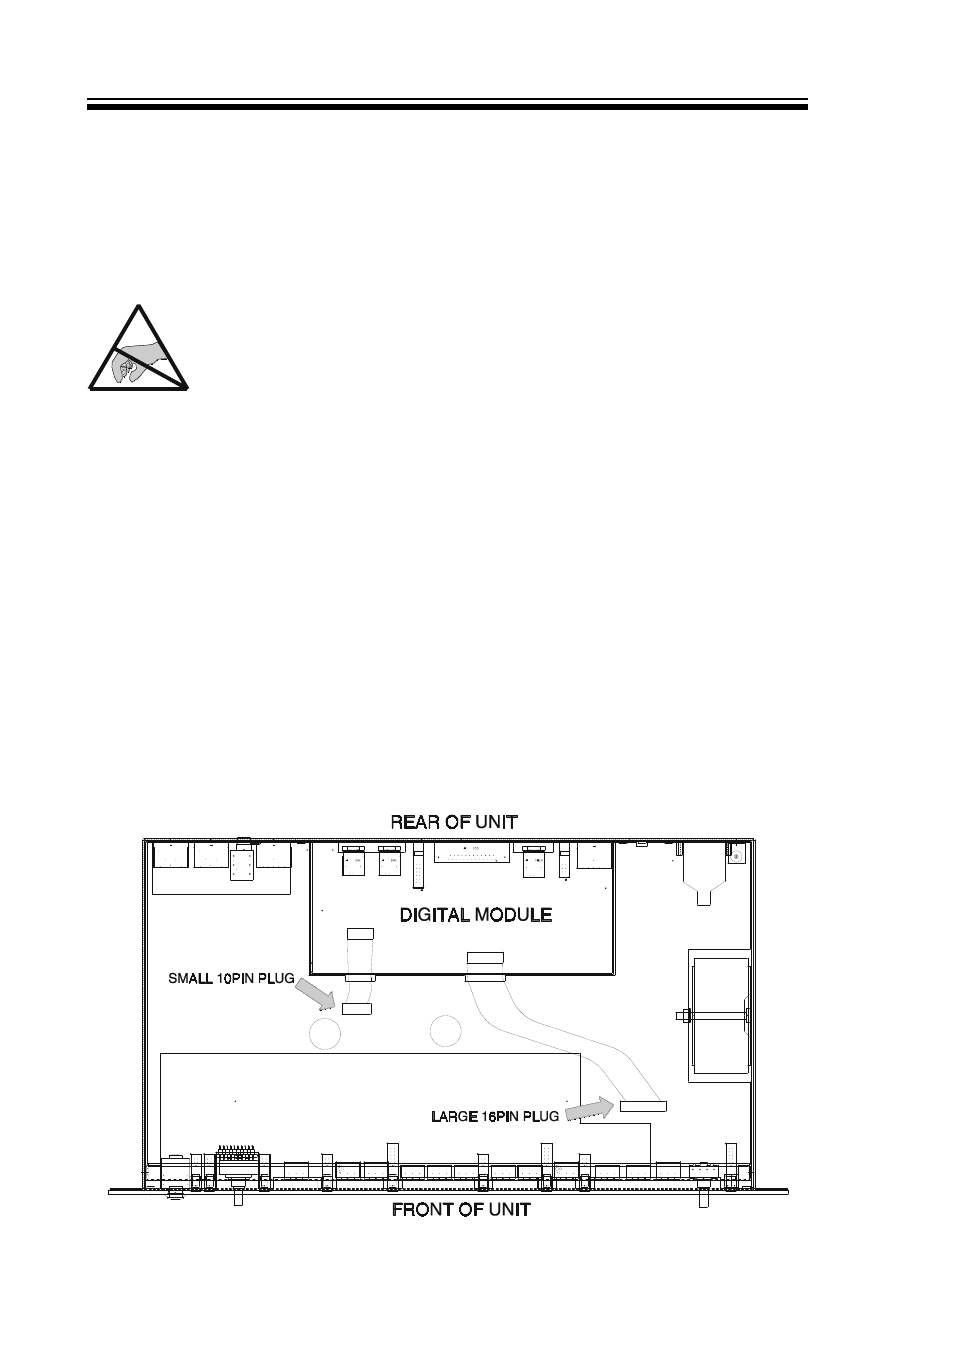
The two flying plugs cannot be confused with each other as they are of grossly
different lengths and different sizes. See the drawing below to confirm the correct
socket for each cable plug. Additionally, each plug is polarised to prevent
damage by insertion of the plugs if wrongly inverted.