Control description, Chapter 2 – Drawmer DMS-1 M-Clock Master Clock Generator and Multiple Sample Rate Converter User Manual
Page 6
6
Also if any equipment in the studio suffers jitter at its output
these sample rate converters may be used to de-jitter and
re-clock the signals before further transmission. Each
sample rate converter input is fed simultaneously to AES/
EBU, SPDIF and TOSLINK outputs solving any connectivity
problems and allowing signal distribution.
see fig.1
Certain equipment in the studio may not have word clock
inputs which has in the past caused synchronisation
problems, using the four channels of high quality sample
rate conversion on the DMS1 M-CLOCK these digital audio
sources may be synched to the same ultra low jitter AES3
grade 1 stability master clock generator as the equipment
using the word clock or AES11 outputs from the DMS-1.
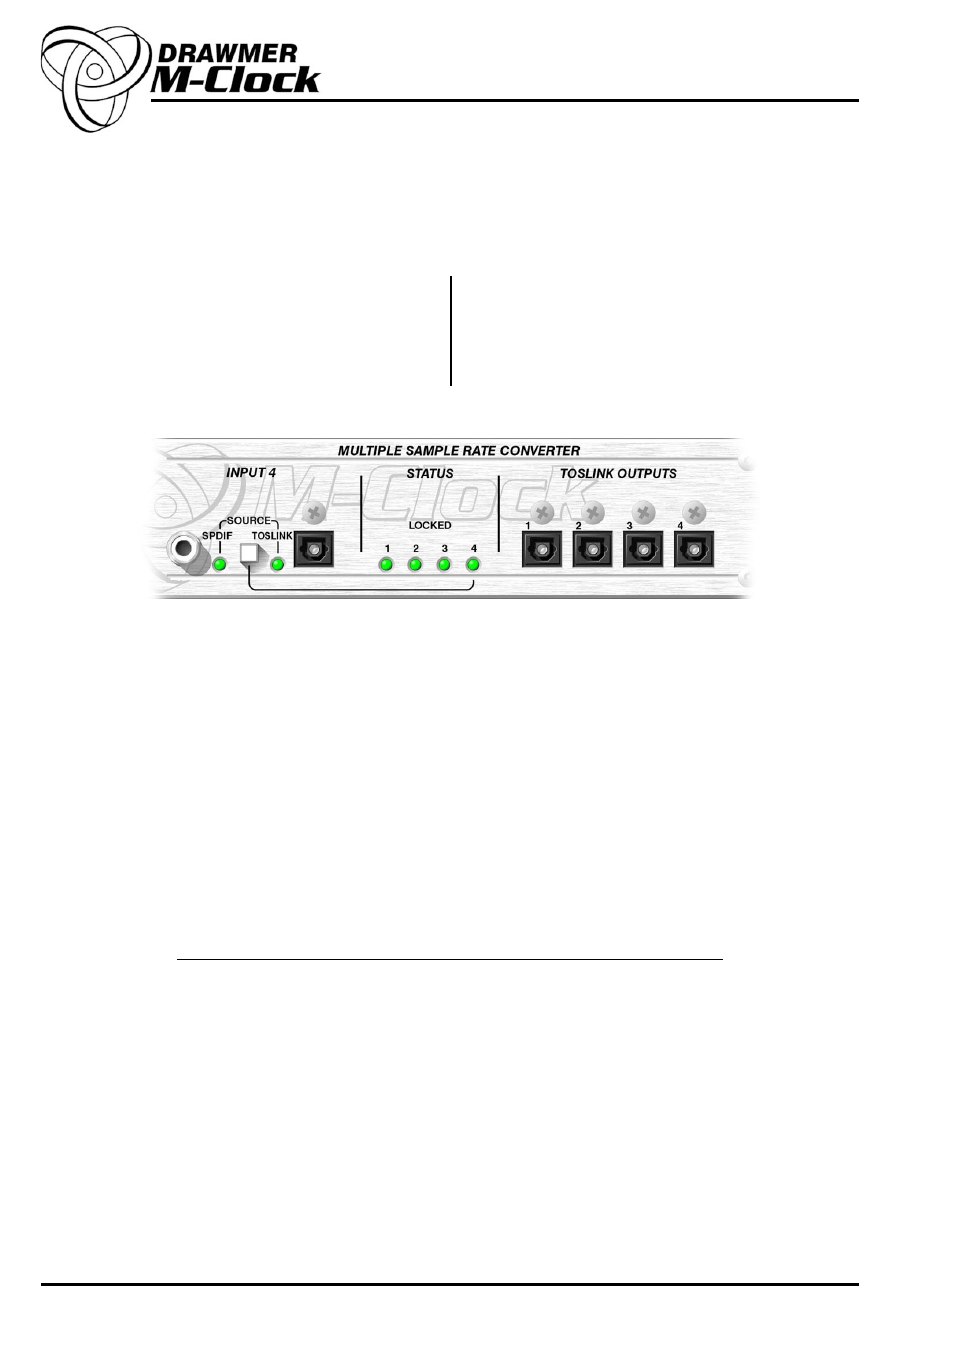
CONTROL DESCRIPTION
MULTIPLE SAMPLE RATE CONVERTER
INPUT 4
As well as the three inputs on the rear of the unit (2xAes/Ebu 1xSPDIF) two further sockets are
located on the front. These provide convenient access for the user to input from alternative sources,
and are selected between SPDIF and TOSLINK using the switch.
STATUS
1,2,3,4
The four LED’s indicate the status of the input sources, and correspond with the numbered input
connectors, 1 to 3 on the rear, and input 4 on the front.
When a led is lit continously a strong signal is being recieved by that input source and the M-Clock
is “locked on”. If a led flickers, the signal for that particular input source is weak or unstable - in this
case the source of this weak signal should be located and improved.
TOSLINK OUTPUTS
1,2,3,4
As well as the numerous outputs on the rear of the unit, four further TOSLINK sockets are located on
the front, providing convenient access for the user.
The numbers 1 to 4 correspond with the relavent input source i.e. Input source 3 (SPDIF on the rear)
has the TOSLINK output 3 etc.
See Fig 1. The Noise Floor of the Sample Rate Converters
CHAPTER 2