COMEUP Chain Hoist (Ver:02) User Manual
Page 10
IV
.
Working Method
8
Power Lead Sections
The machine is supplied with a power lead of 1.5 mm2 x 3 m for 200 – 240V or 2.0 mm2 x 3C x 3 m
for 100 – 120V power source. If the power lead is too long or thin, or if it is branched to supply
other power loads, the voltage will drop and the hoist will not exhibit its rated capacity, possible
resulting in failure. For any other cases, please use a bigger section of power lead or a magnetic
control box to prevent a considerable voltage drop to be happened.
Grounding
To prevent the risk of electric shock, the power plug must be plugged into a matching outlet
and grounded in good condition.
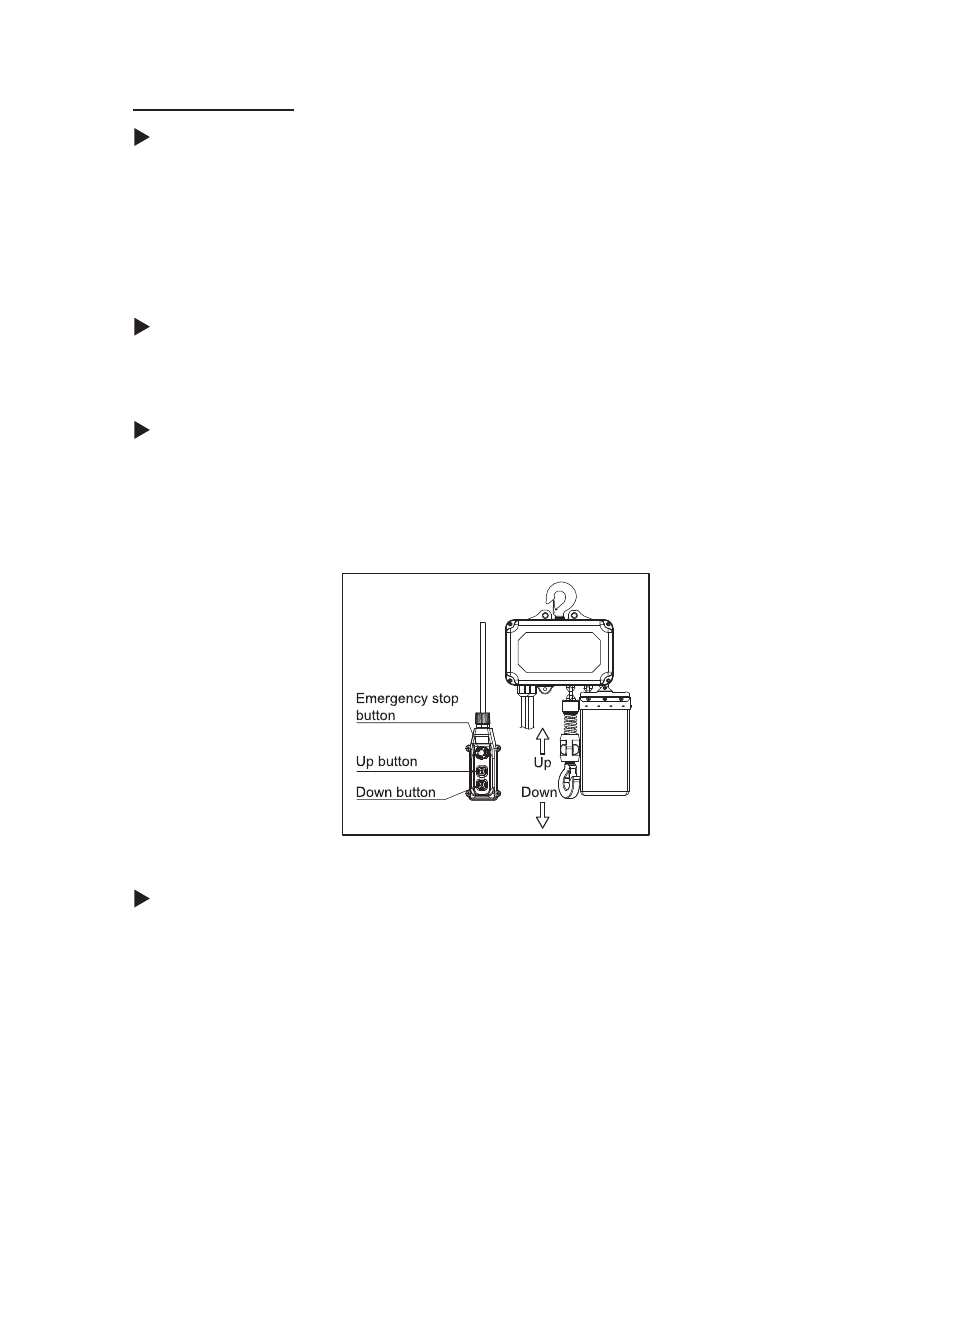
Up and Down Switching
To lift a load, press ↑ button and drum will rotate as shown below operation.
To lower a load, press ↓ button and drum will rotate as shown below.
To stop chain hoisting, release ↑or ↓ button.
To have an emergency stop function, press the emergency stop.
Load Chain Replacement
1). Be sure that the replacement chain is the exact size, grade and constructions as the original
chain. The new load chain must have an odd number links so that both its end links have
the same orientation. Destroy the old chain to prevent its reuse.
2). When replacing load chain, check for wear on mating parts such as sprocket , and replace
parts if necessary.
3). Remove all chain components including bottom hook kit from the old chain for reuse on
new chain. Inspect and replace any damaged or worm parts.
4). Single fall operation - Using a C-link to attach the new chain to the old end link on the no-load
side. The new end link should be connected so the welded portion to pass over the sprocket.
5). Double fall operation – Feed the end link on the load side of the new chain through the
require chain components and idle sheave of load hook. Attach the remaining chain components
to the chain guide rail for the proper locations.