Names of parts and their functions, O cd/i switch (standby/on), 0 cassette holder (deck a) – JVC LVT1089-001B User Manual
Page 6: 0 power standby indicator, 0 ± (eject) button (deck b), 0 cassette holder (deck b), 0 reverse mode switch, 0 phones jack
Attention! The text in this document has been recognized automatically. To view the original document, you can use the "Original mode".
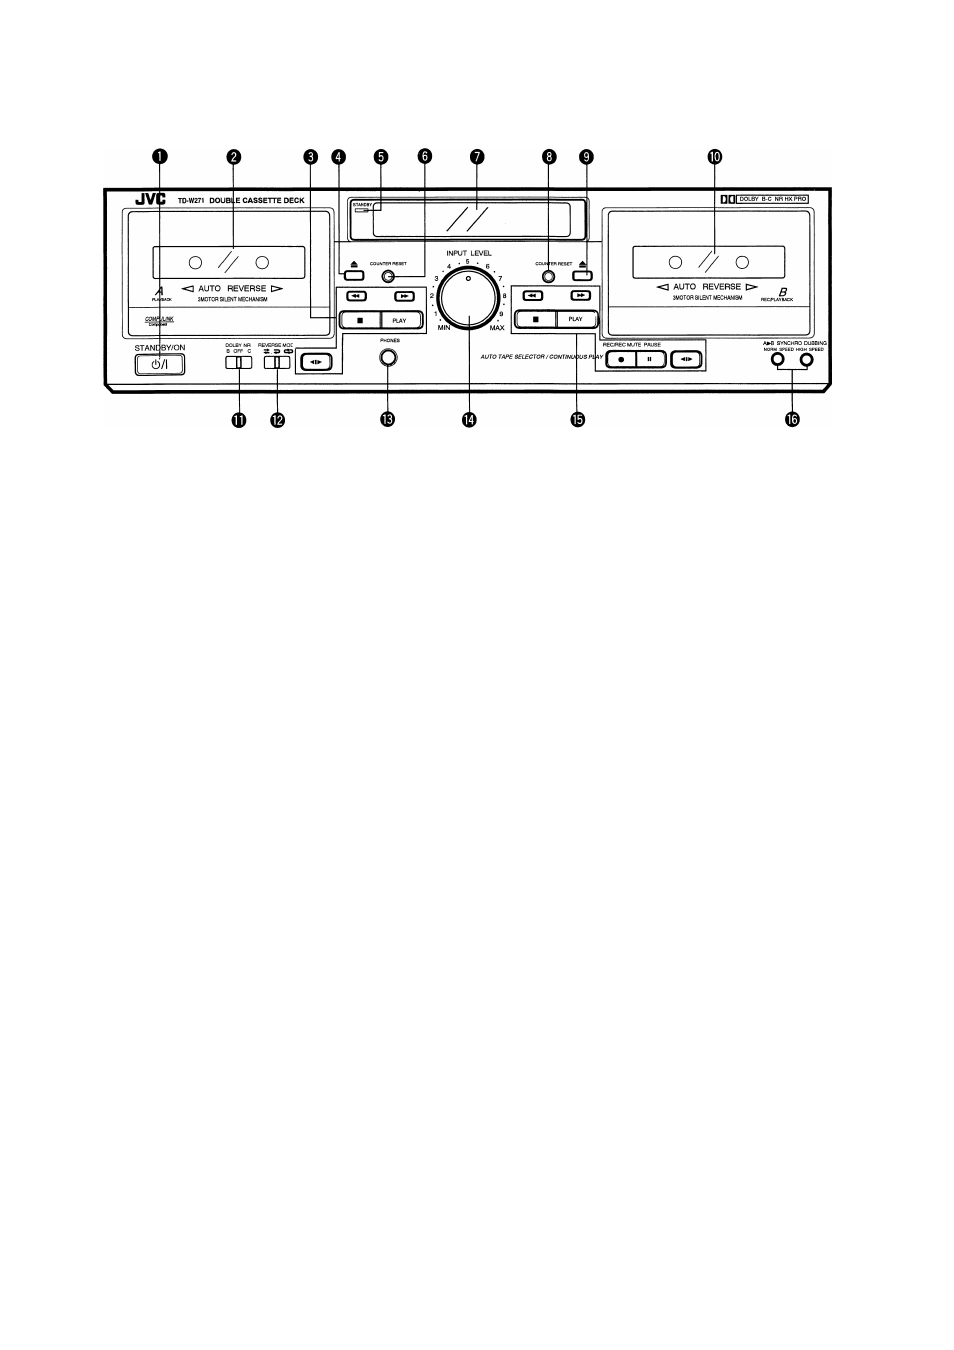
NAMES OF PARTS AND THEIR FUNCTIONS
■ (stop)
PLAY
direction
o CD/I switch (STANDBY/ON)
0 Cassette holder (deck A)
O Cassette operation buttons (deck A)
Press to wind the tape quickly from right
to left.
Press to wind the tape quickly from left to
right.
Press to stop the tape.
Press to play the tape.
Press to change the direction of tape
travel.
O
~ (eject) button (deck A)
0 Power STANDBY indicator
Lights when in the power standby mode.
O COUNTER RESET button (deck A)
Press this button to set the digital counter to
“00
00
”.
Even if the power is set to standby mode (the STANDBY
indicator is lit up), the counter value at that time is stored in
memory.
O Indicators
© DDRP indicator
®
Peak level indicator
These indicators light according to the level of the signal
being recorded or the level of the signal recorded on the
tape.
Note:
0
dB : lEC (DIN) STANDARD LEVEL (250 nWb/m)
0
VU : Signal level at 160 nWb/m
HX PRO indicator
Digital counter
The counter reading increases while the tape is running
from left to right and decreases when it is running from
right to left.
Mechanism mode indicators (Deck A)
: This lights when winding the tape
from left to right.
: This lights when winding the tape
from right to left.
: This lights when in the playback.
: Indicates the direction of tape travel.
©
©
® DUBBING » : “>” lights when in the normal-speed dub
bing mode.
“»” lights when in the high-speed dub
bing mode.
@ CONT
: Lights when the unit is in the continuous
play mode.
® Mechanism mode indicators (Deck B)
PLAY
: Lights when the unit is in the playback
and record modes.
^
: Indicates the direction of tape travel.
REC
: Lights when the unit is in the record
and record-pause modes; blinks dur
ing record muting.
II
:
Pause indicator
: This lights when winding the tape from
left to right.
: This lights when winding the tape from
right to left.
®
: Indicates reverse mode,
o COUNTER RESET button (deck B)
0 ±
(eject) button (deck B)
0 Cassette holder (deck B)
Set to B or C for recording using the Dolby NR system or for
playing back a tape that was recorded using the Dolby NR
system.
Set to OFF when the Dolby NR system is not used.
0 REVERSE MODE switch
Select the single side or full record/playback mode, or the
continuous play mode.
^
: For single-side recording or playback.
1
: To play or record both sides A and B.
: To play sides A and B continuously.
0 PHONES jack
Connects headphones (with an impedance of
8
Q to 1 kQ).
PLAY
<
,
^
- 4 -