Setting oven controls (confd) – Kenmore 790.46268 User Manual
Page 13
Attention! The text in this document has been recognized automatically. To view the original document, you can use the "Original mode".
To Broil
Note: For optimum browning results when broiling, preheat the broil element for
Setting Oven Controls (confd)
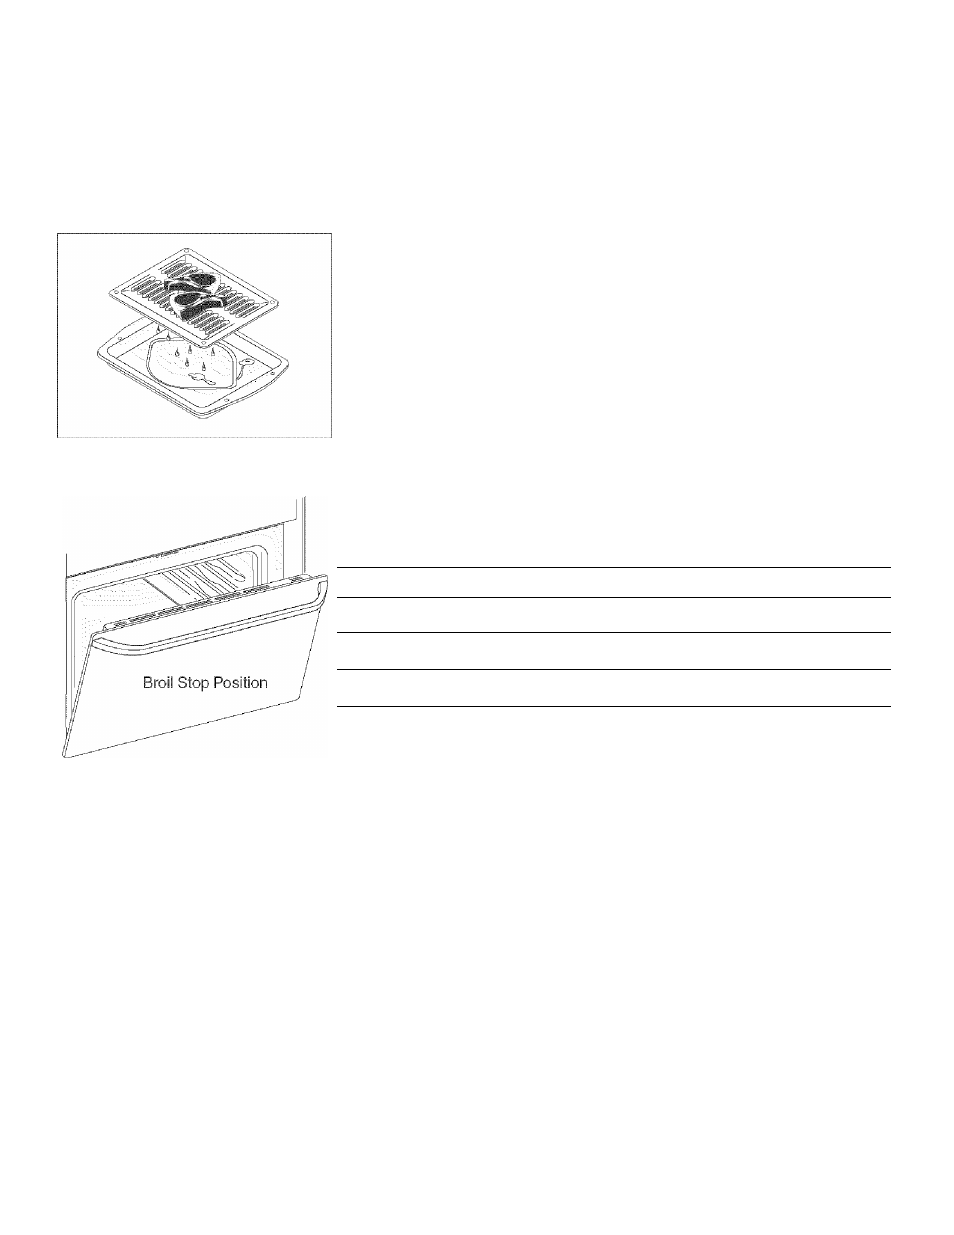
The broiler pan and its insert allow
dripping grease to drain and be kept
away from the high heat of the
broiler. DO NOT use the pan without
its insert. DO NOT cover the insert
with foil. The exposed grease could
ignite.
3 to 4 minutes.
1
.
2
.
3.
4.
5.
Arrange oven rack while oven is still cool.
Press
Press the ^ or v' pad, nor will appear in the display indicating the oven
is set for a normal broil. Press again the /v P^d for HI broil or the v" pad
for LO broil. Most foods can be broiled at the HI broil setting. Select the
LO broil setting to avoid excess browning or drying of foods that should be
broiled to the well-done stage.
Place the insert on the broiler pan, then place the food on the insert. DO
NOT use the broiler pan without the insert or cover the insert with
aluminum foil. The exposed grease could ignite.
Place the pan on the oven rack. Open the oven door to the broil stop
position when broiling {see illustration).
Broil on one side until food is browned; turn and cook on the second side.
Note: Always pull the rack out to the stop position before turning or
removing food.
When broiling is finished, press
m.
Broil Rack Position Table (Referto Figures)
Note: It is recommended to cook food from 3" to 5" of the broil element.
Rack Position
Food category
3rd rack position
Medium-rare steaks & hamburgers
2nd rack position
Fish, medium steaks & pork chops
2nd rack position
Well-done foods such as chicken & lobster
A CAUTION
Should an oven fire occur, close the oven door and turn off the
oven. If the fire continues, use a fire extinguisher. DO NOT put water or flour
on the fire. Flour may be explosive.
Broiling Tips
Broil on one side until the food is browned; turn and cook on the second side. Season and serve. Always pul! rack out to
the “stop” position before turning or removing food.
Broiling times vary, so watch the food closely. Time not only depends on the distance from the element, but on the thickness
and age of meat, fat content and doneness preferred. The first side usually requires a few minutes longerthan the second.
Frozen meats also require additional time.
Broiler Clean-Up Tips:
® To make cleaning easier, line bottom of the broiler pan with aluminum foil. DO NOT cover the broiler grid with foil.
® To preventgrease from baking on, remove the broiler pan from the oven as soon as cooking is completed. Use hot pads
because the broiler pan is extremely hot. Pour off grease. Soak the pan in HOT, soapy water.
® Clean the broiler pan as soon as possible after each use. If necessary, use soap-filled steel wool pads. Heavy scouring
may scratch the grid.
13