Looking inside, Looking inside -12 – Kenmore 25354703404 User Manual
Page 11
Attention! The text in this document has been recognized automatically. To view the original document, you can use the "Original mode".
o
Looking Inside
sm$>0Êmm
ÏS.:
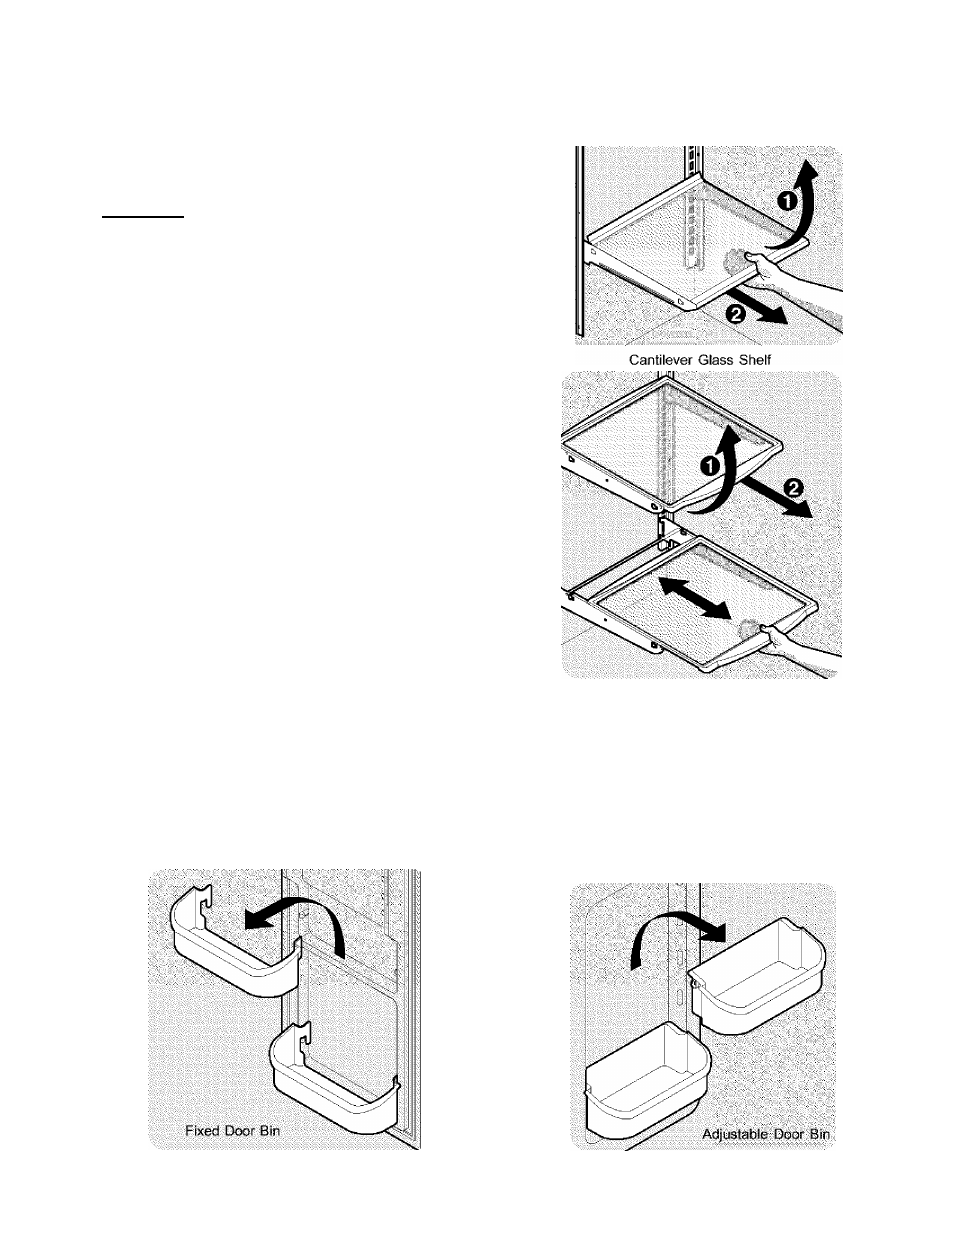
CANTILEVER SHELF ADJUSTMENT
Refrigerator sheives are easily adjusted to suit individual
needs. Before adjusting the shelves, rem ove ail food.
Cantilever shelves are supported at the back of the
refrigerator.
To adjust cantilever shelves:
E
Lift front edge up.
Pull shelf out.
Replace the shelf by inserting the hooks at rear of the
shelf into the w/all bracket. Lower the shelf into the desired
slots and lock into position.
SpiUProof^
glass shelves (som e m odels) catch and hold
accidental spills. In som e m odeis, the
SpiiiProof’^
sheives
slide out for easy access to food and for fast cleaning. The
sheives slide out independently of their m ounting brackets.
DOOR STORAGE
Door bins and shelves are provided for convenient storage
of jars, bottles, and cans. Frequently used item s can be
quickly seiected.
Som e m odels have door bins that can accom m odate
gallon-sized plastic drink containers and econom y-sized
jars and containers. Som e bins are adjustable for
m axim um storage capacity.
The dairy com partm ent, which is warm er than the general
food storage section, is intended for short term storage of
cheese, spreads, or butter.
...................... .
. . . . . . .
............... ..............................
WMwm
TIP-UP SHELF
{SOME MODELS)
A Tip-Up shelf in the freezer section allows tali item s to be
easily stored.
A CAUTION
To avoid personal injury or property
damage, handle teiTipered ^fass
Shelves may break suddenly if nicked, scratched, ;
or exposed to sudden temperature change.
Cantilever Sliding Glass Shelf
ADJUSTABLE DOOR BINS
Som e m odels have adjustable door bins that can be
m oved to suit individual needs.
To move door bins
1.
Lift bin straight up.
2.
Rem ove bin.
3.
Place bin in desired position.
4.
Lower bin onto supports until locked in place.
m
z
o
n
C/)
11