A caution, Storage dra^rs, Door storage – Kenmore 596.50012100 User Manual
Page 17: Iluomkkimaki, A warning, Mq cô
Attention! The text in this document has been recognized automatically. To view the original document, you can use the "Original mode".
m№
HiJUREÌ
ilUOMKKIMAKI
A CAUTION
•To avoid properly damage, observe ■;
theio!iowmgr:V
■-
> PO NOT force ice maker arm
;: down or up. ^
' '
> DO NOT place or store anything in
ice storage bin. :
.
This ice maker creates the ice used in
the dispensing system.
Using Ice Maker for the First Time
> Confirm ice bin is in
place and ice maker
arm is down.
> After freezer section reaches
between 0“ to 2“F (-18= to -17= C).
ice maker fills with water and begins
operating.
> Ailow approximately 24 hours after
installation to receive first harvest of
ice.
>■ Discard ice created within first 12
hours of operation to verify system is
hushed of impurities
Operating Instructions
>- Confirm ice bin is in place and ice
maker arm is down.
> After freezer section reaches 0” to
a=F (-18® to -I?" C), ice maker fiiis
with water arid begins operating. You
wiil have a compists harvest of ice
approximately every 3 hours
Stop ice production
by raising ice maker
arm untii click Is
heard.
>
> Ice maker will remain in the off
position until arm is pushed down.
IMPORTANT; Ice Cream Shelf should
not be installed if ice maker arm is in
“off position
INKRIOR
mm
wmmrLwmKmmmmmw^
r*
freezer
shelf
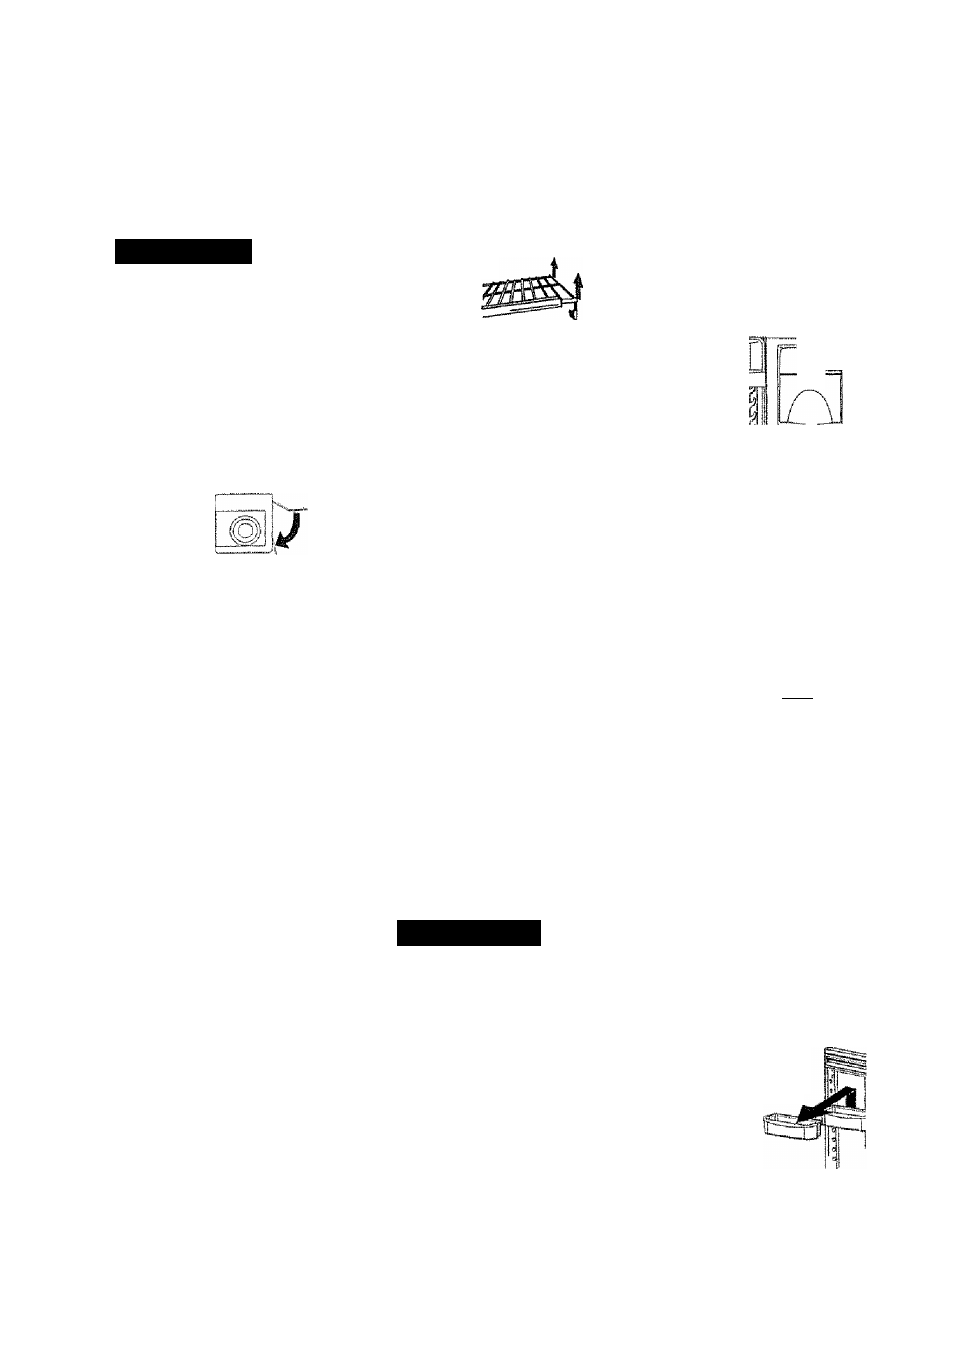
To remove and install
cilp*mounted
shelves:
>- To remove, pui! sheif from wall
mounting dips and pull ieft side of
sheif out of wail mounting Notes.
> To instali, place shelf in mounting hole
arrd attach to wall mounting clips.
To remove and install rail-mounted
shelves:
> To remove, snap
right side of shelf
from cabinet railing
and remove from wal! mounting clips,
> To install, replace shelf in wali
mounting clips. Be sure back edge of
shelf is flush with back of cabinet and
snap shelf into cabinet railing.
tCE CREAM SHELF
Ice Cream Shelf
provides a space for
items to be chilled or
frozen quickly
> To remove, lift ice cream sheif from
ice bin rails and pull straight out,
To install, fit shelf over top of ice
maker and lower onto ice bucket rails.
IMPORTANT: Ice Cream Shelf should
not be installed if ice maker arm is in
“off position.
A WARNING
To avoid possible injury, including
Clc^c|l.i Lie# I iLfli ^rdL«vj
11^ IE F iL#w
cream shelf. Glass objects may
shatter or explode if exposed to
extreme cold. '
STORAGE DRA^RS
FREEZER BASKET
To remove and instati
basket:
>■ To remove, lift
front of basket
Lift lip front of basket and remove
To instali, slide basket into rails at
bottom of freezer section., Lit up front
of basket, and slide to the back of
refrigerator
Ice Storage
/ Bin
ICE STORAGE BIN
The tee Storage
Bin is located below
the automatic
dispensing ice
maker.
To remove and Instatl Ice storage bin:
> To remove bin. remove ice cream
shell
> Raise Ice maker arm to deactivate ice
maker Lift front of bin and pull out to
its full extension, Lift up front of bin
and remove
> To instali, slide bin into rails below ice
maker until bin locks Into place. Drop
ice maker arm to activate ice maker,
diFU itípidLt; tüti Clcditl bncMi<
IMPORTANT; Ice bin must be iocked in
nmnpf filricp fr>r
r—
........
proper ice
|(SI
dispensing H [Qli
■*
freezer door
does not dose, bin is not in proper
location. Turn auger driver
counterclockwise (as shown) to properly
align ice bin with back of refrigerator.
m
Q
CÔ
strtH niiii niit tn ite full extension
DOOR STORAGE
ADJUSTABLE DOOR
BUCKETS
Door Buckets adjust to meet individual
storage needs.
To remove buckets:
> Lift the door bucket up until
it dears the retainers on the
door liner, then puli the
door
bucket
straight out
To reinstall buckets:
> Slide bucket in above desired door
liner retainer and push down until
bucket stops
|J[