Step 4 - install storage tank, Step 4-lnstoll storage tank, Step 3 - install ro filter assembly – Kenmore 625.38556 User Manual
Page 11
Attention! The text in this document has been recognized automatically. To view the original document, you can use the "Original mode".
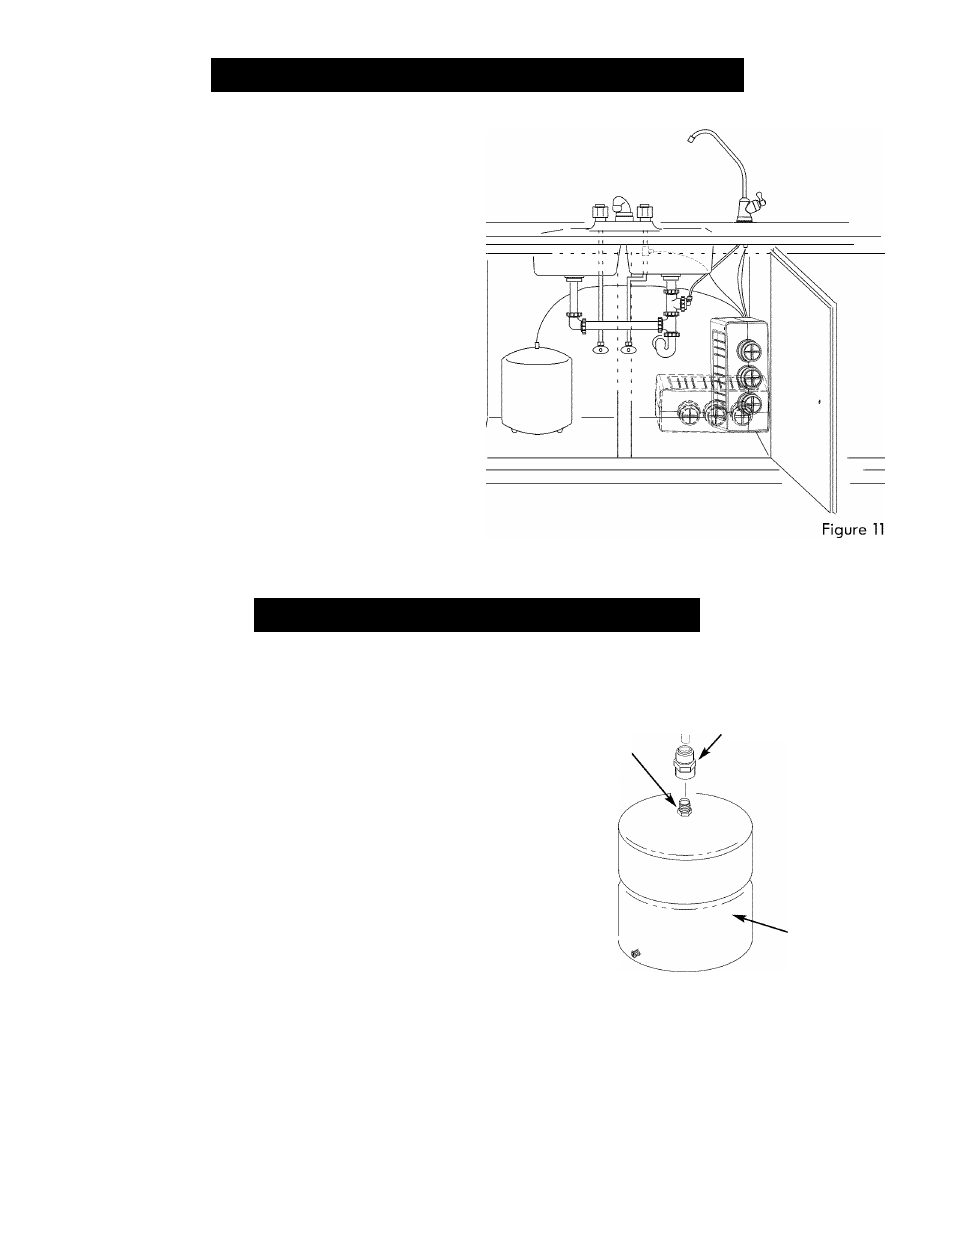
Step 3 - Install RO Filter Assembly
INSTALL REVERSE OSMOSIS FILTER ASSEMBLY
The Reverse Osmosis Filter Assembly can sit upright or lay
on its side. When planning your installation, you need to
allow adequate tubing lengths to be able to access the
back of the Reverse Osmosis assembly in order to change
the monitor battery. See Figure 11.
Step 4 - Install Storage Tank
INSTALL STORAGE TANK
1. Apply thread sealing tape to the threads on the nipple
at the top of the tank (max. 2 wraps). See Figure 12.
2.
Locate the tubing connector. Tighten the tubing connec
tor with a wrench onto the tank nipple 7-8 turns, being
careful not to cross thread or overtighten. See Figure 12
3. Do not connect the tube at this time. This will occur
later in the assembly.
4.
Place the storage tank next to the Reverse Osmosis
Assembly. The tank can be placed upright or on its
side.
tubing connector
tank nipple
storage tank
Figure 12
Questions? Call The Kenmore Water Line 1-800-426-9345 or visit KenmoreWater.com
11