Kenmore 625.385700 User Manual
Page 10
Attention! The text in this document has been recognized automatically. To view the original document, you can use the "Original mode".
- STEP 5: INSTALL STORAGE TANK,
MAKE REMAINING TUBING CONNECTIONS
1.
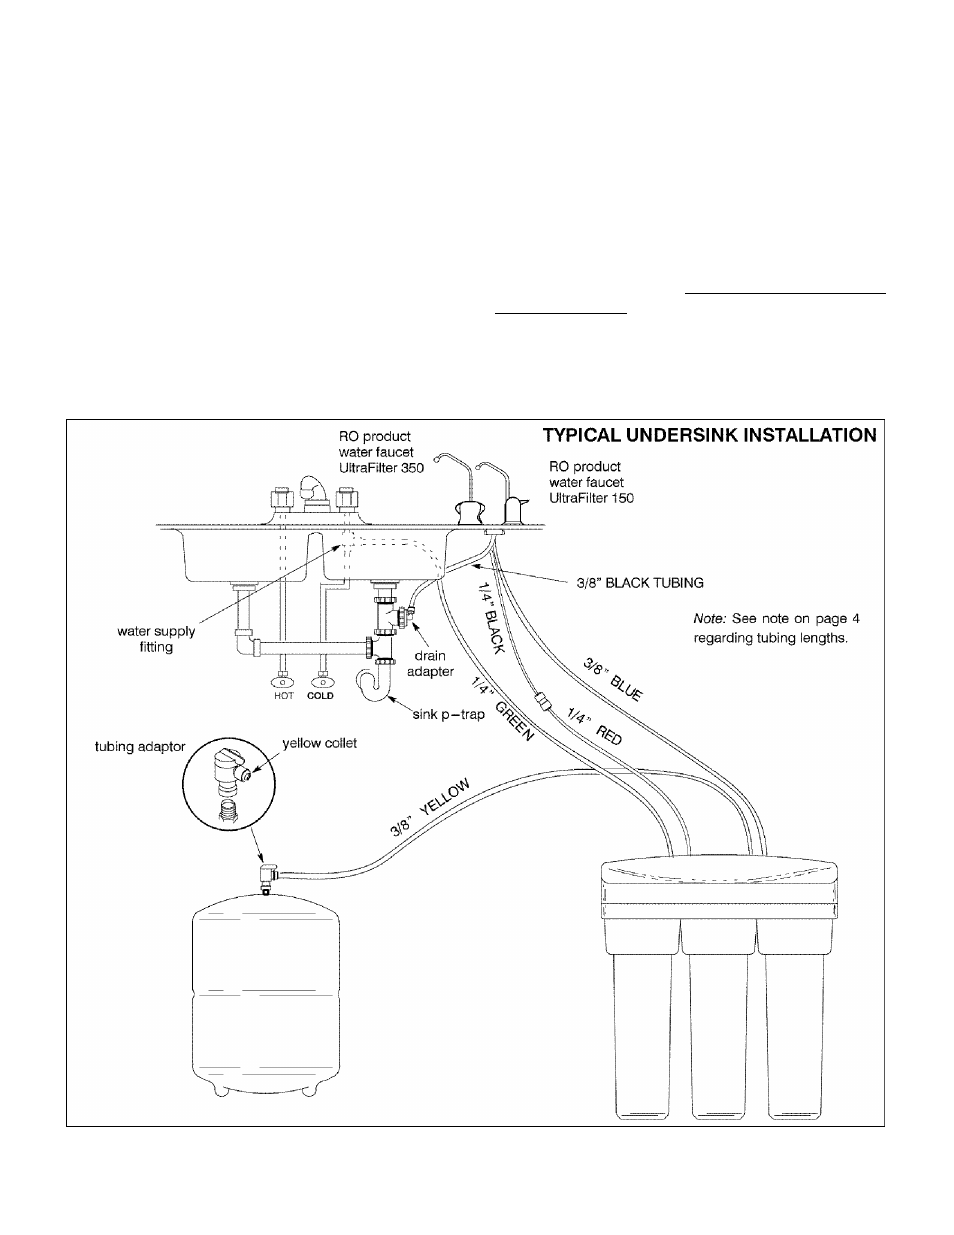
CONNECT DRAIN TUBING, FAUCET TO
DRAIN ADAPTER: Referring to Figure 10, run the
loose section of black 3/8" tubing from the faucet to
the drain adapter, with a black collet, installed on
page 6. Cut this tubing as needed to route in as
straight of a run as possible, without loops, dips,
low spots or kinks. Cut the end of the tubing square.
Then push all the way into the fitting. Pull on the tub
ing to be sure it's held firmly in the adapter fitting.
See page 16 for tubing connection instructions.
2. CONNECT TUBING TO WATER SUPPLY: Con
nect the feed (green) tube to the water supply fitting
installed on page 5. Connection to the fitting is as
described in Figure 14, page 16.
3. Move the storage tank into place next to the RO as
sembly. You can stand the tank upright, or lay it on
side. Apply no more than two wraps of Teflon tape
to the threads on the nipple at the top of the tank.
Eland tighten the other included tubing adapter fit
ting with the yellow collet onto the tank nipple, then
wrench 1/4 turn only. BE CAREFUE NOT TO
CROSS THREAD.
4. Run the 3 / 8" yellow tubing to the fitting installed
in step 3. Be sure the end of the tubing is cut square,
and insert all the way into the fitting. Again, pull on
the tubing to be sure it's held firmly in the fitting.
Figure 10
10
Problems, Questions? Call 1-800-426-9345 Kenmore Water Line